I was rearranging a bookshelf today and I came across a UFO, tucked away in a notebook that I’d forgotten all about. Imagine that!
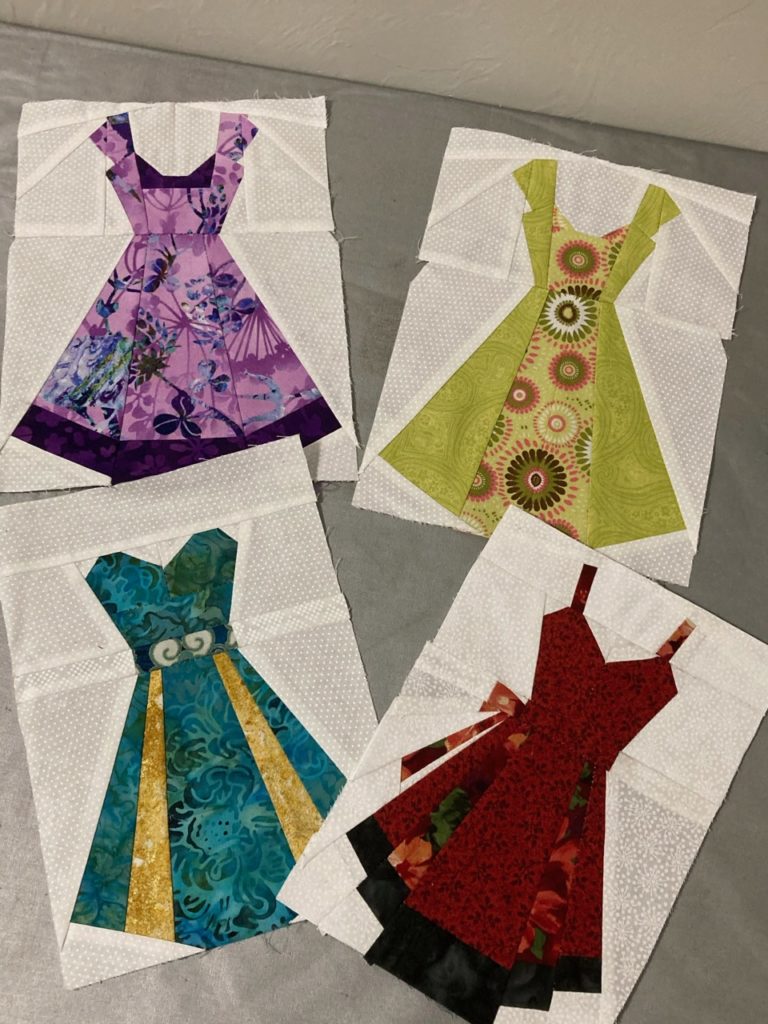
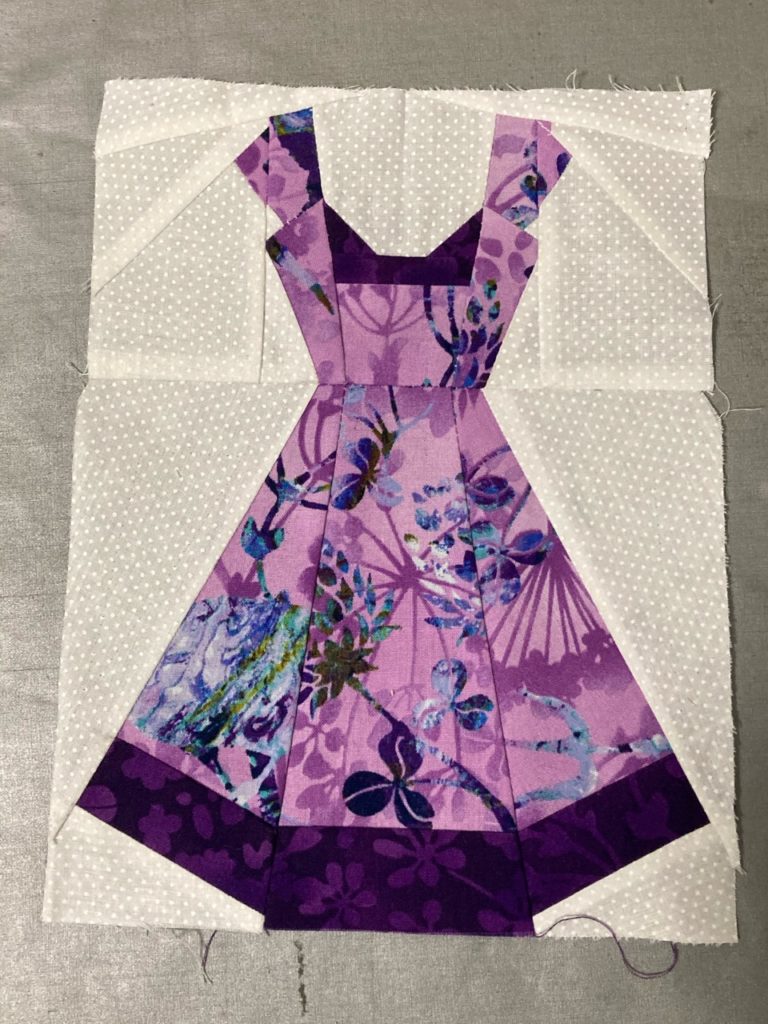
Here they are! I get the biggest smile on my face when I see these. Such fun fabrics and sweet looking dresses. I have a hard time deciding which is my favorite.
It’s a shame these little cuties are still unfinished, but I plan to rectify that toot sweet! I think the reason they are still in the block stage and not completed is that I simply couldn’t decide how to set them. Should I make them each into single little wall-hangings to be spread out in a couple rooms? Should I group them into pairs? Or should I put them all together in a group of four—wait—should they be place in a line horizontally…or vertically…or maybe in a square with two rows of two????
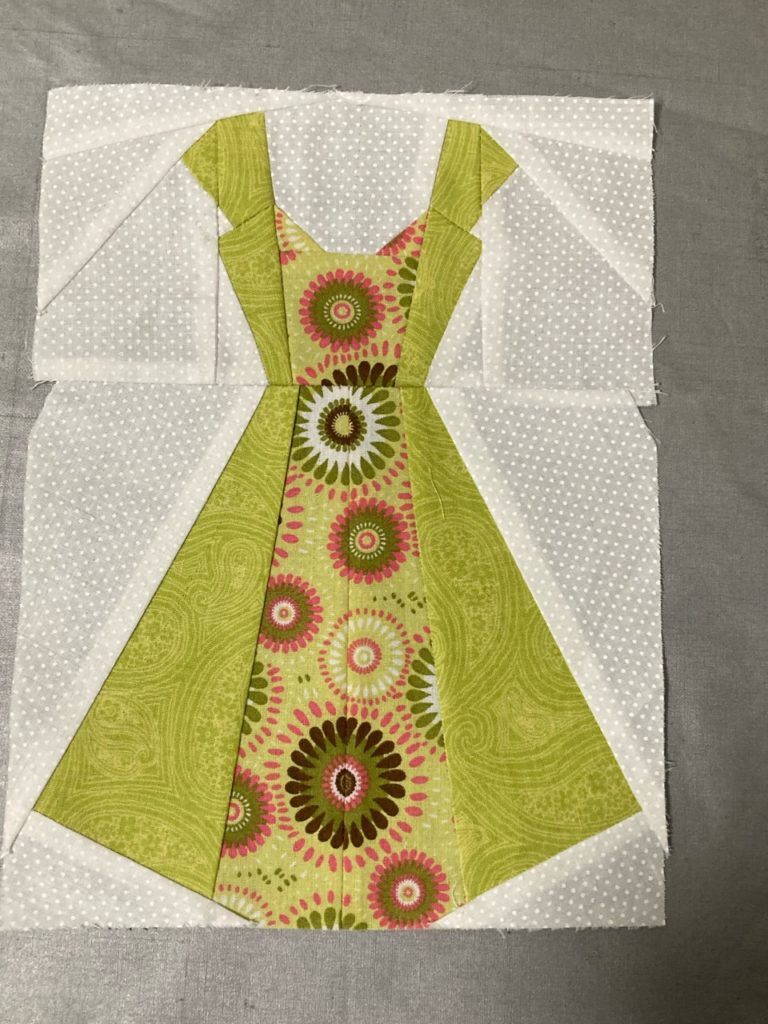
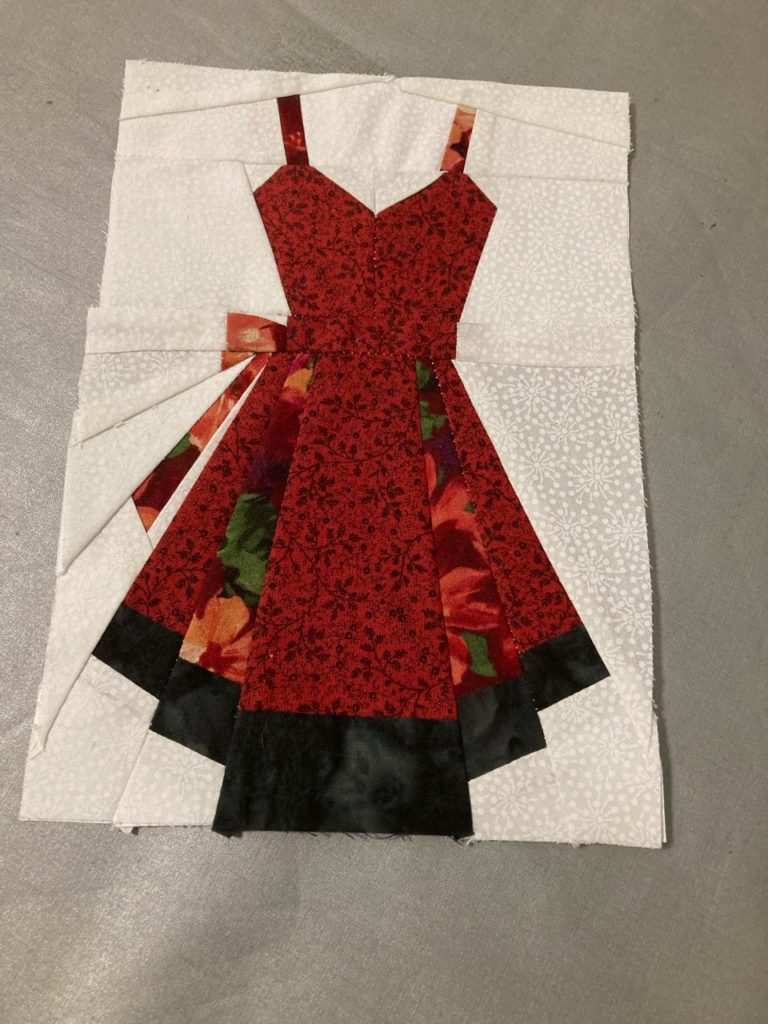
Obviously this little girl needs a trim to square up the sides, but how fun are these fabrics together?? I was so determined to use the big print as the center panel, I had to match together a couple pieces in order to get a big enough piece to use. Not too bad at that. Flashy and feminine all at the same time.And this one is just so ready for a dinner party. I would loved to wear something like this back when I had a figure to match. Who says you can’t mix batiks with regular cottons.
I’ve been stumped, evidently for years over the very same questions.
Maybe this one is my favorite…red IS my favorite color after all. Then again…maybe not….And then there is this lovely. Yes, red is my favorite color, but this one just makes me hum. It’s so awesome when something makes my heart sing.
I think the answer is just going to have to be…yes! To all those options! Which means of course, that I’ll have to make more.
Hmmm…. maybe not.
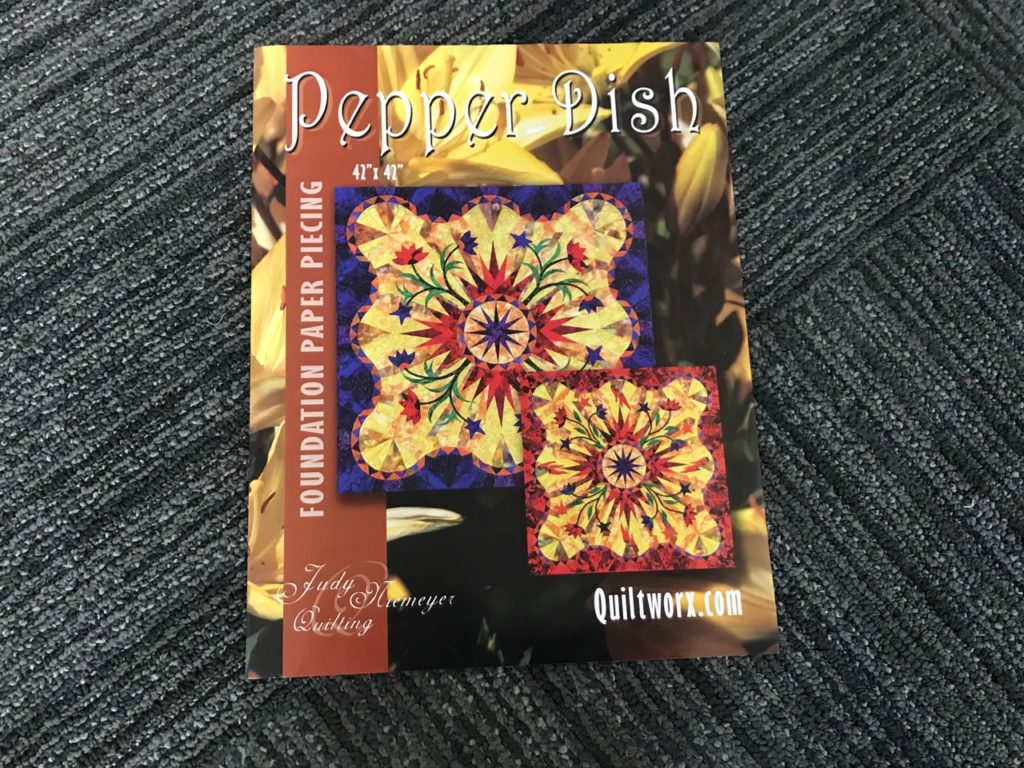
Now I love paper piecing. You could even say that I’m a bit crazy over paper piecing. But I’ve learned a thing or two about these types of patterns over the years. And the bottom line is that you get what you pay for.
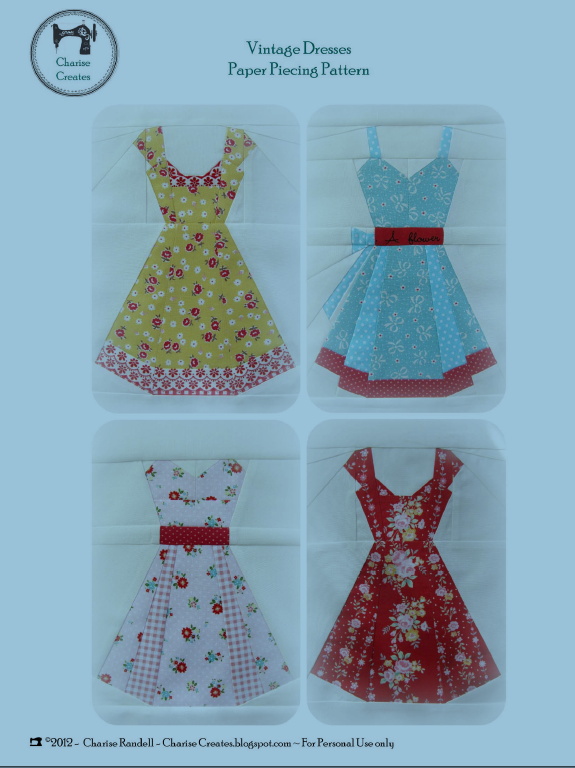
This is the pattern cover sheet that originally caught my attention. The cover samples are quite cute, but I have to admit that I like mine better. I wish the patterns were just a tad bit better, but I can’t be unhappy with the end product. I haven’t seen any of this designers more recent work, but I hope she’s still at it and going strong.
These adorable little dresses were purchased from a pattern designer from her on-line shop, just sure if it was Craftsy or Etsy. And she’s got several others that I also bought. Sweet, sweet little projects, and very reasonably priced. And! The patterns can be printed on your home printer with great success.
So, here’s my little bit of unhappiness with these patterns. There are no seam allowances written into the pattern. Definitely not the end of the world…not by any means at all! But it does make sewing these patterns a little easier to mess up without that little added bit on the pattern.
Her graphics are good…and the instructions are succinct in their explanation of what to do. I just think one little additional thing put on the pattern would make the construction just a tad easier.
I don’t mean to sound like a paper piecing snob. But I think I’m just really used to how Quiltworx puts their patterns together. And I suppose that would be why I’m working towards becoming a certified instructor for Judy Niemeyer and company. From their entry level patterns to their advanced level patterns, they build upon skills every step of the way. And it’s more than impressive.
But for now…I’m going to raid my scrap tubs and see about pulling out some fabrics that I’ve been eager to put into something small and quick just for me. I think these little cuties are going to see some needle time real soon!
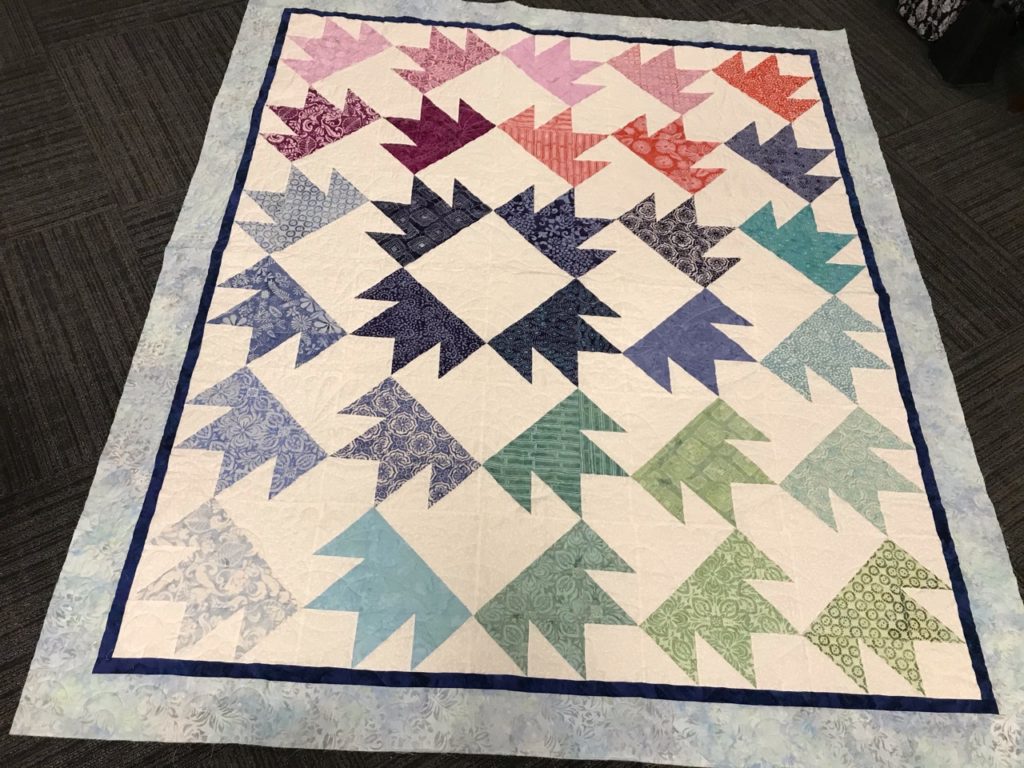
Are you in a bind? Well, I mean…are you binding? I am. Today I am putting on a binding to a sweet quilt that has been hanging as a store sample at Clubb’s Fabric Store in Delta. I retrieved it for a class and then brought it home to put a binding on it.
I simply love this quick and easy pattern. The batiks remind me of the beach, so I’ve named it my Beach Bear Gingerbread quilt. It’s the second time I’ve done this same pattern, and I have a 3rd set of blocks in this pattern made with rich mulberry and green batiks with cream background. Looking forward to seeing how that turns out too!.
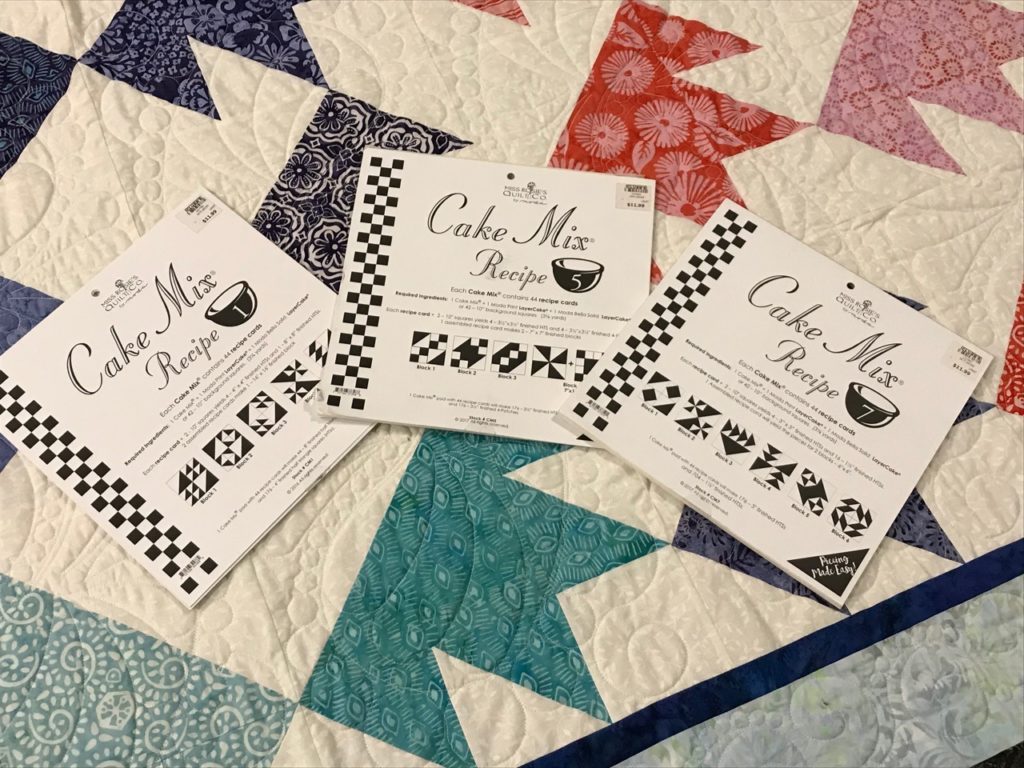
This is a Moda Bakeshop, by It’s Sew Emma Patterns. Bakeshop? Well, let me give you a quick run-down on this clever pattern set-up. The “Bakeshop” is built on layer cakes. You have an instruction book called “The Cake Mix Quilt Book, Volume One”, (the “cookbook”, aka the instruction book). All these patterns utilize “layer cake” fabric collections plus some amount of yardage for backgrounds, borders and binding. Genius!
This is such a great pattern book! The instructions are written with clear and concise directions, and has lots of graphics and pictures to help in construction of the project.
And you have “Cake Mix Recipe” cards like this.
This is so clever. The mixing bowl shows the number of the recipe card. And the black and white pictures on the covers show the variations of how to set the block that each of the recipe cards can make. You can make them all the same, or a combination of any shown.
These “recipe cards”, (printed like a tablet that you can tear off, one page at a time), are numbered 1 thru 8. In the “Cookbook” each recipe card has two different quilts from which to choose. For instance, the quilt I’m working on is from Recipe Card #1. I made this quilt, named the Gingerbread Quilt, but I could have chosen to set the same recipe card into a different quilt named the Sherbet Quilt. Totally cool!
I have used these Bakeshop patterns several times, and love them as a quick gift or easy “take-along” project where I know I’ll be talking a lot or have lots of interruptions. It’s a perfect retreat project. It’s also a terrific introduction to paper piecing. And it would be an excellent project for a younger aged 4-H youth project.
Then, because I had nothing else to do with my time, and because I can’t stand to throw away fabric that I think can be used for something else, I took my scraps from a couple different Bake Shop quilts and threw these blocks together. I know, just a tad OCD, but definitely cute. I’m sure that I’ll be doing something clever with them before too much longer….stay tuned.
These little gems were done in a weaving method…much like kids do with paper strips. I used fabric glue to keep things together, nothing is sewn yet. They vary slightly in size and the tapered ends still need to be trimmed, but I think there will be more coming. It won’t take many more to create something else to add to the “tops to be quilted” pile hanging out in the long arm pile.
But let me get back to the task at hand…binding.
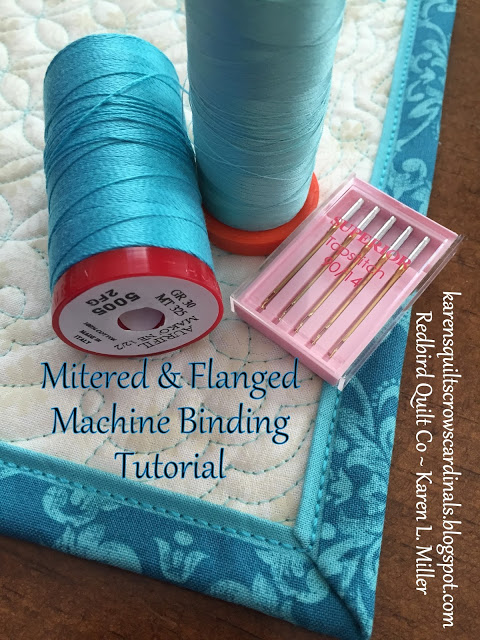
I don’t know about you, but binding can be a pickle. Some quilters love it, some don’t. Some even avoid it at all costs. But let me tell you about a method I found while I was surfing around Facebook one day. Or rather, it surfaced in my Facebook feed as a “suggested for you” type of item. Usually, I don’t follow those bunny trails, but for this one I did. And boy howdy am I glad I did.
This is the link to Karens Quilts, Crows and Cardinals of the Redbird Quilt Company. This has been my saving grace for peaceful bindings! (Pardon my pun). https://karensquiltscrowscardinals.blogspot.com
If you follow this link you will go to her home page. You’ll want to click on the “My Tutorials” tab and scroll down until you see this topic.
The flange binding that is in the title of the blogpost is what caught my eye. After reading her post, I saved it and was determined to give it a try. Fast forward a few months and bingo…I had a quilt I wanted to try it on. It turned out wonderfully well!! And I’d love to show it to you, but of course the quilt was gifted away with no pictures taken before it’s departure.
But even more than the flange binding, I want to tell you about her method for joining the beginning and ending of the binding. THIS is THE –best—method—ever! I kid you not! Before I read this blog, it would take me a huge…HUGE…amount of time to do this one step. Binding prep, attachment and finishing are all a breeze to me. But the sewing of these two ends always eluded me. I wrote myself directions, drew pictures, cussed, cried, and cringed…always wanting to master that elusive mitered seam ending. (Totally not cool when I can do sooo many other, and much more technical sewing tricks.) Then the stars aligned, the angels sang as the clouds opened to rays of sunshine and I followed a bunny trail to this beautiful blog about binding. (Yes, it’s a bit overly dramatic, but when the lightbulb finally goes on, it’s a glorious thing.)
Putting all silliness away, I want to share with you this method. It is most definitely not my idea. She gets all the credit and the kudos for putting together a fantastic tutorial. Throughout her blog tutorial there are lots, I mean LOTS, of pictures of every step as well as excellent instructions showing you exactly how to make a flange binding AND how to join the two end together.
I can’t tell you how many hours I’ve saved using this tutorials’ instructions. And with all the projects that I have ready to bind, and those waiting for the long arm, I’ll be using this binding method even more. If you follow no other links that I share in my blog…go to this one and at take a look. I’m telling’ ya…it’s so worth your time. And while you’re there, take a peek at the rest of her blog. Gobs of interesting things are waiting there as bountiful treasures!!
So, without further ado, I’m off to finish up this binding. Hope you enjoy the tutes!
Sitting at my desk this morning, I pondered what to blog about today…and it struck me the while I’ve been showing pictures about my work, and that of my students, I’ve not expanded much upon how I came to this adventure and the tasks this journey requires. Making samples of patterns for my portfolio is just the tip of the iceberg. A beautiful one to be sure, but there is so much more to the whole endeavor. Come along with me while I share a bit more of the journey.
Let me start by telling you how I came to love the patterns that Judy Niemeyer designs. The first time I ever saw a Judy pattern was in 2005. I was at The Great American Quilt Factory (which is sadly no longer open) just poking around and checking out the store. They had a red version of this on display and no joke, I stood there staring at it for 15 minutes! I was spell bound. And I HAD to have the pattern. I bought it with the thought that s-o-m-e-d-a-y I would be good enough to make this. I had never seen anything like it, and I knew nothing about Judy’s method of paper piecing. I had taught paper piecing before, but nothing to this degree. I went home and dreamt of this pattern many times for a number of years.
Here it is…the one that started it all. The store sample was of the red color way. Red just happens to be my favorite color, so of course it caught my eye. It was a love at first sight that still captures my heart. 2021 will be the year that I bring it to life. A 16 year love affair is long enough to wait.
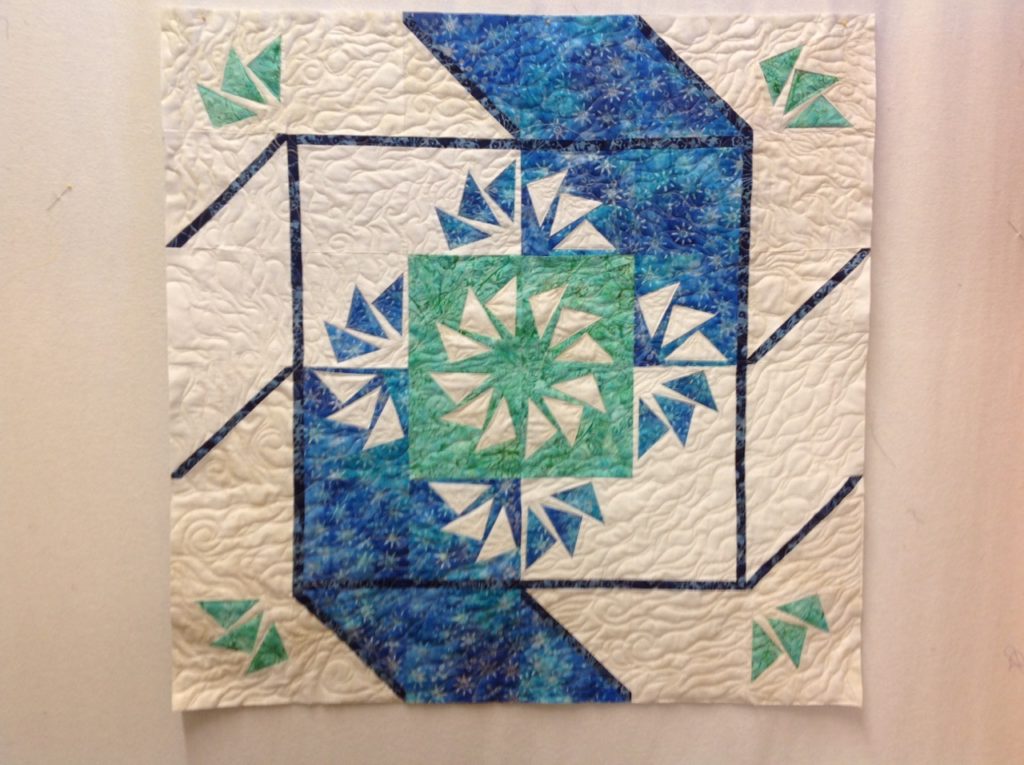
Fast forward to 2015 when I was perusing the pages of the April edition of American Patchwork & Quilting and lo and behold…there was the Paddle Wheel. Another Judy pattern! I said to myself, “If it’s in the magazine, it must surely be easy enough for anyone to make! I’m going to give it a try.” I did, and following all the directions, and the pictures (which are always worth a thousand words), I gave it a go. And I was hooked.
Here is my Paddlewheel, fresh off the long arm from a few years back. Isn’t it silly that I’ve still not taken a picture of the finished one with the binding on it?? I used colors that reminded me of the ocean along the Australian west coast when my husband and I vacationed there for our 25th wedding anniversary. Both my paper piecing and my long arm quilting have improved greatly since then.
I decided to check out their website Quiltworx where I learned about Certified Instructors and retreats in Montana with Judy Niemeyer herself. I was intrigued by what I was reading and the idea began to percolate on my back burners. Over the next few years I made a number of different patterns and really found my groove. I finally found what I wanted to be when I grew up! (You can click on the underlined word and the link will take you to their website.)
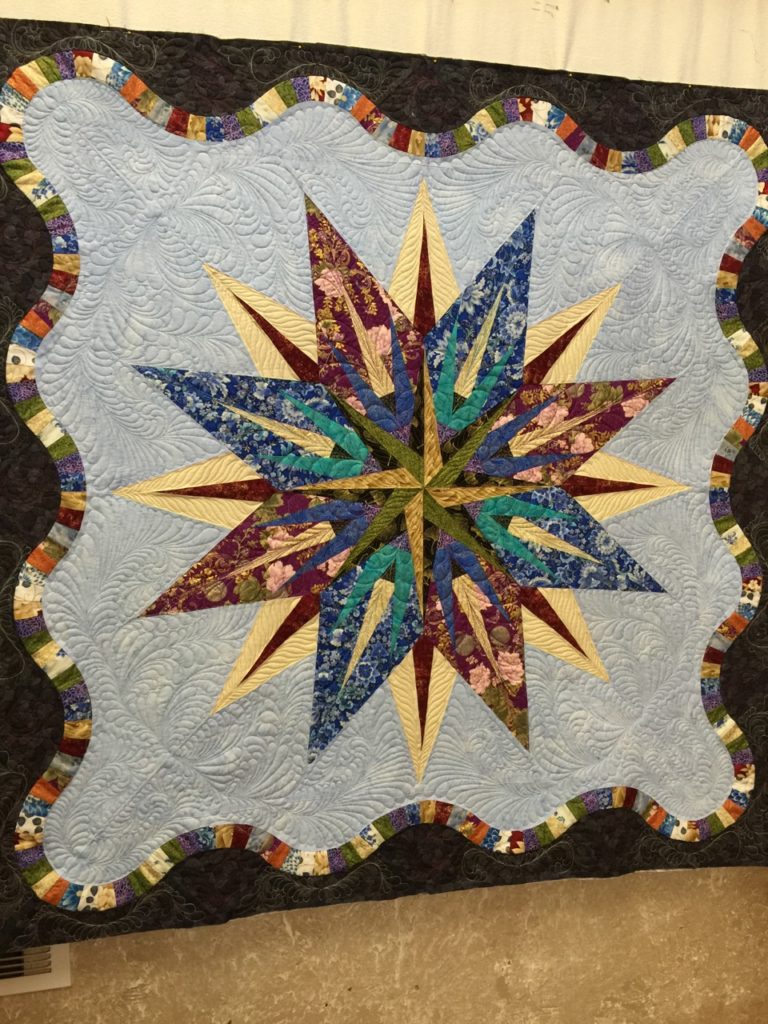
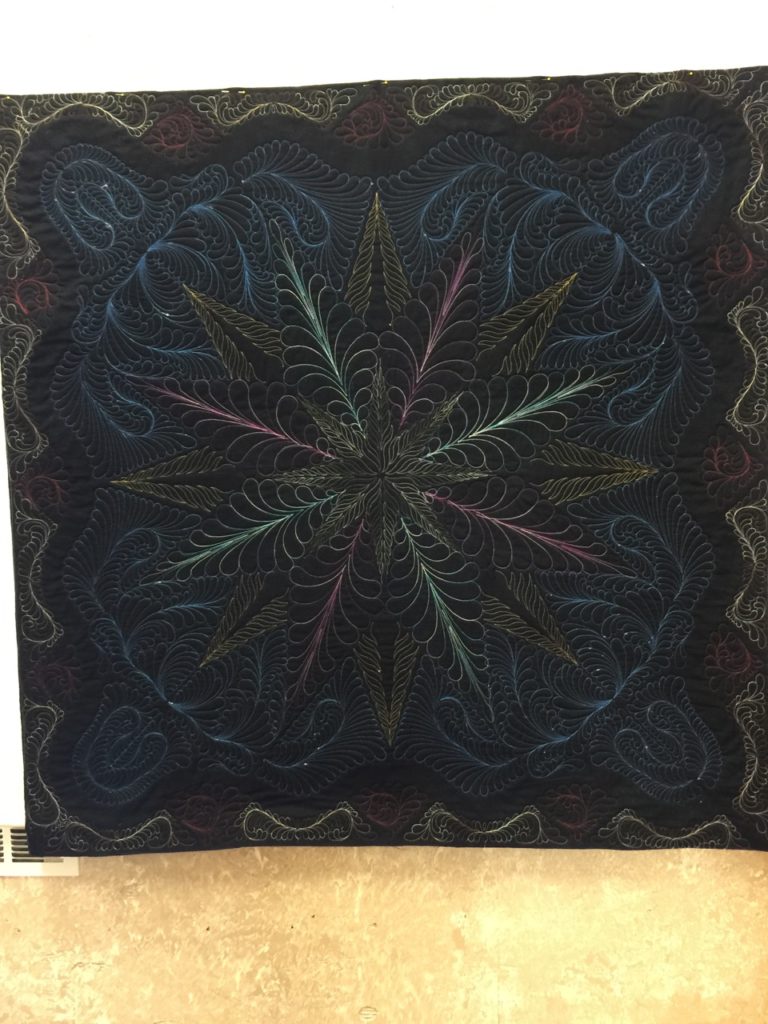
In 2018 I bit the bullet and decided to attend my first retreat in Montana to venture into the world of becoming a Certified Instructor. It’s challenging to be sure, and it should be. To date, at my last count I’ve complete about 25 different patterns with an undisclosed number currently still in progress, lol. (Not everyone needs to know the extent of my fetish, heh heh heh.) There are some that I’m very happy with, and some that make my buttons pop. Here are a couple pictures of one of those.
This is my Vintage Compass, made from my stash of Asian fabrics. It’s the second pattern I attempted and attended a class with a certified instructor. My goal was simply to learn the techniques of the pattern. I had low expectations of how it would turn out due to the fabrics as I’d never seen an example made with non-batik fabrics. Imagine my amazement when I saw the finished product.And here is the back. Don’t mind the wonkiness of the picture…IT is straight, quilt hanger (me) had a wonky time of it. This is also my long arm work using Quiltworx digitized patterns. I’m super proud of this one. I won my first ribbon at a quilt show with this one. Red is a good color, (it IS my favorite after all). Hoping for a blue and maybe even a purple some day.
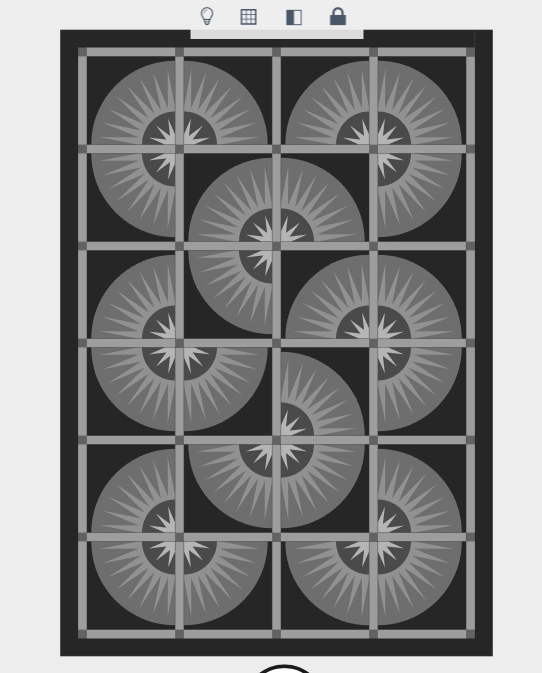
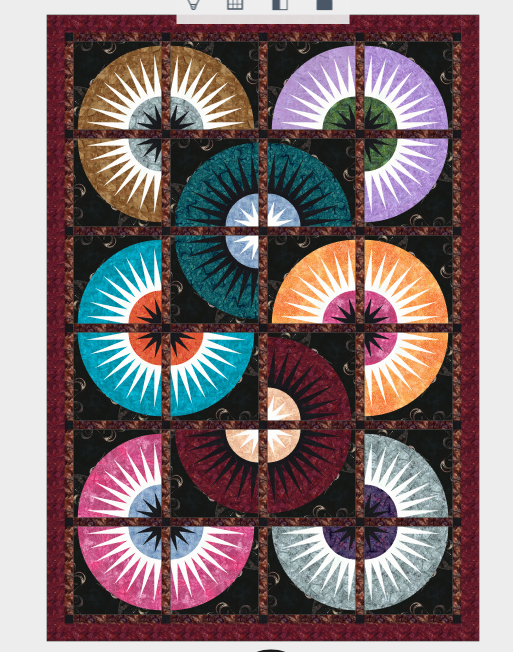
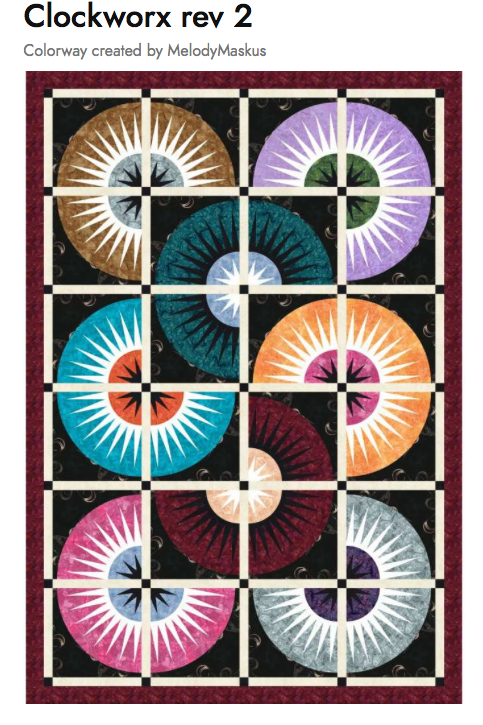
So along with making quilts and learning patterns, there are a number of things that a CI-in training must do to reach certification. Things like teaching and getting in front of groups for trunk shows and demonstrations; learning about and introducing others to Quiltster and it’s amazing capabilities to literally color a quilt to see what your ideas for color and placement actually look like BEFORE you buy one inch of fabric! It even gives you the yardage requirements for each color in the quilt, as well as how to sub-cut it for the proper size needed in each component where it’s used. I’m telling ya it is genius! Go check it out at Quiltster You’ll be so impressed! Here’s a few pics to show what you can do.
This pattern is Clockworks. You start out with a black and white version.Next…you begin to color by selecting different fabrics.Then, you can make slight changes, or big ones, to arrive at a version you like best. For this quilt I chose to make my first rendition. The white of the sashing in this version was just too much. I felt the darker sashing of the first attempt was more cohesive and allowed the colors of the New York Beauty circles to shine more. Would love to hear your thoughts on this!
Other things include developing an on-line presence. While there are many, many ways in which to do this, I’m starting with this blog. I’ve wanted to do this for a while, and have tried my hand at it a couple times, but never really got in a groove. They say to really do well and find inspiration you should write about what you know. And that’s how I got this little blog going again. 5 days in and I’m loving it. They say it takes 21 days to create a habit, but I think for this…it’s already stuck. I’m craving my blogging time.
There are more things on the “To-Do” list of the CI-in training, which I’m sure I’ll be sharing about as time goes on. But I wanted to touch on the highlights that are happening for me right now. Covid has thrown more than just a monkey wrench into the mix on trying to accomplish some of these things, so being creative about how to keep going forward is an important part of this whole adventure as well. I’ve always been a firm believer that it’s better (not easier, just better) to start with the hardest part of anything you want/need to do. After that, everything gets easier. But if the hardest part can whoop you, it’s worth finding that out sooner rather than later. This hard part–the Covid hard part–has jumped into the middle of my equation setting me to dig in and really work through it. IT will not be the deterrent it could have been if I were just beginning this journey.
It’s a big thing when you figure out what you’re meant to do in life. I’m not about to let a pandemic get in the way. Detours and alternate routes are definitely in order!
So hang on Vera! We’re gonna blast our way through this and get to the other side squealing and laughing the whole way through. Quilting really IS my life!
What’s under your needle today? Are you piecing, or planning? Laying out blocks to complete a top? Are you quilting or binding? I’m so curious as to what’s under your needle!
Today, after my morning chores, a few phone calls and emails and a couple hours of standing at my long arm, I’m piecing. Paper piecing to be more exact. It’s what I love to do…in fact I crave my time at the machine, working on several different patterns at a time.
I’m sure there are many people who think I’ve got a screw loose, and they probably aren’t far from the truth. But my passion for creating quilts is super focused on paper piecing. And Quiltworx patterns by Judy Niemeyer are the highlight of my quilting world. I find my mind and my heart breathe a sigh of contentment when I sit down at my sewing desk to work on the current projects. It is definitely my happy place.
Becoming a Certified Instructor for Quiltworx is something I’ve been working towards since my first trip to Montana in April of 2018. It’s January 2021, and I’ll be finishing up this adventure a year from now. It’s a huge time commitment. And in every way, in my humble opinion, equal to a Bachelor’s degree from a college. Each of the patterns that I complete is easily equal to the cost of a college class and it’s required books. Especially if I only buy the newest fabrics for each of my projects.
Don’t get me wrong…I love, LOVE all the gorgeous and newest fabrics, but I’m also quite budget conscience. I’m especially proud of the fact that I have been able make several of my portfolio patterns directly out of my stash. Out of my STASH!!! I’m over the moon about that. Here are a few that I’ve been able to do that with.
Here is my version of Lincoln Log Cabin. It’s 31″ square and a super fun and fast project to make.
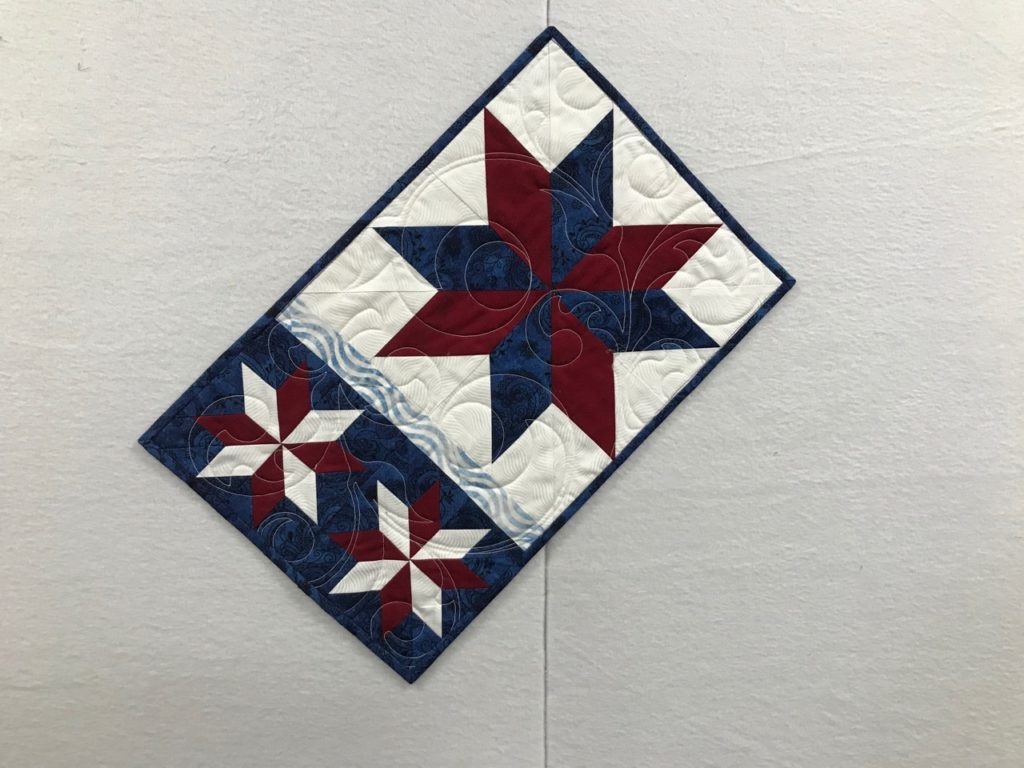
I love my Twinkle Star! It was sooo much fun to make. And at only 38″ square, it’s a great size for gift giving too!
Next is a summer color way of My Two Baby Sisters placemat. Another quick project with endless color options.
This is Star Baby…waiting for her turn on the long arm. I LOVED putting this together! Another sweet little wall hanging.
And here are Tea Time Placemats, also waiting to be quilted. This pattern is awesome! And comes with enough papers to do a set of 4 for your table. Can’t wait to make some in autumn colors too!
Golly! There are more than I thought that came from my stash. Actually, there are even a few more, but I’ll save those for another time. Using from my stash is something I’m pleased with . And it’s also something I think will be a helpful to encourage my students to do. Of course…when my students are shopping for fabric I’m only a phone call away to ask a question, if I’m not already there helping, guiding and suggesting options to add to their selection process. Who doesn’t like to shop for fabric??
So, leaving the bunny trail that took me away from my original question…What’s under your needle? This is what’s been under mine for the past several days. I’m working on just a few patterns all at once. It’s a skill set that I’m honing and finding it to be quite productive. It can be a bit confusing at first, but it only takes a little while before it becomes second nature. I love working on my projects this way.
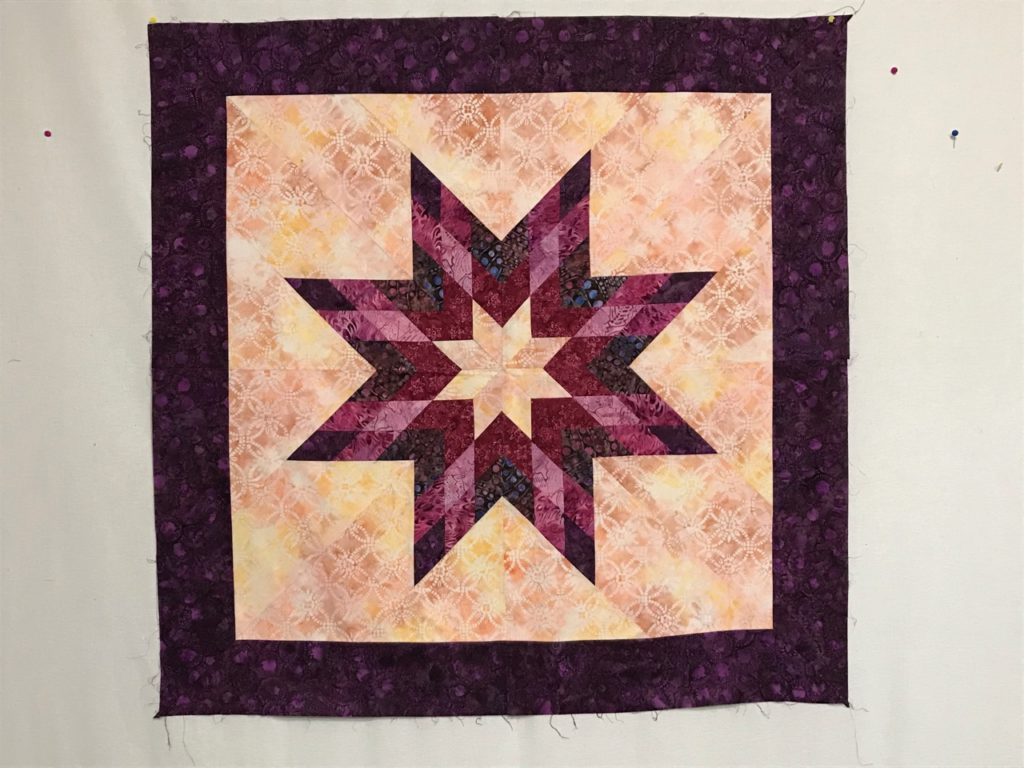
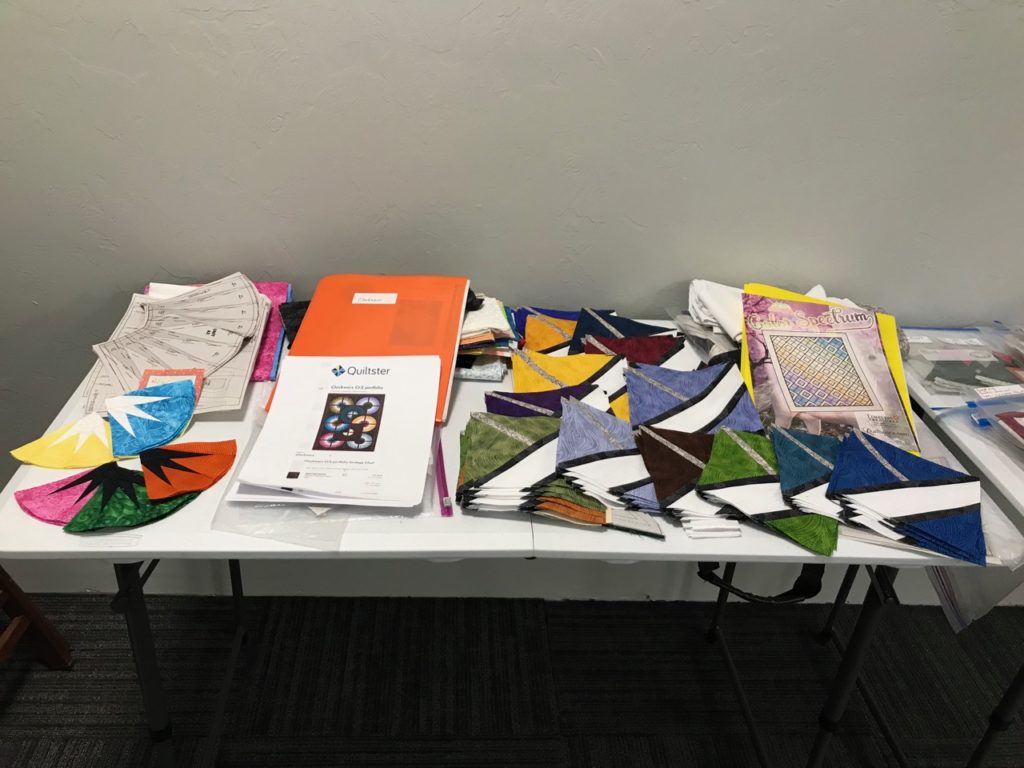
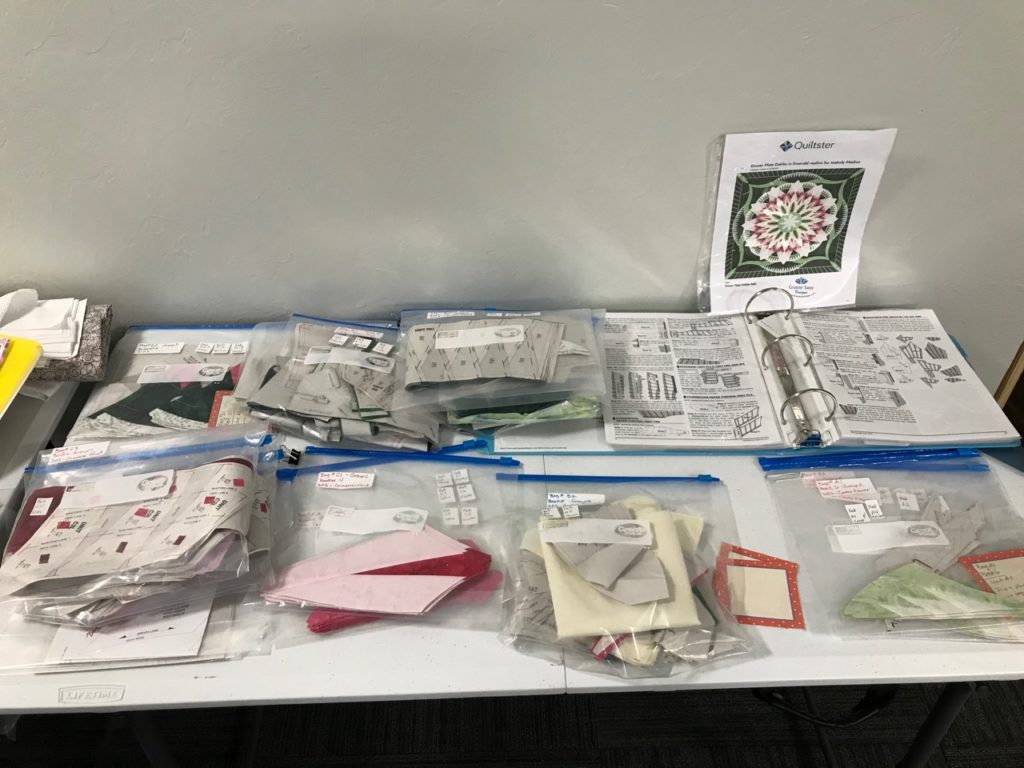
I have two 4 foot tables that I use for my pattern staging. Here’s the first one. On the right is my version of Clockworks, which is a Quiltworx Cut Loose Press pattern. And on the left is Color Spectrum I have nearly all of these blocks completed…next will come setting the blocks to make the top.Here is the second 4 foot table. I’m working on my Dinner Plate Dahlia here. Granny Sassy Designs put this kit together for me, and she does an AMAZING job! I’ve loved this color way since the first time I saw it. I’m over the moon about this beauty!!This is how I stack my projects as I work on them. Each time I go through the stack I do the same step to everything regardless of the project. For example, each layer will get ironed all the way through the stack, then on to trimming and placing the next piece, then sewing them together, repeat.Here is what the stack looks like exploded out layer by layer. I know what each of these belongs to, and where they are in the process by just looking at the top layer. Oh! And there’s an Impatiens placemat in there too. That’s 5 patterns across these 8 layers. Not everyone wants to work in this way, and that’s the beauty of it all…we all get to enjoy our own process with no judgements.
For me, it breaks things up enough to keep me from being bored if there is a lot of repetition (as in a large quantity of the same thing). It also lets me make significant progress on a project if I employ the same method on a single pattern. Yep…there must be a screw loose in there somewhere. But boy to I have a good time with it! Yippeee!!
I hope you are having a stitch filled day with lots and lots of enjoyable moments and a sense of accomplishment in being able to put needle to fabric.