I was rearranging a bookshelf today and I came across a UFO, tucked away in a notebook that I’d forgotten all about. Imagine that!
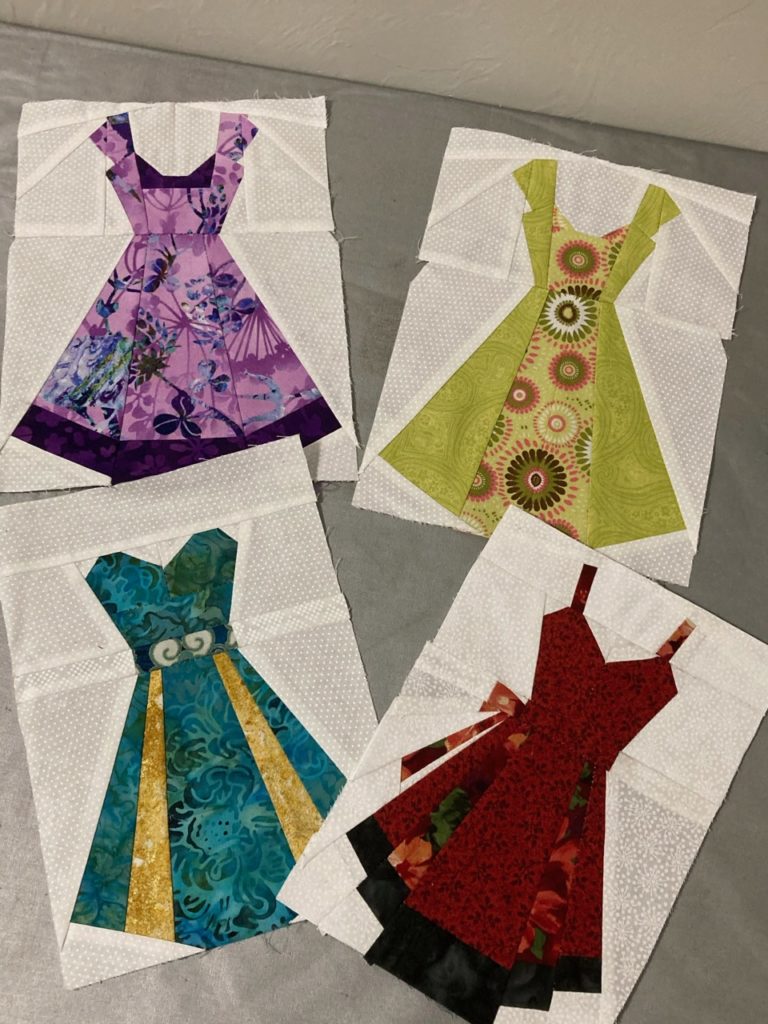
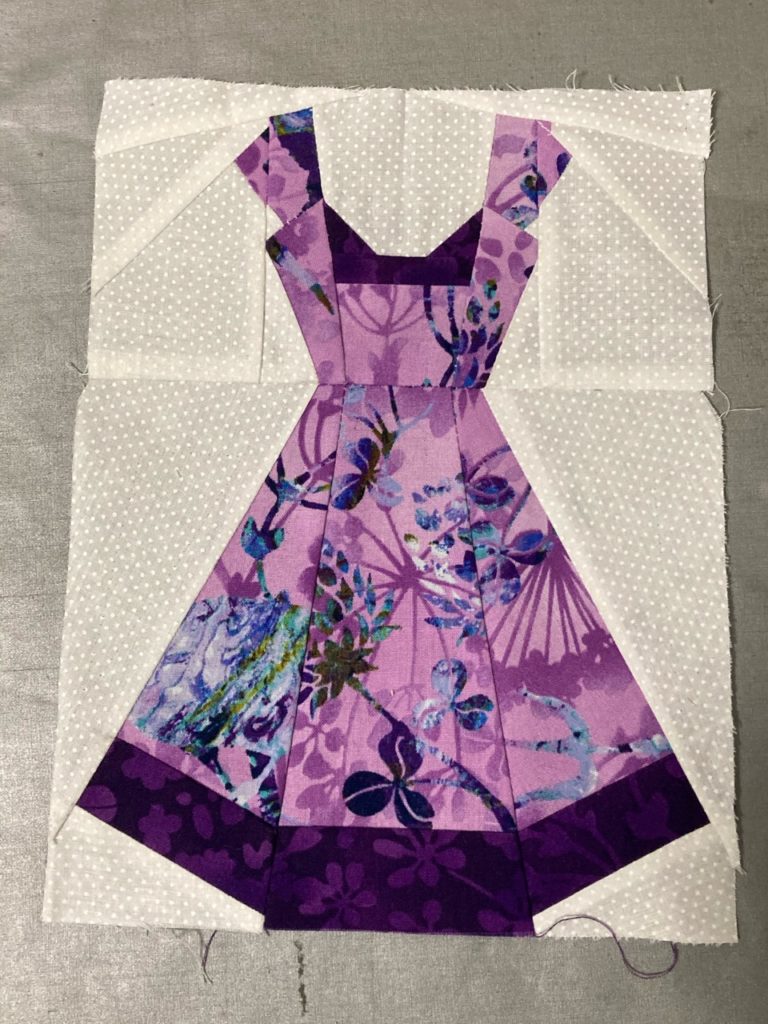
Here they are! I get the biggest smile on my face when I see these. Such fun fabrics and sweet looking dresses. I have a hard time deciding which is my favorite.
It’s a shame these little cuties are still unfinished, but I plan to rectify that toot sweet! I think the reason they are still in the block stage and not completed is that I simply couldn’t decide how to set them. Should I make them each into single little wall-hangings to be spread out in a couple rooms? Should I group them into pairs? Or should I put them all together in a group of four—wait—should they be place in a line horizontally…or vertically…or maybe in a square with two rows of two????
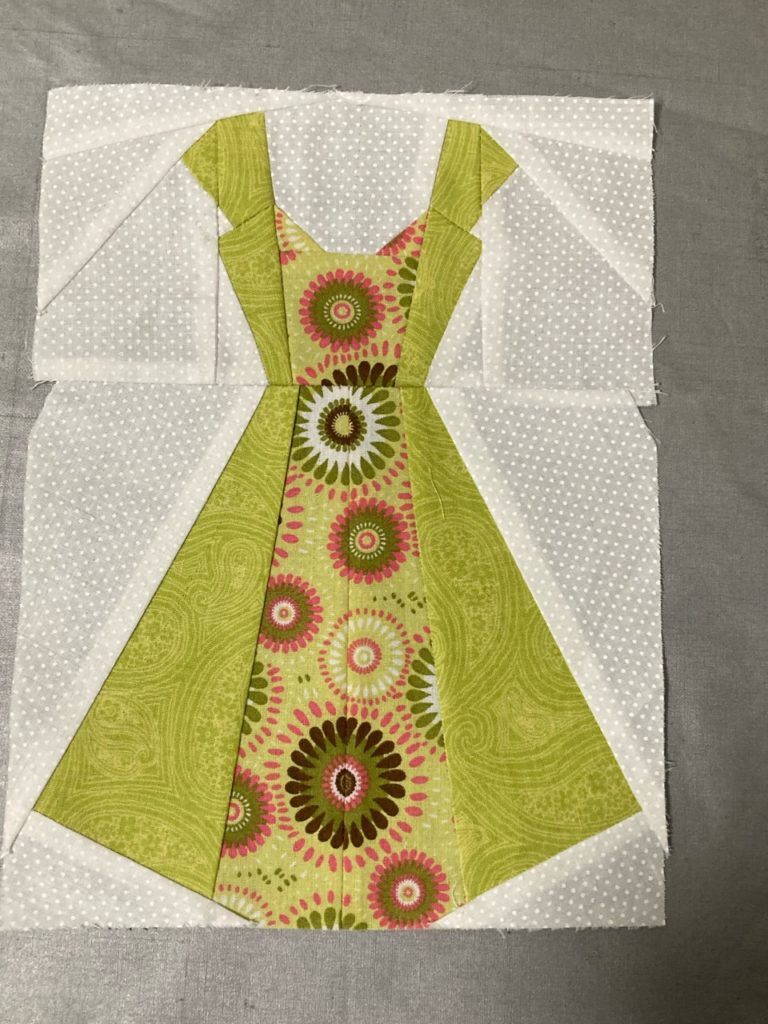
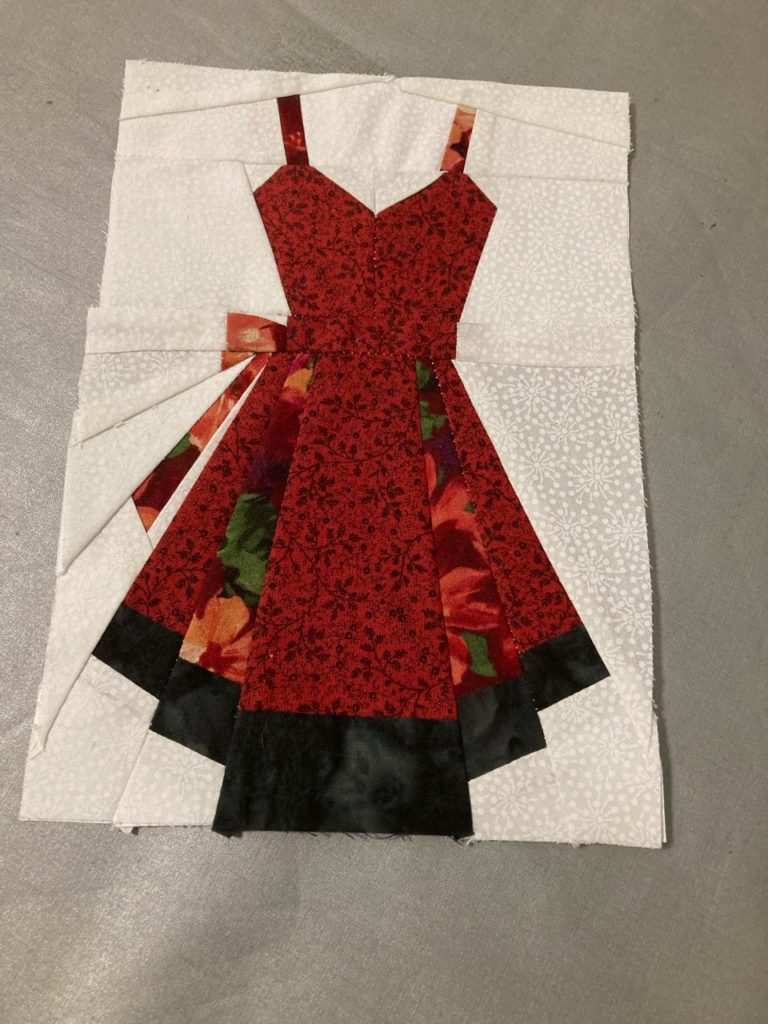
Obviously this little girl needs a trim to square up the sides, but how fun are these fabrics together?? I was so determined to use the big print as the center panel, I had to match together a couple pieces in order to get a big enough piece to use. Not too bad at that. Flashy and feminine all at the same time.And this one is just so ready for a dinner party. I would loved to wear something like this back when I had a figure to match. Who says you can’t mix batiks with regular cottons.
I’ve been stumped, evidently for years over the very same questions.
Maybe this one is my favorite…red IS my favorite color after all. Then again…maybe not….And then there is this lovely. Yes, red is my favorite color, but this one just makes me hum. It’s so awesome when something makes my heart sing.
I think the answer is just going to have to be…yes! To all those options! Which means of course, that I’ll have to make more.
Hmmm…. maybe not.
Now I love paper piecing. You could even say that I’m a bit crazy over paper piecing. But I’ve learned a thing or two about these types of patterns over the years. And the bottom line is that you get what you pay for.
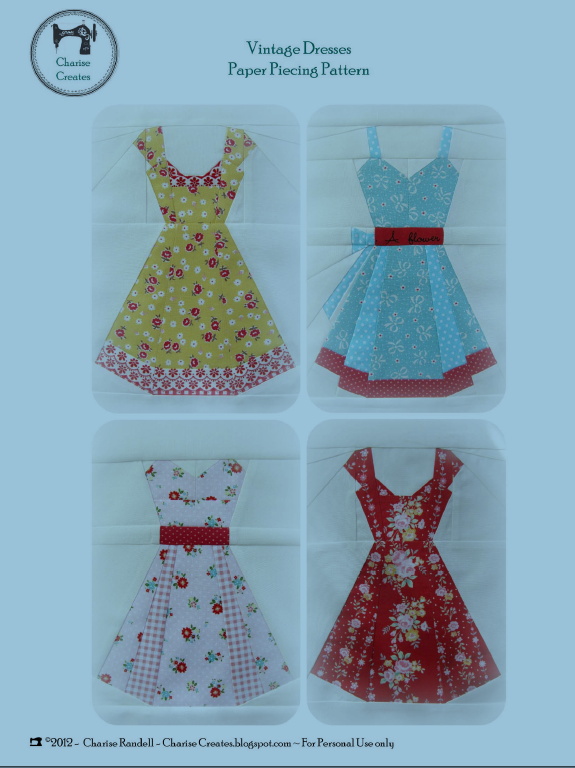
This is the pattern cover sheet that originally caught my attention. The cover samples are quite cute, but I have to admit that I like mine better. I wish the patterns were just a tad bit better, but I can’t be unhappy with the end product. I haven’t seen any of this designers more recent work, but I hope she’s still at it and going strong.
These adorable little dresses were purchased from a pattern designer from her on-line shop, just sure if it was Craftsy or Etsy. And she’s got several others that I also bought. Sweet, sweet little projects, and very reasonably priced. And! The patterns can be printed on your home printer with great success.
So, here’s my little bit of unhappiness with these patterns. There are no seam allowances written into the pattern. Definitely not the end of the world…not by any means at all! But it does make sewing these patterns a little easier to mess up without that little added bit on the pattern.
Her graphics are good…and the instructions are succinct in their explanation of what to do. I just think one little additional thing put on the pattern would make the construction just a tad easier.
I don’t mean to sound like a paper piecing snob. But I think I’m just really used to how Quiltworx puts their patterns together. And I suppose that would be why I’m working towards becoming a certified instructor for Judy Niemeyer and company. From their entry level patterns to their advanced level patterns, they build upon skills every step of the way. And it’s more than impressive.
But for now…I’m going to raid my scrap tubs and see about pulling out some fabrics that I’ve been eager to put into something small and quick just for me. I think these little cuties are going to see some needle time real soon!
I’m thinking, a cuddle is worth a whole heck of a lot. Whether it be with a pet, or a child…a loved one or a warm fuzzy cover…cuddles take care of a very specific thing we humans need.
In a word…Comfort. Cuddles bring comfort—to both the giver and the receiver. And comfort brings security and peace and eases stress, and—and—and… The list goes on and on for the benefits of a cuddle.
As quilters, we have the unmatched ability of being able to create cuddles without even being present. I love that aspect of what we do. It reaches not just beyond our immediate surroundings and those we gift our work to, but it also reaches beyond time. Much like the quilt in a quilt mystery that I unveiled yesterday.
Over the weekend, I made a cuddle throw. Literally…a throw sized little thing made from Cuddle fabric by Shannon. It has a great story to start it off. And I’ve included some of the tips I learned about dealing with this sort of project. Read on, my friends…
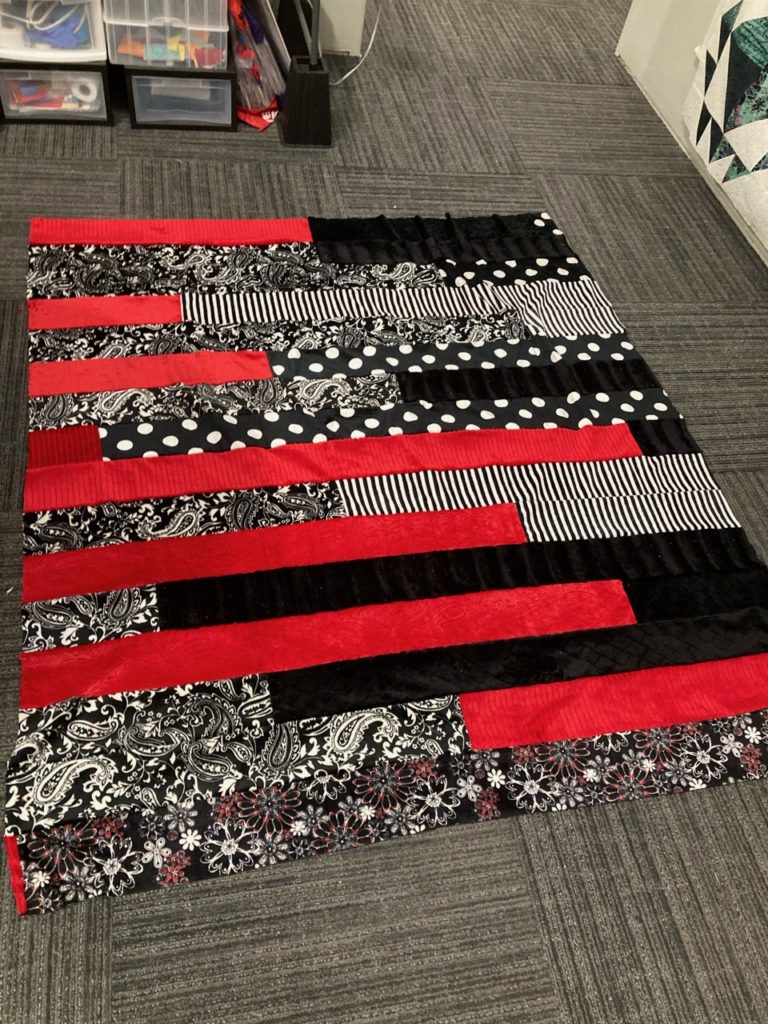
Here it is…first look after the last seam on the top. SOOOO cute!
During the summer, last year, Gary and I went to an estate sale. I was specifically looking for vintage linens that I use to make quilts. These items also are incorporated into my trunk shows and workshops to teach about this method. Of course, when at an event like this, I look at everything I can find to see if there is anything to re-purpose or might be a treasure of another kind. You can find literally anything and everything at one of these sales.
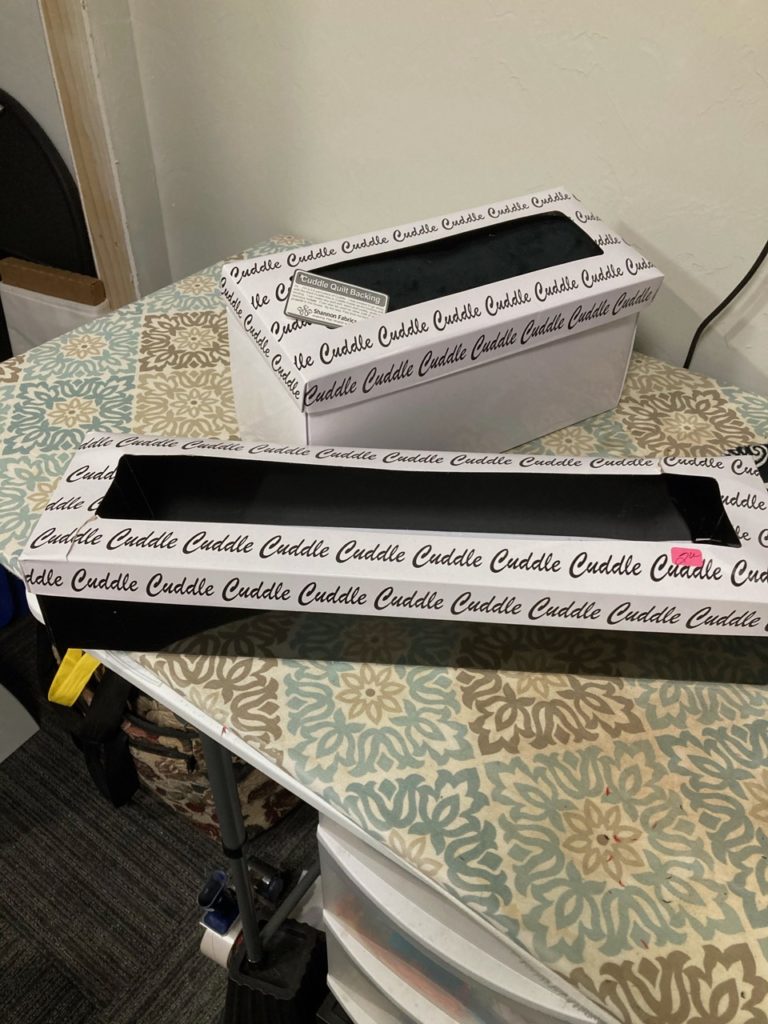
Here they are! You can see the pink sticker on the box that says $2.00…it was such a no-brainer choice. They were all mine!
I found these boxes tucked under a table, just haphazardly sitting on the floor. I knew what they were and was a bit intrigued to see if the contents matched the boxes. They sure did. And when I saw the price on the boxes, they didn’t just slide quietly into my bag, they jumped.
You see, there is a technique to shopping at a sale like this. You don’t pick it up unless you are truly interested in the item. If you need to think about it before you buy it, you put it in your bag and carry it with you until you decide. Because believe me when I say, people watch you and if you touch it and show interest in it, others will as well. Then, the likelihood of it being there when you decide to go back and get it, is nearly zilch.
The price alone was worth the purchase…$2.00 a box! That’s right…just 2 smackers a box. The original price was over $50.00 a box! Yep…they jumped into my bag, and home they went.
I decided right away I was going to make this little cuddle throw for our daughter, and over Valentine’s Day weekend seemed to be the perfect time to get started.
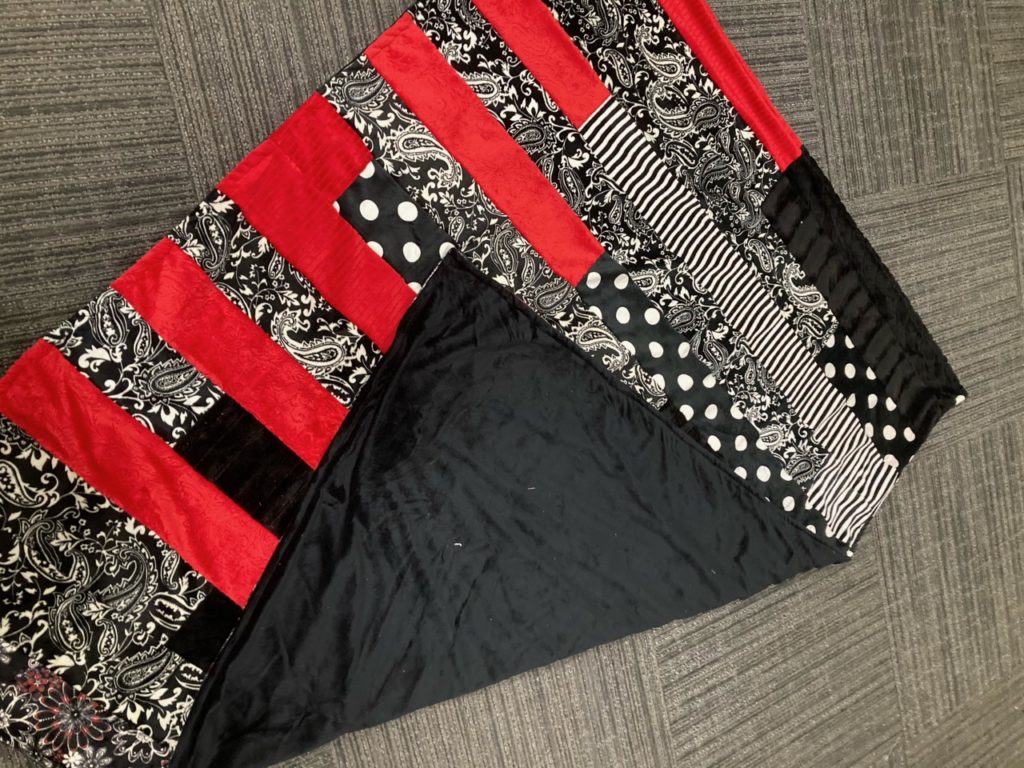
The long narrow box held 17- 5” strips of a variety of red, black and white colored Cuddle fabrics. A “quilt-as-you-go” pattern was included, which I promptly ignored. I chose to use a “Jelly-Roll Race” pattern. No measuring, no fuss. But…. there was lots and lots of muss.
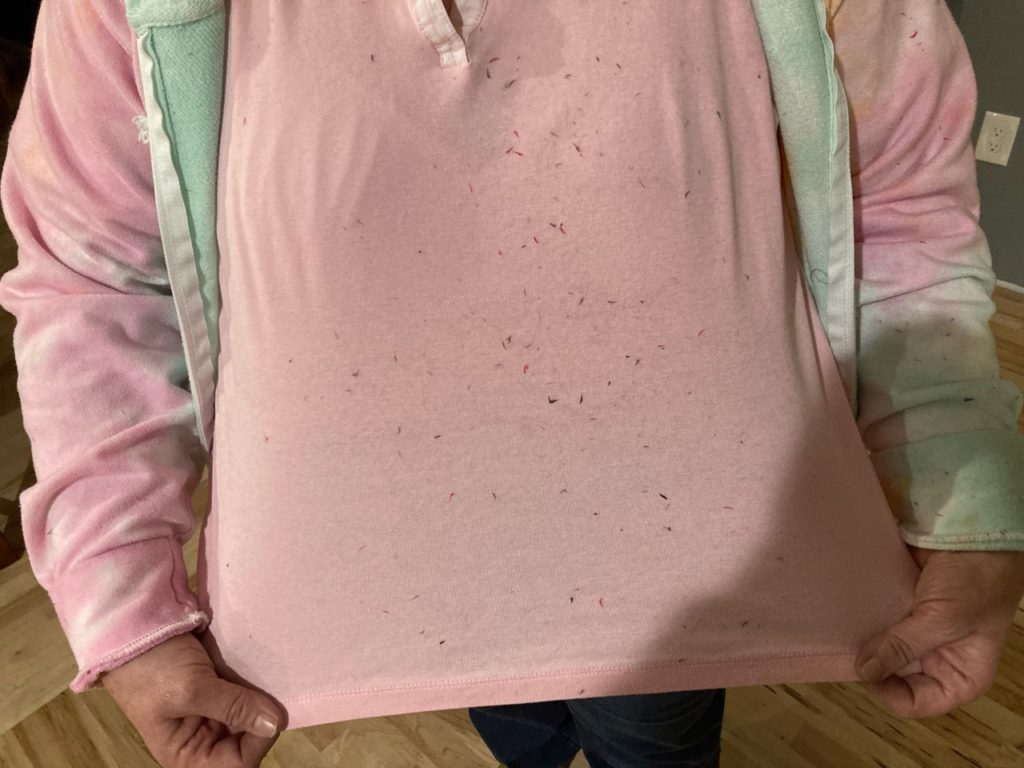
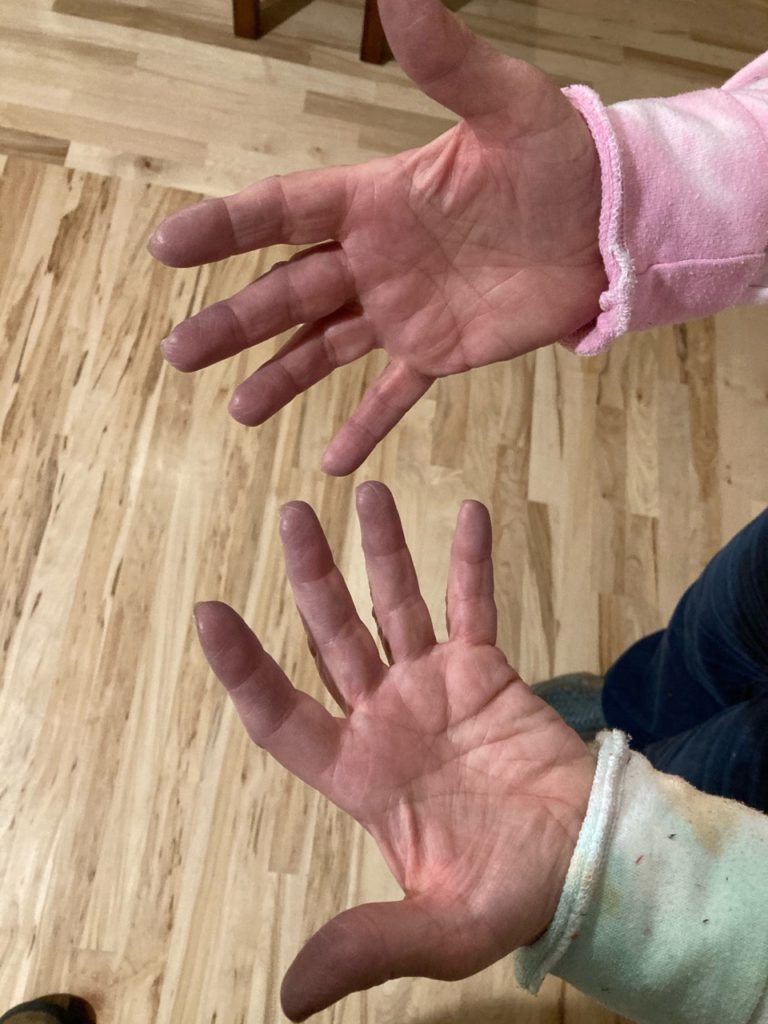
Yep…lots of muss. My shirt and jacket were COVERED in red, black and white fuzz. The floor, my desk, my machine…fuzz was everywhere and I’m still vacuuming it up 4 days later. The dye wore off on my hands too. It needs a serious washing after its done. After the first wash and dry cycle, it will all be good and shouldn’t affect anything more.
Cuddle fabric is a unique product which has a lot of wonderful qualities, but also some things about it that are less than fun to work with. Now, I’ve used Cuddle type fabric several times as backings for quilts, and they give me absolutely no problem at all. The end product is totally worth the little bit of care that’s needed to ensure a good result.
Having said that, the issues in working with a fabric like this…regardless of the type, whether it is Minky or Cuddle, smooth or textured, they ALL are slinky and stretchy. And! Their edges curl when cut. The larger pieces don’t curl quite as much, but the smaller the pieces are cut the more they curl. Stretching the fabrics cause them to curl even more. BIG thing to be aware of.
The other thing to be aware of is that they shed. Like a shorn angora anything. There is fuzz EVERYWHERE! You simply cannot avoid it. There are ways to reduce the fuzz…like placing painters tape across the backside of the fabric to make a long WOF (width of fabric) cut. You cut down the middle of the tape so each side has a bit of the tape when separated. Then you don’t take the tape off until that edge is sewn into a seam. Taking the tape off takes most of the fuzz, and the pulling of the tape and subsequent curling of the edge won’t matter because it’s already got a seam to keep it straight.
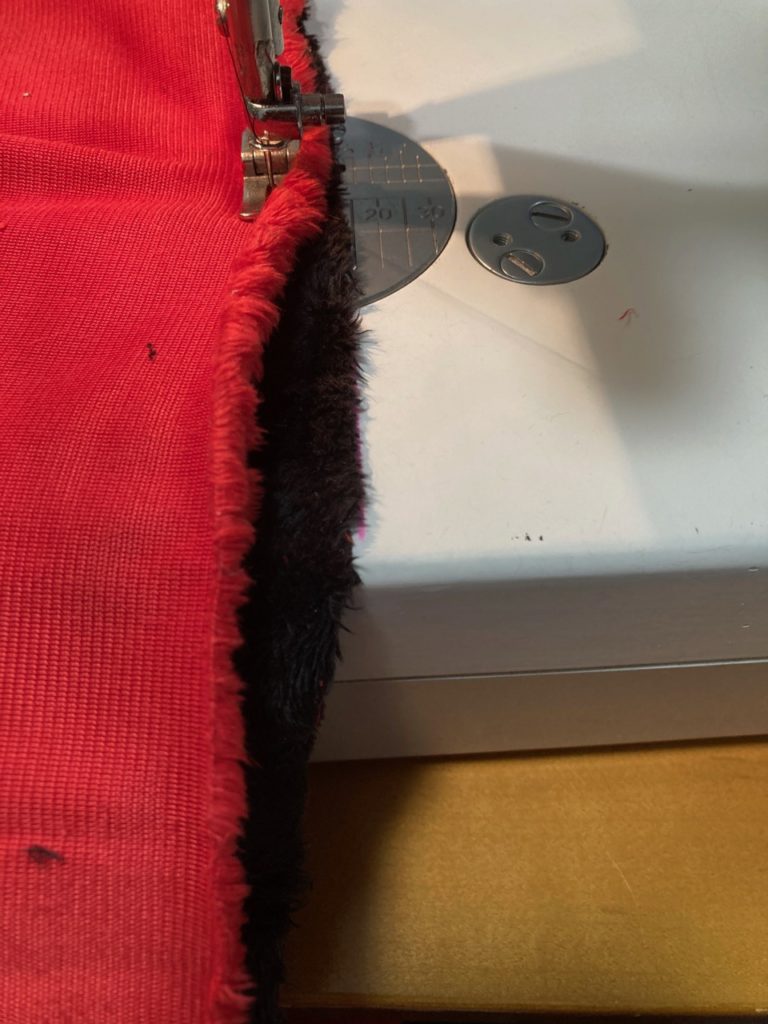
But I digress. The tape method doesn’t work with smaller pieces. And these 5” WOF strips had curl to them as soon as they came out of the box. Knowing how to manage the curl is a learned skill that I’m happy to share. To have a good outcome I did several things. First, I increased my seam allowance to ½” which allowed me more maneuverability on the approach to the presser foot. Curling on the bottom fabric could be managed by the machine bed, but the top fabric had to be continually uncurled and repositioned as I fed the layers to the presser foot/needle. But the struggle grew as the project did.
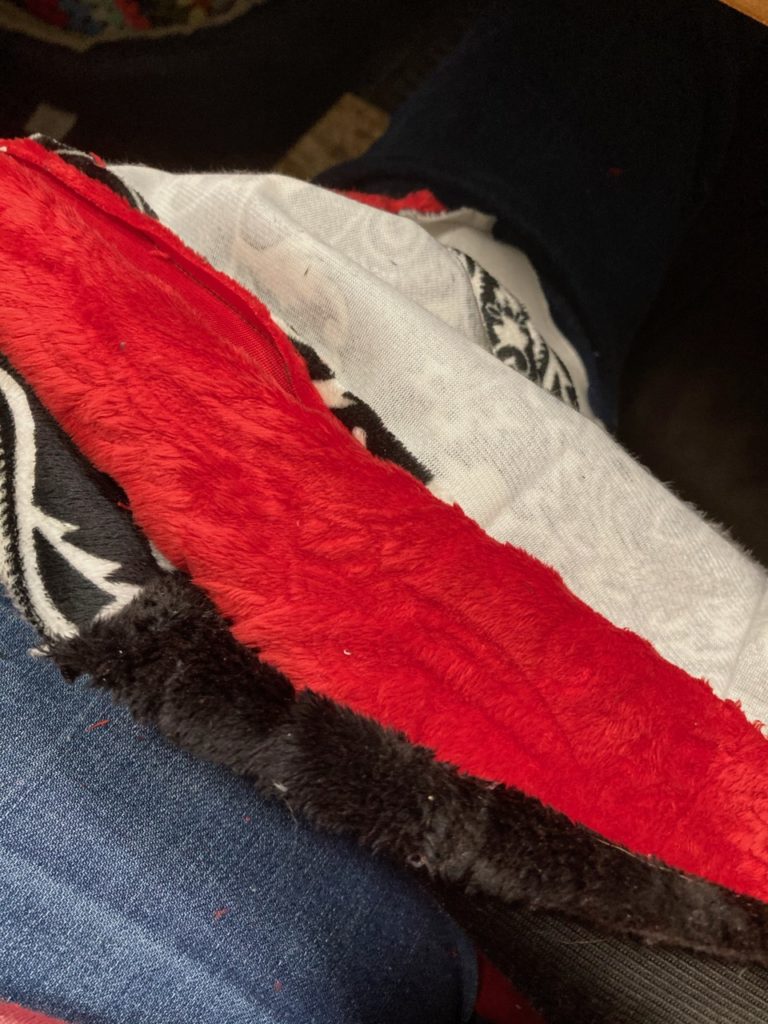
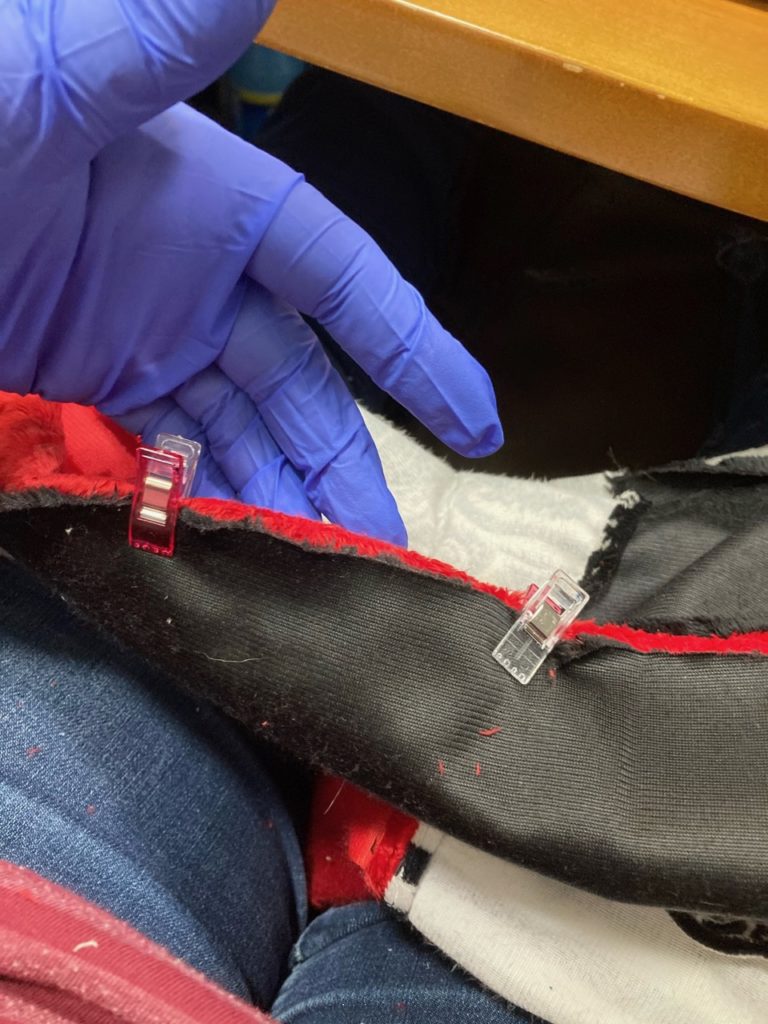
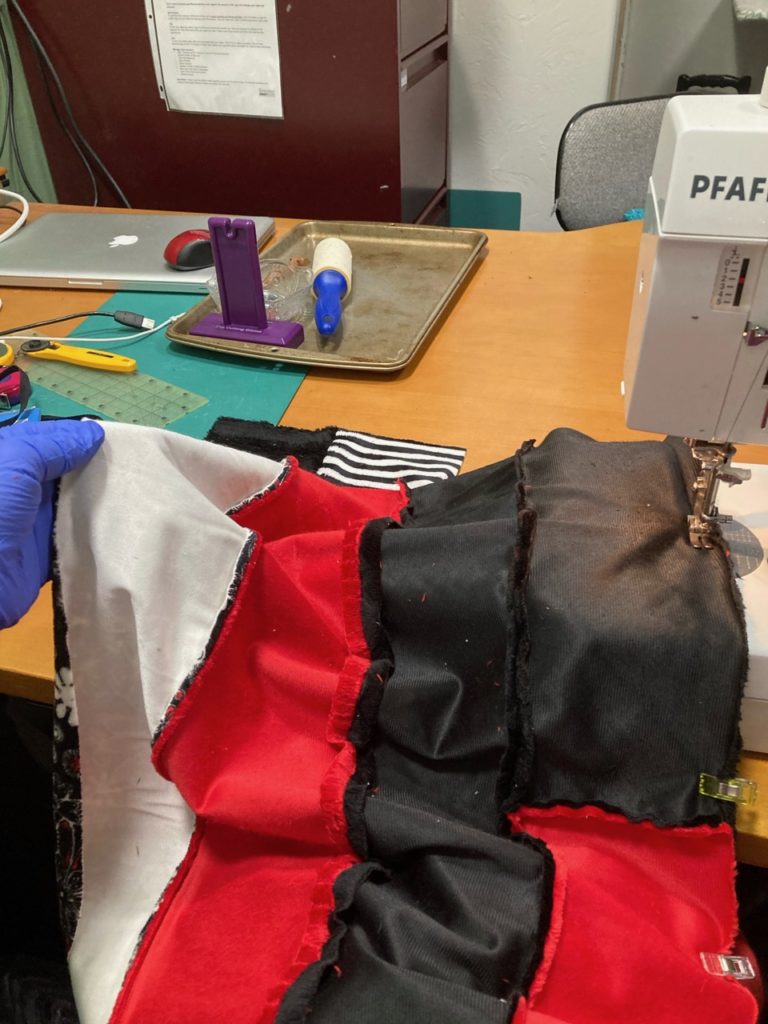
Here is the next pass lying across my lap. Both sides of the fabric are curling away from each other, and the curl is becoming more and more significant.My solution was to use wonder clips to hold the two edges together. I prick myself over and over again with pins on a long seam like this, so wonder clips were the tool of choice here. They also allow the fabric a little give when it comes to adjusting out pleats and folds.
Then, there is the sliding/slickery issue of having two layers of this pass through the machine. As the project grew, it became heavier and thus would pull slightly to the side. So, another factor was added into the “anti-curl” technique. The bottom fabric had to be guided with the right hand to keep it true for the ½” seam allowance. The left had to continually readjust the top fabric, along the left side, to keep the “curling” influence at the right side of the fabric from pulling it askew. Uncurl, readjust the tug-of-war, sew; uncurl, readjust, sew; repeat to the end.
Here you can see the distortion of the fabric as its growing weight pulled at the top fabric. Time to step up the game.Here’s the right hand keeping the right side straight and managing the curl as it goes under the needle.And the left hand holding the left side up to keep the weight from distorting while also helping to keep the alignment straight.
Even with the added steps necessary to work with this fabric, it went together quite quickly. The finished top size was 58” x 67” and took only about 4 hours to sew up. Perfect!
Next, was what to do about the finish.
The top was a bit weighty, and backing of the same fabric doubled the weight. Adding batting was too much. So, I opted for no batting. I also decided to not quilt it either. Reason being, to add stitch lines for the quilting would completely change the look but more importantly the feel and drape of the cuddle.
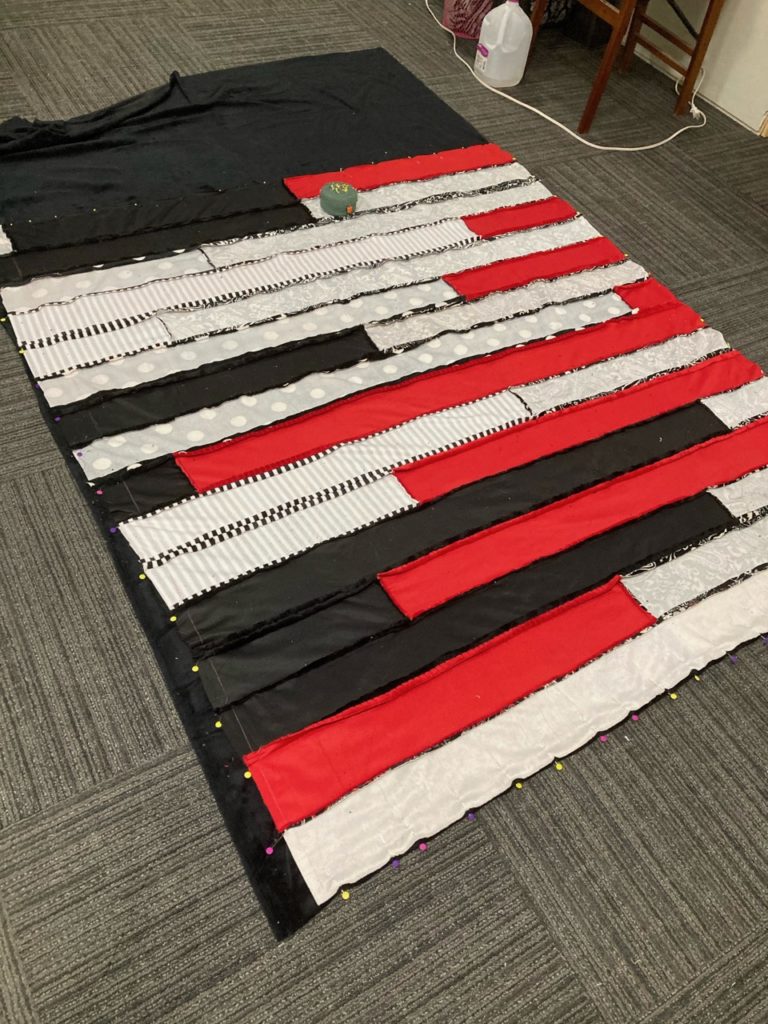
Finishing looked like this! I laid the backing on the floor, face up. Then, placed the top over the backing, face down. I pinned along one side, the top and the bottom of the quilt. That left the uneven 4th side of the quilt, which always happens on a Jelly-Roll Race. Measuring in from the side of the backing along the last side, I marked a straight line the full length of the quilt, then pinned it in place. Now, I had everything secure. And I did NOT cut anything off to bring it square at this time!
Pinned and marked…ready for the closing seam all the way around. NO trimming yet!
Next, I sewed a ½” seam all the way around the quilt, using the marked line along the crooked side as the edge, and leaving a 4-6” opening along one of the other sides. Once it was all sewn, THEN I trimmed the excess fabric off the bottom and the crooked side, making all sides even and no trouble with the curling problem.
Last step was to turn everything inside-out and sew a 1” seam around all 4 sides. Plus, a few inches of hand sewing nicely closed the turning opening. Just another couple of hours of sewing.
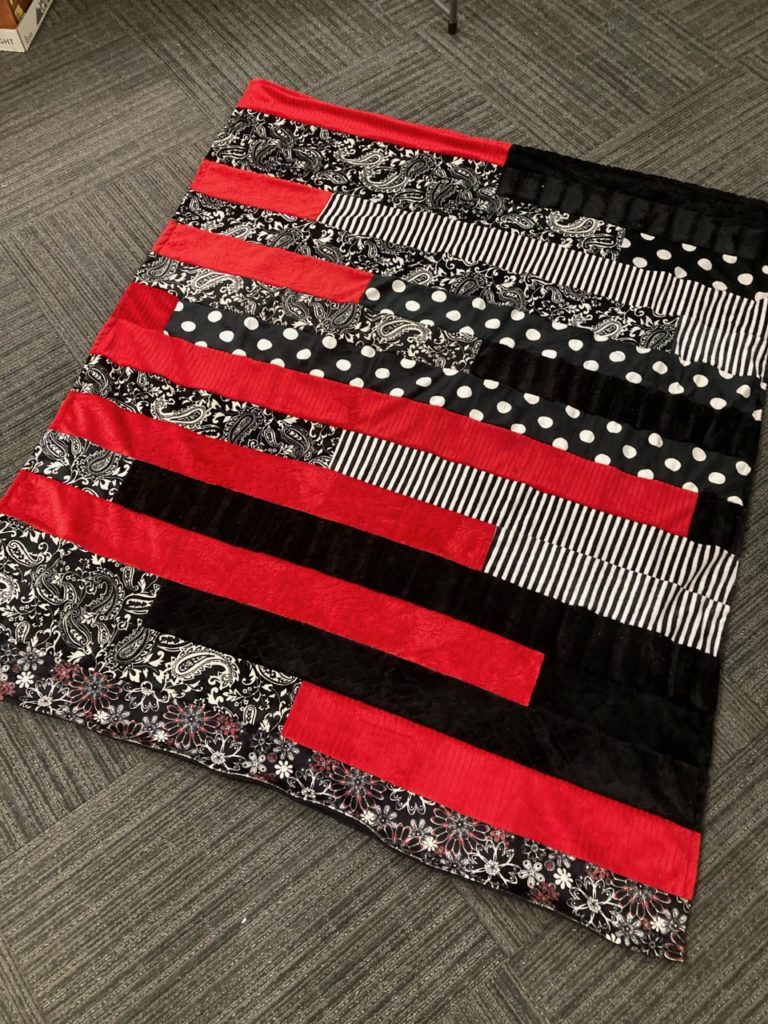
Here she is! Ta-daaa! It’s done. A wonderful, soft and cuddly little throw was made, and is now waiting for delivery to its new home. It was kinda hard to send it on its way it turned out so nicely.
When our kids were little, I always made them pajamas to sleep in. I told them that even when they were sleeping, I was holding them and giving them lots of love and snuggles because I made their pj’s to do that job for me when we were apart during the night.
This little cuddle blanket is kinda like those pj’s…sending lots of love and snuggles to my girl when I can’t be there in person.
So, what’s a cuddle worth to you? It’s worth everything to me…and I’d do it again in a heartbeat.
Not a shop hop, where every shop you enter holds a new gadget and fabric to revel in. But a real scavenger hunt within one quilt?
I did that today. Let me tell you about it.
When Gary and I began our quest to build a new “barndominium” to hold both our home AND our business ventures, we bundled up all our furniture to move into a storage unit during the build. Just this past week we’ve brought more of that furniture home. Several of these pieces were wrapped in sheets and old blankets. As several of these pieces were unwrapped, I set out to launder the wrappings and put them away until needed again.
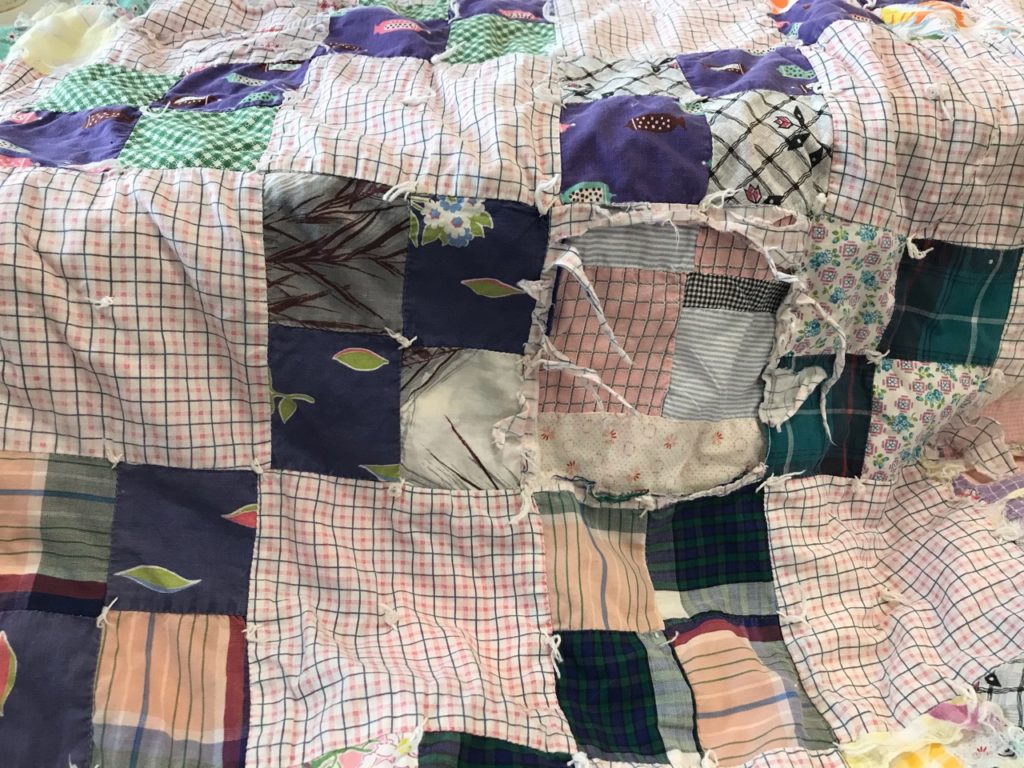
In the pile of things to wash, I found not one—but two quilts from Gary’s great-grandmother. (Great Grandma Davis lived from 1887-1964, and Gary has a few memories of her from his early childhood.) I think they were pulled into this service because they were heavily worn and showed much damage. Well, when I picked up the first one to inspect for laundering viability, I noticed right away there was more to this quilt than met the eye. A further investigation was in order.
You can see here an area of the quilt that is completely missing…but there is something peeking out that shows there’s more to see beneath the rest of the old girl.
I’m glad I looked further, because this old girl held a secret inside her.
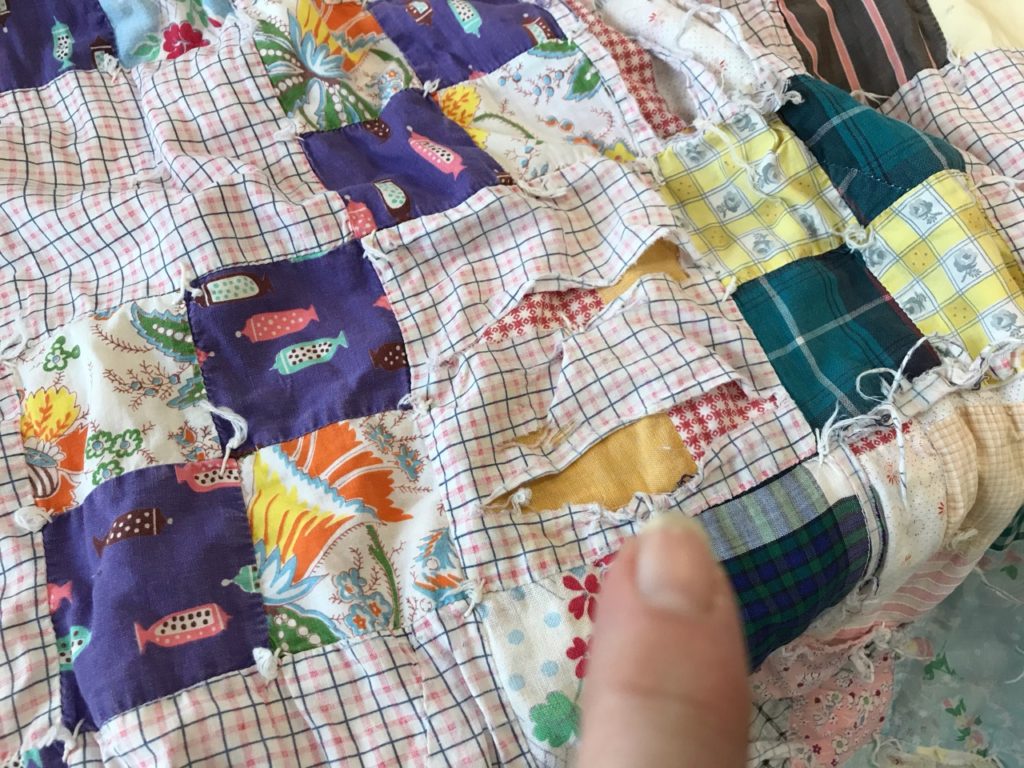
And another area of shredded fabric with more surprises hiding beneath whats on top.
Yep…a quilt within a quilt. My fingers got itchy and the scavenger hunt was on.
This old lady was tied, and the only way to learn her secrets was to clip all the ties and separate the layers.
Once all the ties were clipped and removed, the only thing keeping it together was the binding. It obviously needed to be removed, but how. The decision was made after looking at the condition of the folded edge of the binding. It had several threadbare areas and showed a lot of wear over the whole binding.
The decision was easy…I chose to cut the binding off. Now if it had been in slightly better shape, I would have opted to carefully remove the stitching and unfold the binding with the expectation that if the backing needed a little patching, the material in the fold of the binding could provide that. That wasn’t the case, so out came the scissors.
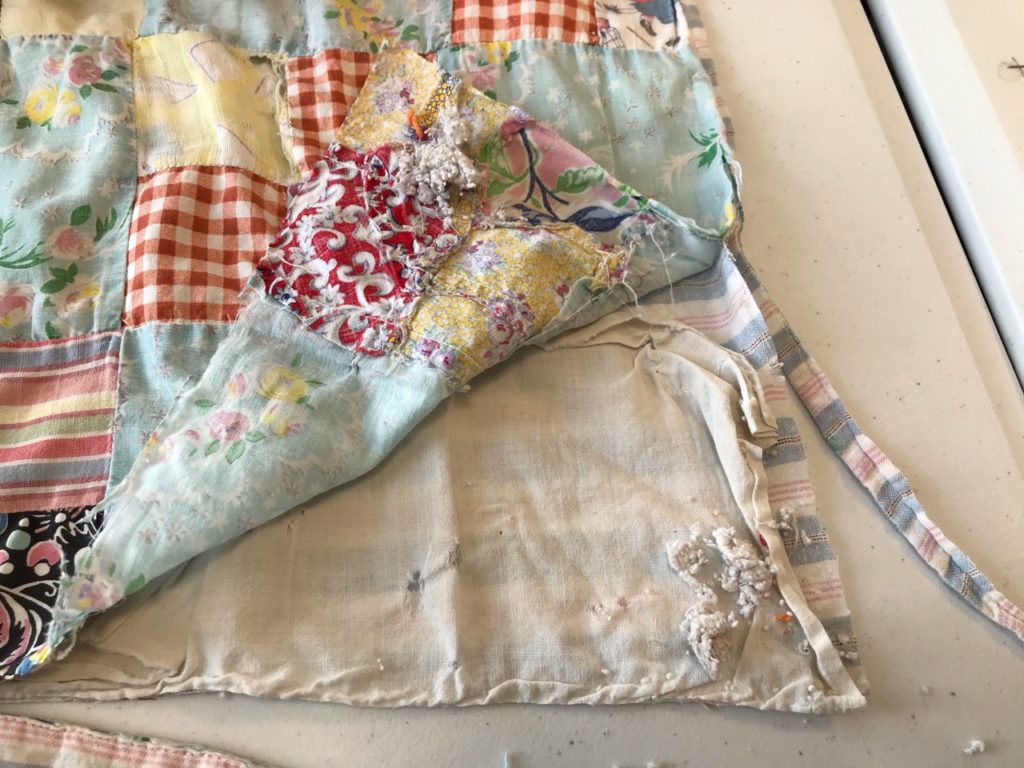
The ties are out and the binding has been cut into. You can see the beginnings of what started to fall out of the quilt as soon as the scissors opened up the layers.
As I was cutting away the binding, the batting…or wadding… began to crumble from inside the quilt. Crumble sounds like it disintegrated, but that’s not an accurate picture of what occurred. The batting fell out in crumbs. It had long since balled up into crumbs and migrated towards its corners and simply fell out of the quilt when the fabric was no longer there to contain it.
What looks like a pile of lint is actually whats left of what was used as a batting. I’m thinking it was more of an unwoven layer of cotton, nothing like anything used in todays quilts.
You can see what’s left of the batting in the lower right hand corner of the quilt…it’s a wad of crumpled, pilled batting. Not much of it either. I assume the rest of what used to be the batting must have fallen out of the quilt through the various holes and missing fabrics of the quilt.
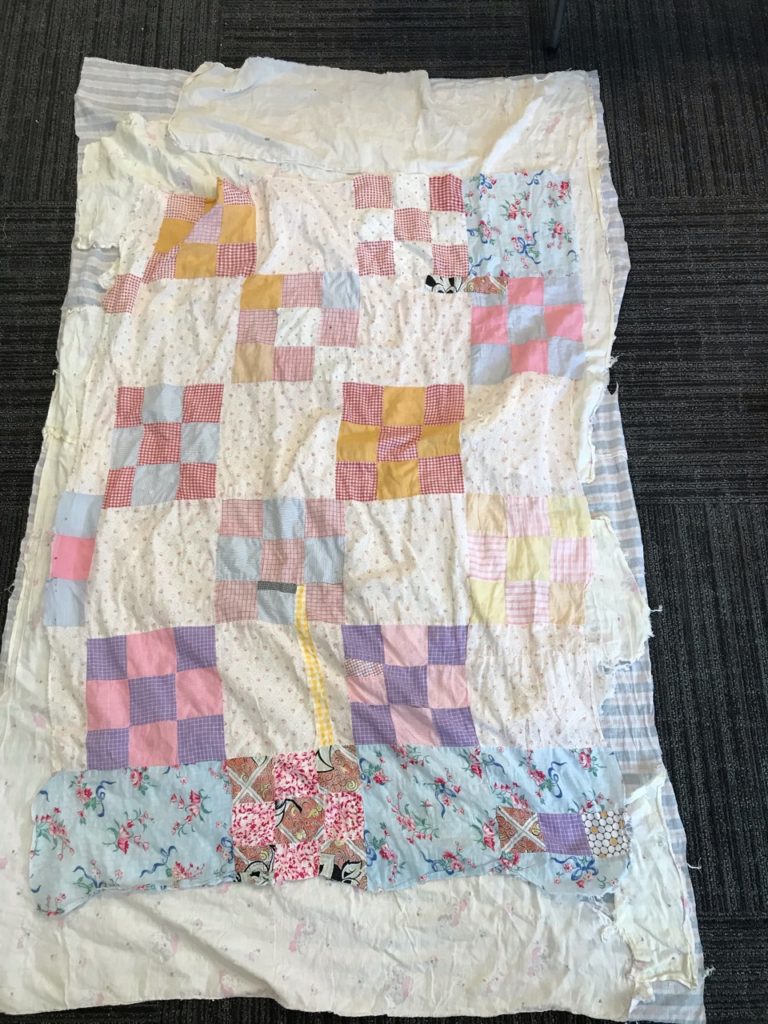
Once the top was removed, you could definitely see what was inside. This little quilt was revealed. The curiosities didn’t end there. Beneath the little nine-patch baby sized quilt was not a jumbled layer of crumb-y batting, but a collection of various other fabrics which I am guessing was the original backing to the baby quilt along with perhaps some aged muslin. And what was even more curious is the layers of fabric were not stitched together, but rather laid on top of each other with the hidden quilt top over that. The batting that turned to crumbs was placed in there somewhere, but the evidence of where is a mystery.
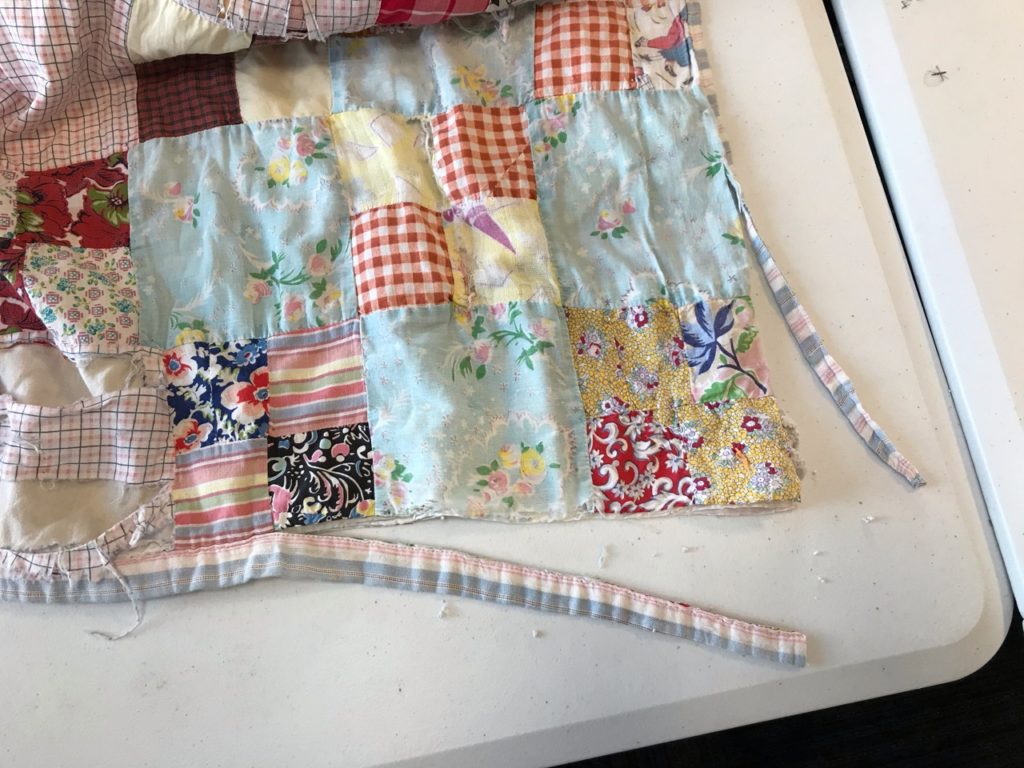
Here is what I found when I lifted off the outer top remnant. A sweet little baby quilt with some patches and partial blocks to make a uniform size.
The little baby quilt top has a few other stories to tell as well, and someday I hope to learn about them. The fabrics that it’s made from look to be from the 1930’s and perhaps even earlier than that. I’ll learn more as I research the print patterns and fabric types. It does appear they are mostly from shirt weight fabrics in more feminine colors. Cottons with a variety of weaves, and perhaps a linen print as well as a lawn or batiste. All the seams are sewn by machine, but the various patches correcting cuts or holes are done by hand.
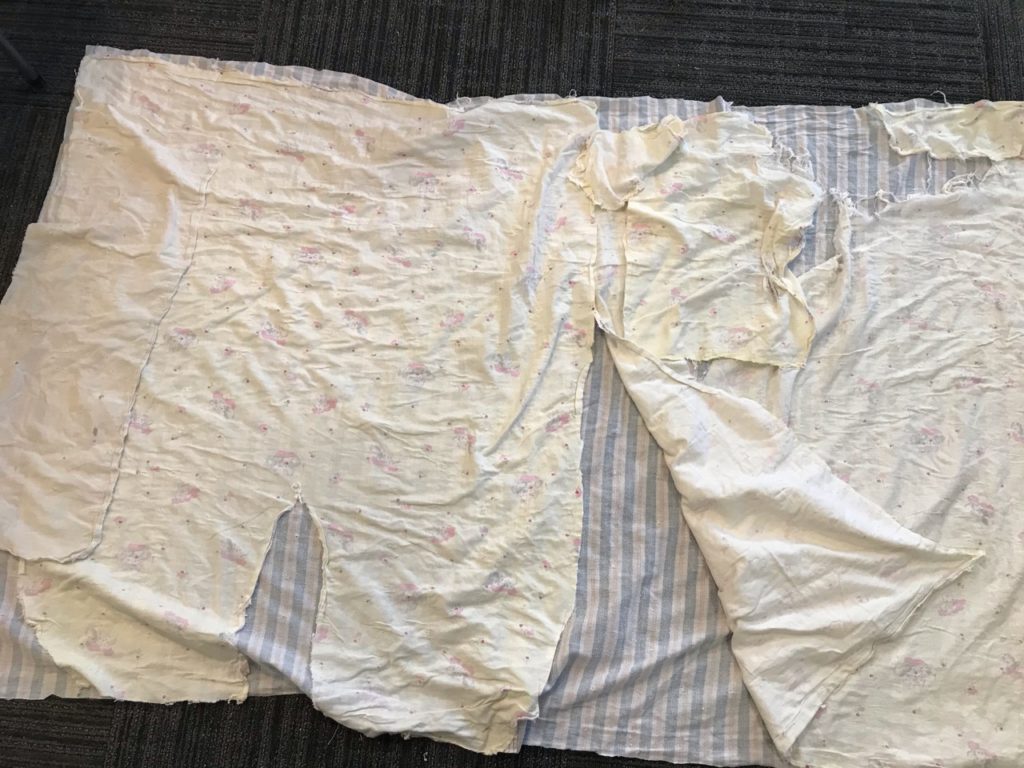
Beneath the little baby quilt top are these layers of what looks to have primarily been flannel with a baby print on it as well as some added pieces of muslin. The blue and pink striped fabric on the bottom of everything is the back of the original quilt. I’m so curious as to how this all came together.
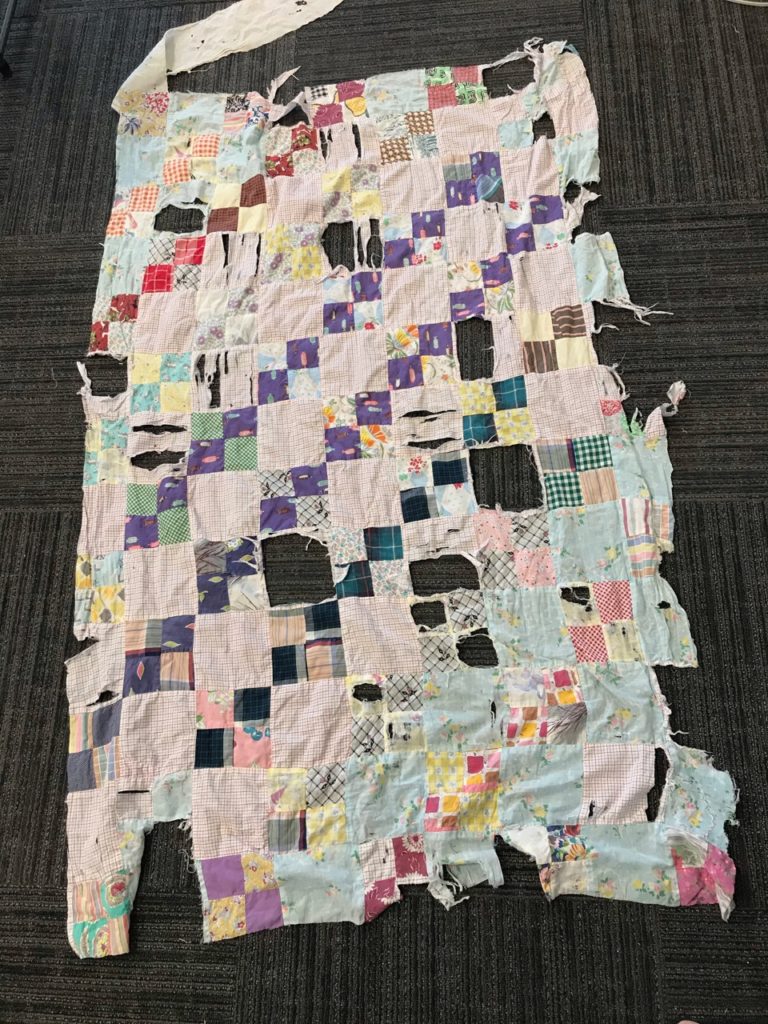
Then there is the original top. Several large holes and tears are present, and some places the fabric is missing altogether. Other places within the body of the top are sound enough to save and add together.
I’ll be selecting the best areas of this tattered old girl to save…most likely to add onto the body of the baby quilt that’s been revealed in the middle of this quilt. We always remark about walls having eyes as we wish we knew the history created within a home, but I think this quilt has quite a few stories to tell. Somehow, I think my scavenger hunt is far from over!
Now that everything is separated into its respective layers, I’ve got some choices to make as to how best to proceed. Through all this process, my goal is to preserve as much as possible to create a useable top which will become another quilt. It will take some time to determine what to do, but I’m up for the challenge. It’s a great test of my skill set, and I’m happy to bring to life something that was most likely destined for the garbage bin.
I know I have another “prize” to open with the other quilt lying beside me. And what is even better is that I have another one like these two, but from my family. These will be a trip down memory lane with lots to tell as the layers are uncovered. I’ll save those adventures for another day.
Wow! It seems like forever since I’ve been at my laptop and sharing my world with you, but it’s only been since Tuesday. Settle in for a cozy read and see what’s been happening around here.
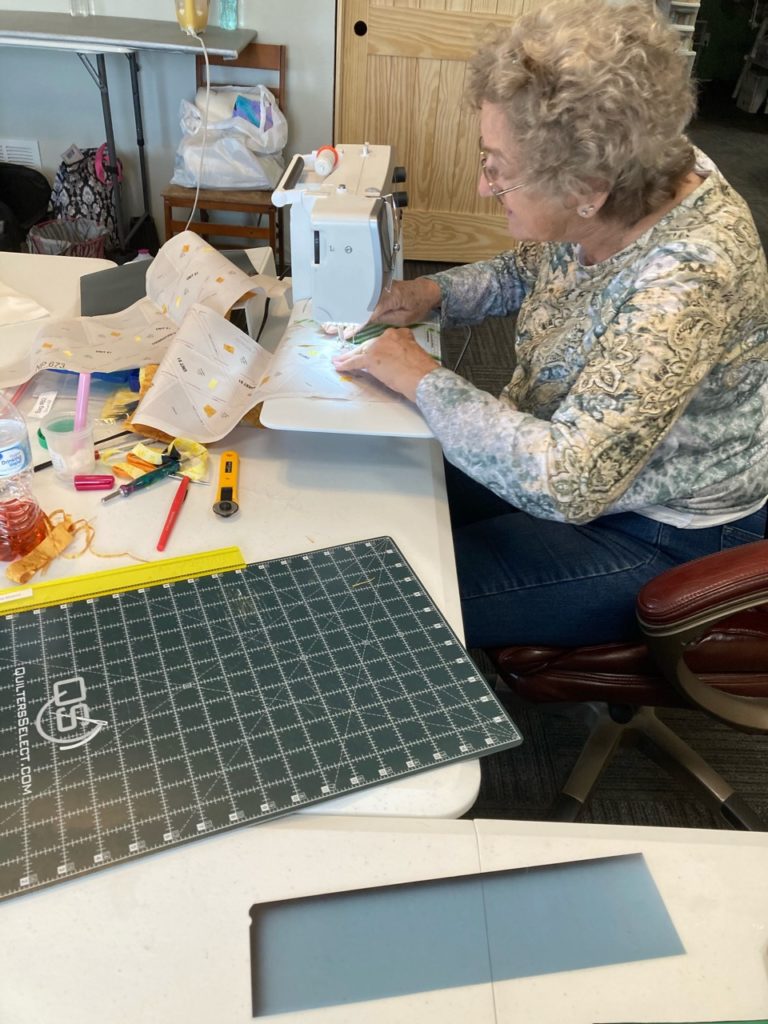
Wednesday was a great day because I got to spend the day with my good friend Susie. We hadn’t been able to spend a girls’ day of visiting and sewing since before Thanksgiving. It’s good for the soul when a little time is spent nurturing a friendship and motivating your creativity. We giggled and squealed and summed up our lives for each other. Susie worked on a great project, the Carpenter’s Star by Jennie Doan of Missouri Star Quilt Company. And I worked more on my Moda Bake Shop Ganache pattern.
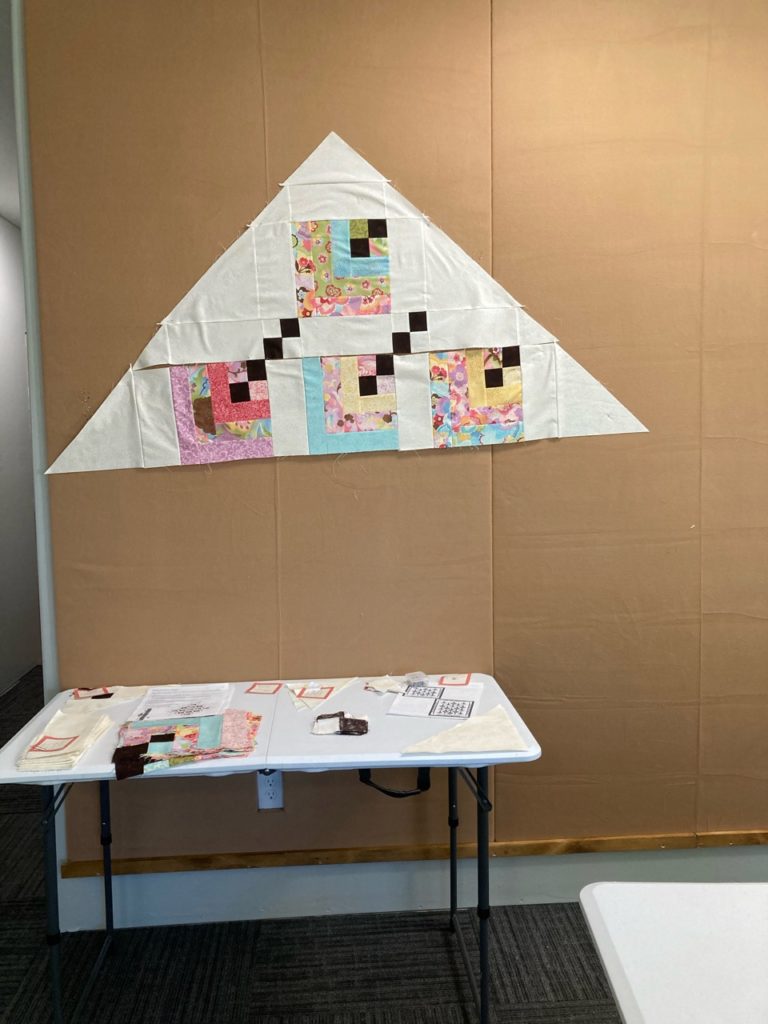
Here is Susie’s Carpenter Star. The blocks have been laid out and she’s putting the rows together. It’s looking marvelous!
We even had another good friend stop by for a little while. Maggie leads a quilting group at her church and I’ve helped her several times over the past 6 years that they’ve been active. As part of my certification process for Quiltworx, I’m encouraged to do some pro bono work and I love doing things for Maggie and her ladies to help them learn new techniques to incorporate into their mission of giving.
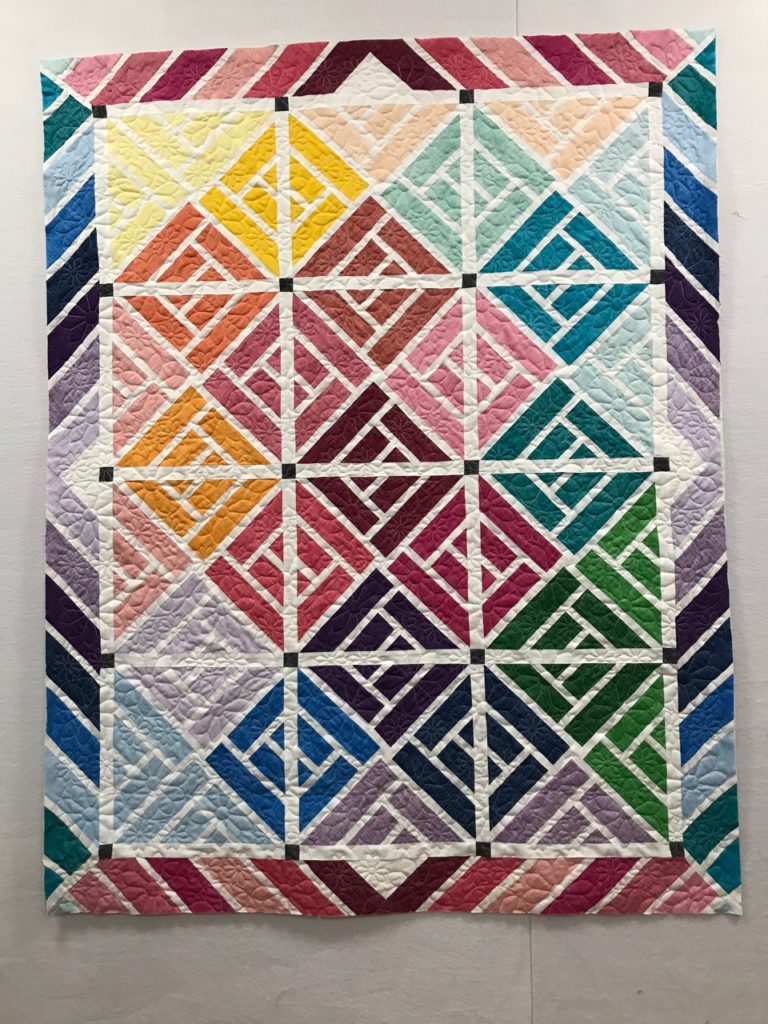
We’ll be meeting in March for a day class on Fractured Paint box. It’s a terrific introduction to Judy Niemeyer’s method of paper piecing…one I love teaching and seeing the light of accomplishment sparkle in the eyes of those giving this pattern a try.
This is my Fractured Paint Box quilt that I will use to teach Maggies’ group in March. I love this pattern! Jelly Roll friendly and the perfect size for a throw on the sofa to cuddle in during TV time.
It was a great day!
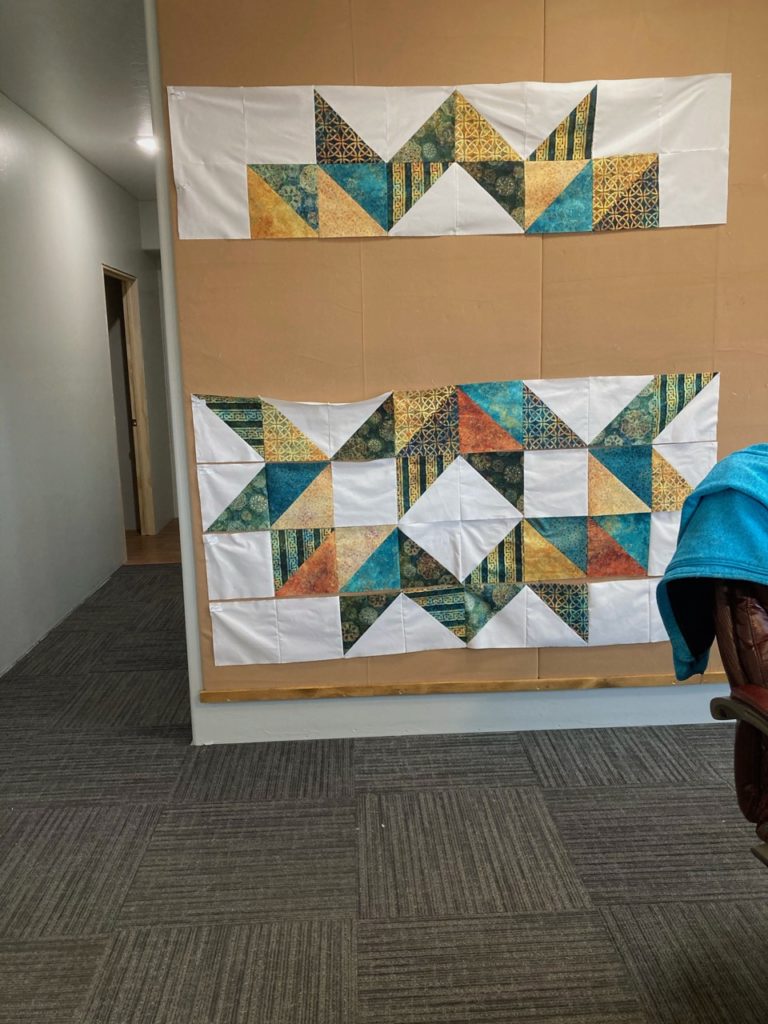
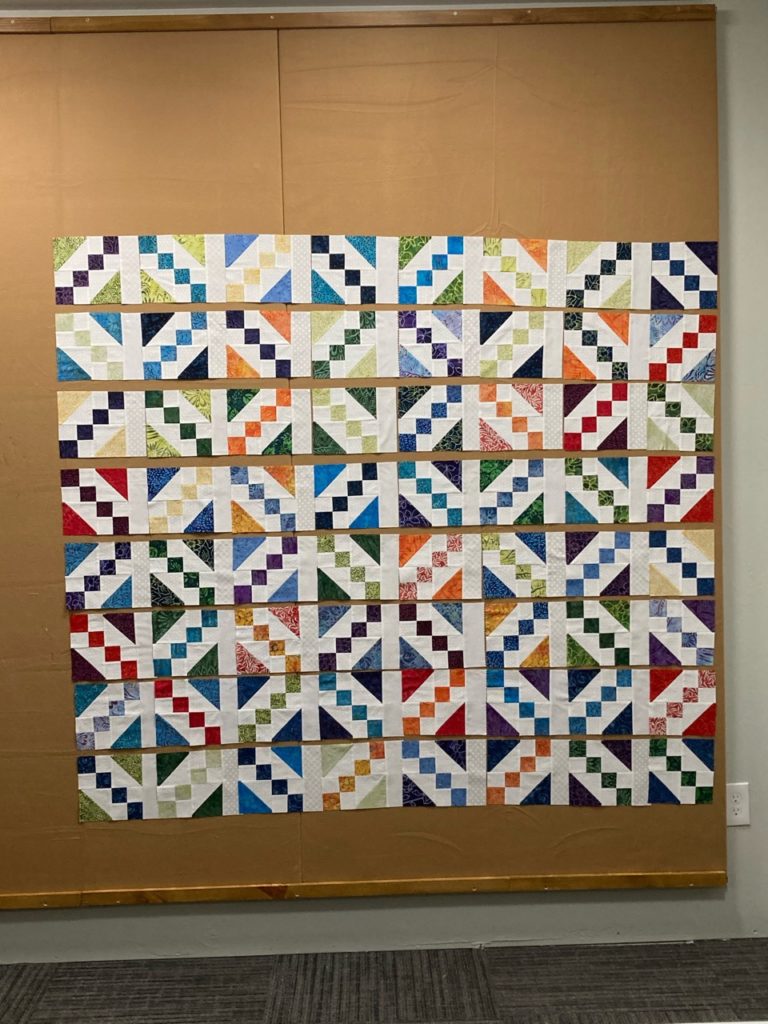
Mission UFO landed again on Thursday and we had another new table arrangement for 4! Cindy, Jean, Susie and I all spent the day working on our various projects. Susie again was at her Carpenter’s Star.
Cindy nearly finished up the body of her Hanging Garden, only two more rows to add. Then the borders!
Once those last two rows are attached, switching the layout to be square to the world will be so much easier to visualize. But it’s coming along nicely.
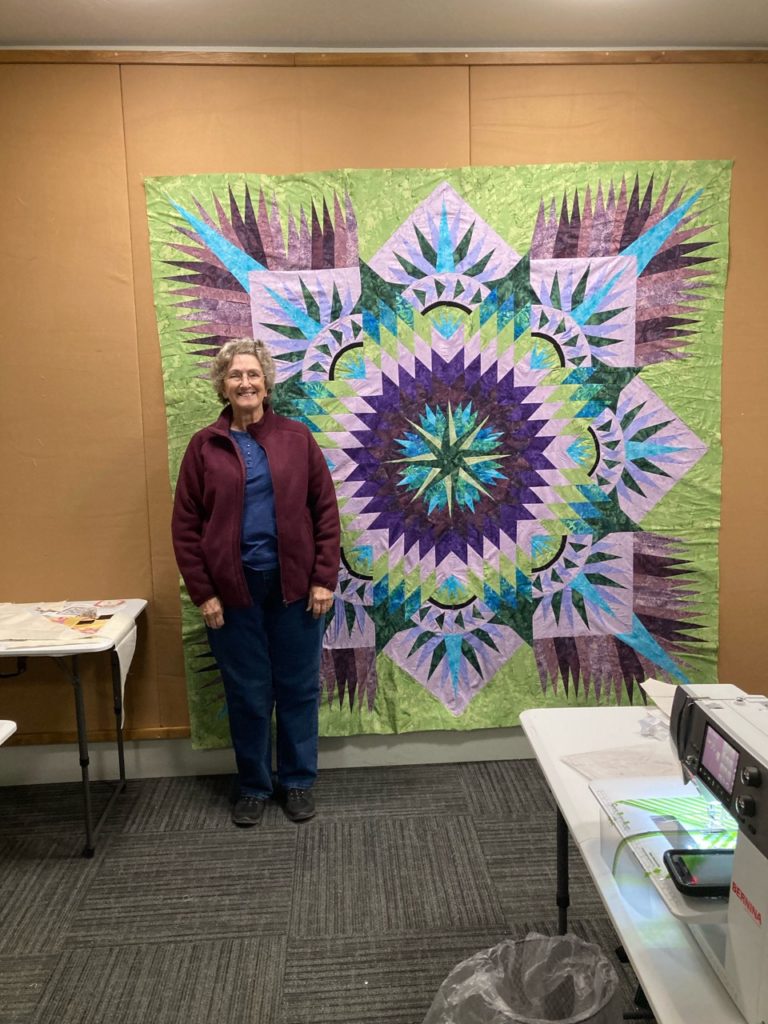
Jean was hard at work on her second Prairie Star in a blue and yellow colorway.
Jean’s working on the lone star diamond points that are in her Prairie Star. The blues and yellows to golds are stunning in this color way she’s selected.
And I was putting the rows together on my Ganache.
Here are the rows all connected. Next comes the horizontal sashing. It’s coming along too!
So much laughing, visiting, sewing and sharing happened on Thursday. It was a great way to spend the day while working towards our respective goals of finishing up projects on our UFO list.
Friday was good too! Kids coming home for the weekend means lots of activity, lots of fun and good food too. Our son Grant and his friend Tyler came home to help us move furniture. We missed out sweet daughter-in-law Maddie, who couldn’t come this trip, but we visited with her several times and kept her in the moment as best we could. Getting older isn’t for the faint of heart. And while Gary and I aren’t all that old, we just don’t move the way a 20-something can. Go figure!
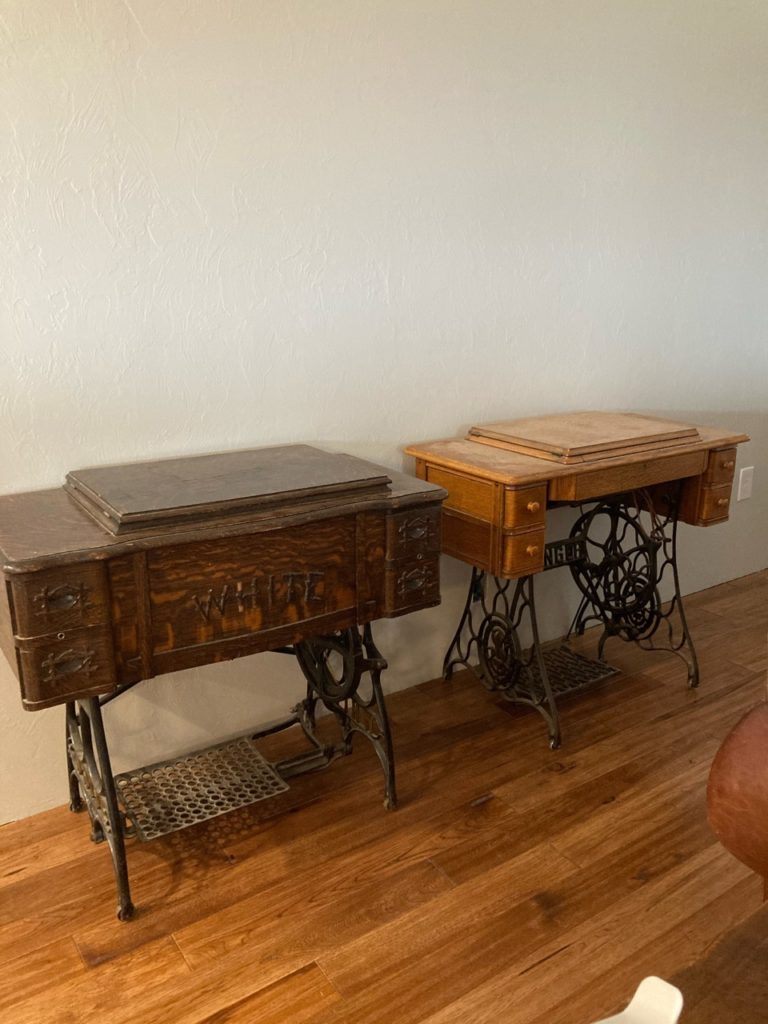
These ladies came home from the storage place, and it was so cute to see them side by side. After a little bit of sprucing up, they will each find their way to a special place to be admired and honored.
The darker cabinet on the left holds a beautiful White machine that I bought from a friend 20 years ago when her family was moving and didn’t have room to take this along with them. And the lovely on the right is a Singer Redeye that I bought from an estate sale a couple years back. She’s been in storage for quite a while before we brought her home so will need a bit of a spa treatment. But her decals are beautiful! Looking forward to seeing her in all her glory soon.
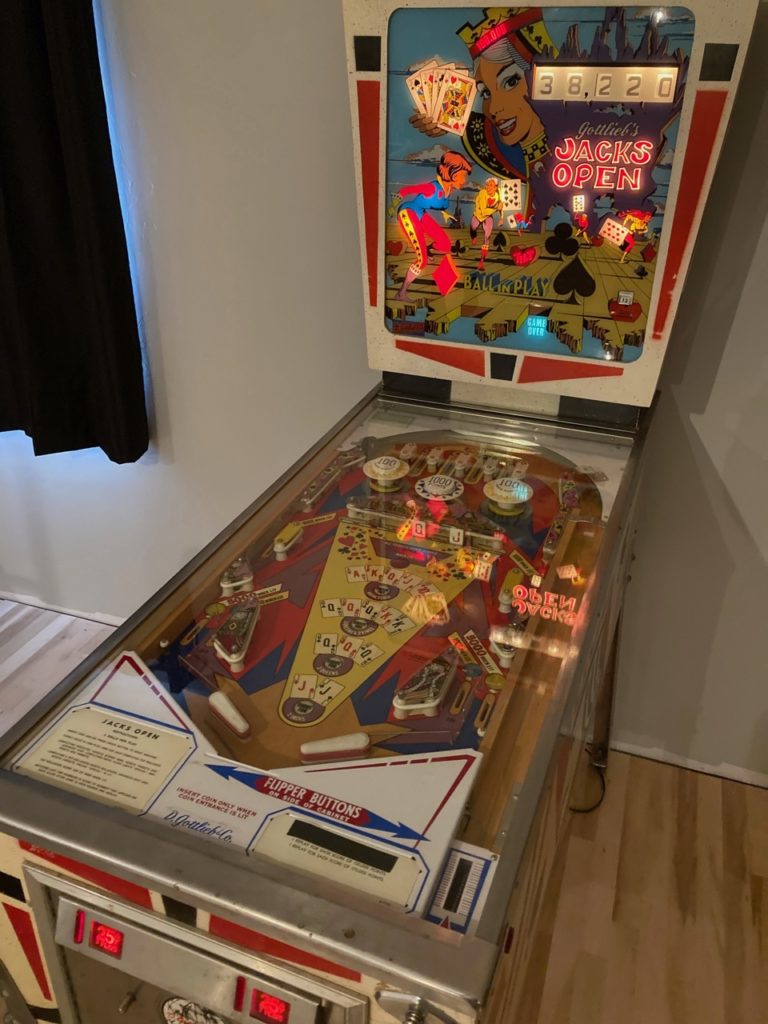
And this family heirloom made its way to the game room. It put a smile on my face to be sewing and hear the guys playing the pinball machine, laughing and carrying on for a few fun hours as the kids tried to best the dad whose skills were a little dusty but still spot on to win several matches.
Gary’s dad bought this pinball machine when he was high school. They spent many, many hours playing on this machine. It’s a wonderful thing to share this same kind of fun with our kids.
Saturday was more of the same. But Sunday was a day we enjoyed together just keeping company and swapping stories.
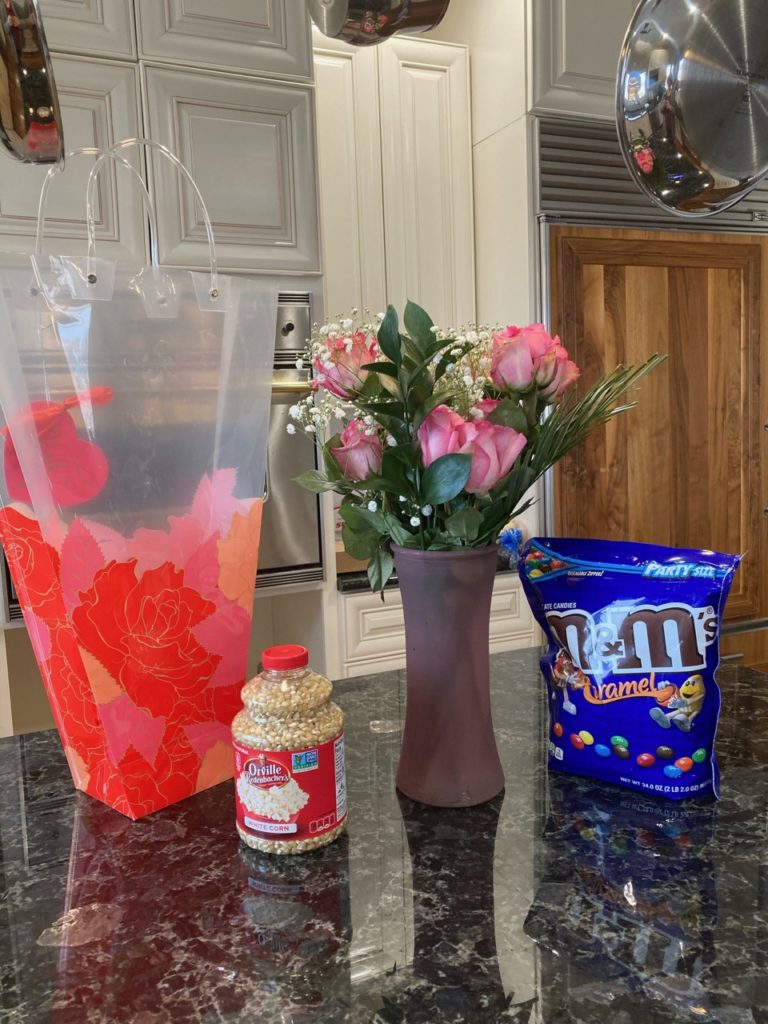
And my Sweetheart of nearly 35 years surprised me with these! Flowers for my heart, and fixings for a movie night…popcorn for me, and M & M’s for Gary.
The first flowers for me in our new home. They are so pretty, and who can go wrong with popcorn! It’s better than chocolate to me, lol!
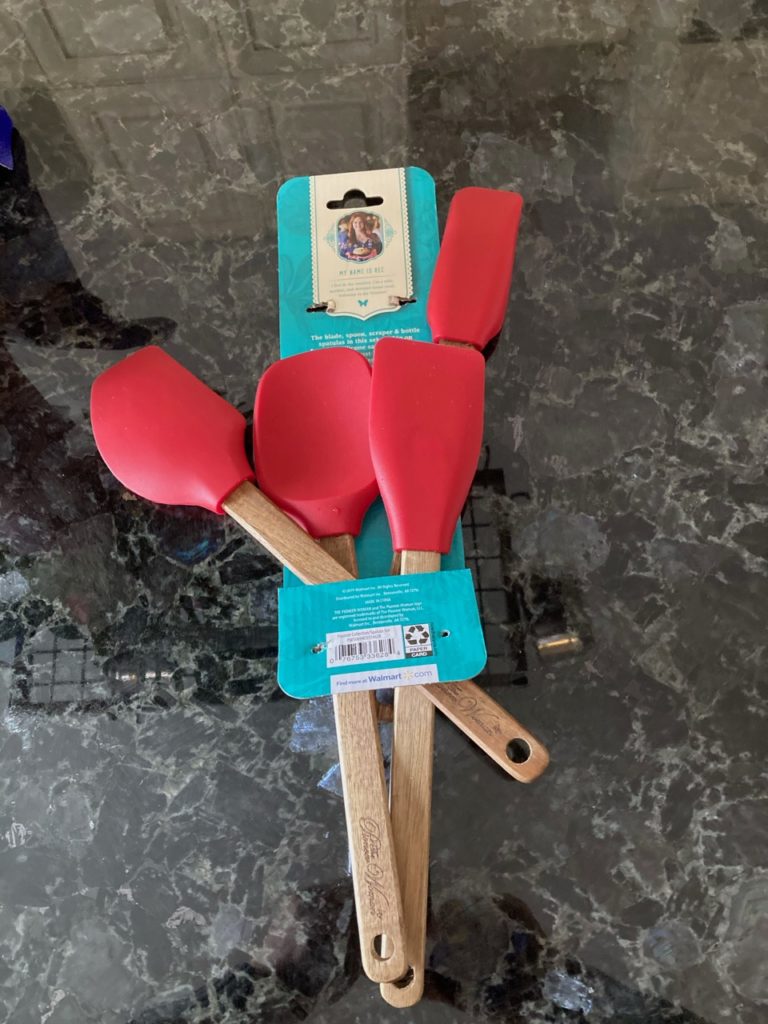
And the sure way to a girl’s heart, after flowers of course is a new set of kitchen spatulas! ! They are! I had snapped the handle of my favorite spatula while whipping of something on Saturday, and these lovelies came home with my flowers. And presented much the same way. Like a bouquet of flowers, lol. He’s such a keeper…looking forward to the next 35 years too!
I’ve been admiring many of the Pioneer Woman’s kitchen gadgets for a while now. So when these came home to live in my kitchen to replace the sadly broken spatula, I just clapped my hands and smiled happily to use them to cook our next meal.
Today, Monday, was a bit melancholy as we said goodbye to the guys when they headed back home, and we began the task of settling back into regular life. Lots of laundry to catch up on as I clean and stow blankets and sheets used to wrap furniture; a blog to catch up on; a quilt to load on the long arm; figuring out the placement of the furniture brought in; and perhaps a nap…maybe a couple games of pinball too.
Would you believe me if I told you that I’m really enjoying my Tuesdays these days? Well actually my Tuesdays AND my Thursdays which are now dedicated to Mission UFO.
While the weather outside was looking blustery and full of snow over Grand Mesa to our north, we were warm and toasty in the classroom being industrious and having a great time visiting and sharing stories with each other.
Cindy is making lots of progress on her Hanging Garden project. Take a look at how far she got today.
I love how this is going together. It’s built on-point, so tilting your head slightly will give you a better view of what it will look like when finished. Just a little more for the body before the borders go on. Such a great pattern!
Her boarders are already made, and her goal on Thursday is to finish up the body and then get the borders put on. I think I’m looking forward to her finish as much as she is.
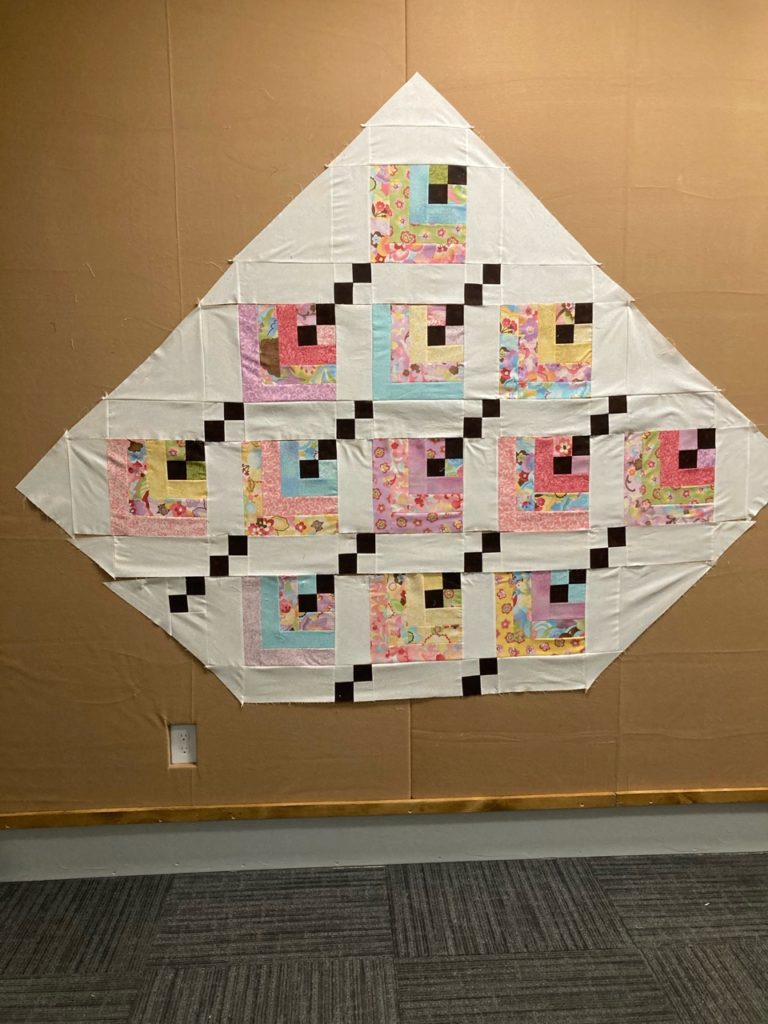
I was able to get the blocks on my Ganache set with side sashing. Now, I just need to add the horizontal sashing and put the rows together.
Here it is…growing wider all the time. Adding the horizontal sashing will increase the body to be a much better shape to fit on a bed, lol. I struggled a bit in trying to put the smaller components together in a scrappy way until I tried a sample block that all matched. THAT was way harder to do, which surprised me a lot! Back to a scrappy layout and it just got easier from there.
Out of the same project box (…my Moda Bakeshop box), I pulled out a set of blocks that I’ve had waiting to be set for several months. This quilt is called “Sherbet” and is made from the Bakeshop Recipe Card #1. It’s another quick and great looking quilt made from a layer cake plus some additional background fabric.
I can honestly say that I don’t remember a thing about buying the layer caked being used here. I like the fabrics well enough. Actually, I like them a lot better in this quilt than I did as a layer cake. My preferred palette is much brighter than the colors here. But it’s growing on me and I’m glad that I’ve worked with this color way. It’s stretching me as a quilter…and that’s always a good thing.
And over the weekend, the yummy plaid fleece that I showed in a previous blog became a cozy quilt. As soon as it makes it to its new home, I can show you pictures of the front, but for now…a peek at the back is all I can share.
It’s a happy day when the quilting motif looks so good on the back of a quilt. It’s curvy without being too feminine, and a quick moving e2e pattern that allows a nice drape to the over all quilt.
Tomorrow, I have another friend coming to spend the day and we plan to sew and visit to our hearts content. We haven’t been able to have a sew day for a couple months now. So, I’m really looking forward to our time together. I hope to have some great pictures for you too!
Have you had a chance to sew with a friend lately? I mean, in person and not through a virtual platform? Even in our current life where so many of us are taking extra precautions, and self-isolating, I think it’s an important thing to still try and get together with others. Don’t get me wrong, each of our personal situations require us to do the things we are compelled to do, but the shortest story to the long diatribe is that we are social creatures. Everyone needs personal contact to thrive — and we are suffering in ways many of us cannot see right now because we are just trying to make it through all this “stuff”. But for others, they feel it more acutely.
I suppose that as I write this, my readers could easily ask about what I do and the why that goes behind having classes and meeting with a friend or two. The honest truth about the classes is that I’m trying to get my business back on track…classes and retreats followed closely by long arm business are my focal points. But meeting with a friend is purely because I need to be in contact with that person.
I would love to say to everyone, just meet with one friend, and catch up with them. Meet outside or wherever you can to respect each other’s personal decision about dealing with “stuff”, but reach out. Our isolation can be such a hard decision to bear, and the simple act of seeing a face you care about…a whole face, is like food for the soul.
Somehow, somewhere, sometime…we have to reach out and re-connect. I think those days are going to become easier to accomplish. I hope we all can find a way to reconnect and regain so much of what we’ve lost by being absent from our regular lives.
I wish everyone a better day today than what we had yesterday.
Not only has Mission UFO launched…it has landed with a beautiful finish!
Last week Mission UFO was begun. We meet on Tuesdays and Thursdays at my home classroom/studio and anyone can come. The exciting thing is that in just a few together we are seeing some excellent finishes being made. For more information, contact me for details and you too can join in the fun!
Jean and her Prairie Star. What a great moment! Some happy tears were shed for this lovely success.
Jean has been working on this project for a couple of years, and it is a wonderful finish for her. I’ve been with her every step of the way and must say, it’s been a fun adventure. She has already made nice progress on a second quilt of this same pattern in a different color way. We’re both excited to see how her next one comes together.
Mission UFO at its finest! It’s such a rewarding experience when projects that have been put aside are brought out to reach their conclusion. The sense of accomplishment is such a nice reward.
Here is Cindy’s progress on her Hanging Gardens project. She’s completed all her blocks and is now laying them out row by row and sewing them together. This a trickier build since it’s constructed on point. She’s doing a terrific job and it won’t be long before the top is completed.
I’m so excited for both ladies!
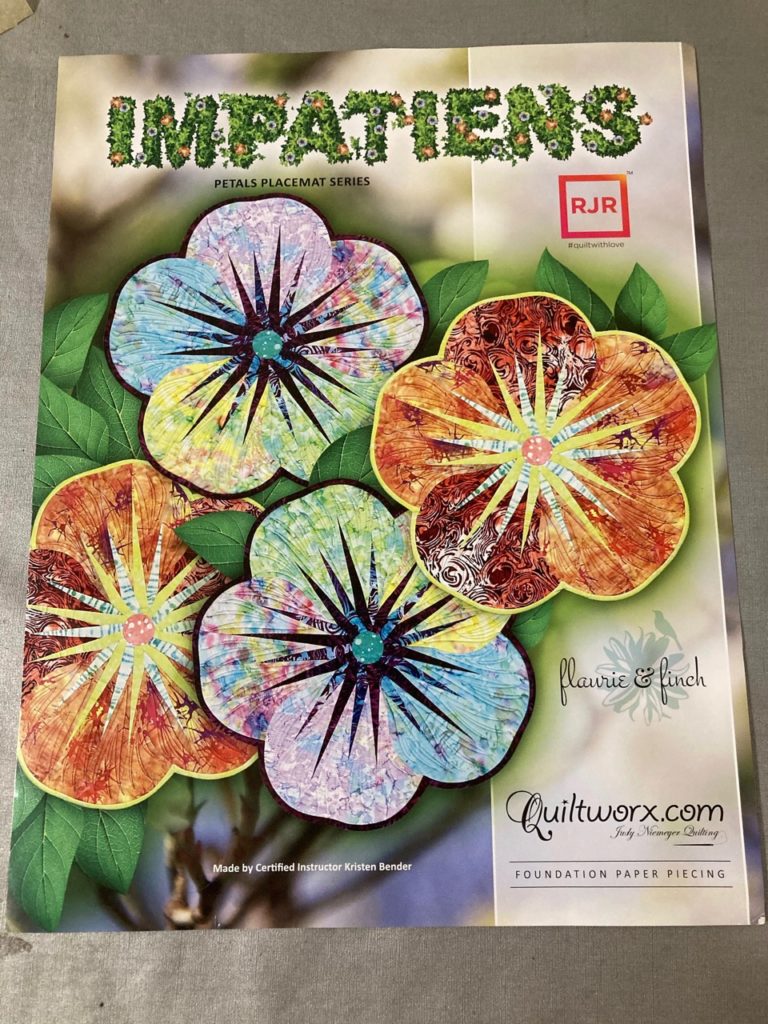
Here is the cover photo of the Impatiens pattern.
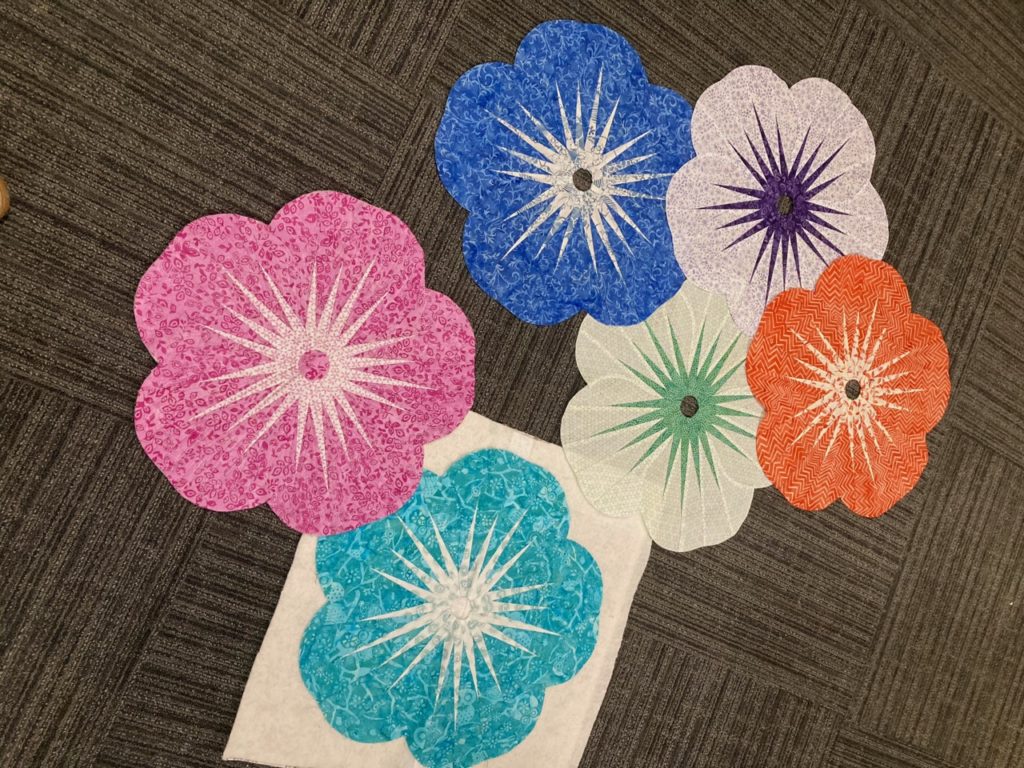
For me, one of the piecing finishes I’ve marked off my UFO list is the Impatiens placemats by Quiltworx. This is such a sweet pattern, and the color ways you can use are endless! This five-petal flower can be made with just lights and darks of the same color as I’ve done with mine shown below. They can be made with a different color in each petal with centers all the same. You can even mix up the colors within the petals to be two of one color and three petals of another then group them to resemble a pansy, which is one of my favorite flowers. The combinations are endless. And they make fabulous gifts.
Here are my lovely flowers. The pink one is waiting for her binding, and the little teal lady is prepped to quilt. The other four will follow their friends shortly.
The Impatiens pattern comes with enough sewing papers to make a set of 4 placemats. To make larger sets of placemats, you simply need to buy more sewing papers. Additional sets of papers are called “Replacement Papers” and come with everything you need to make more items…minus the instructions. No need to buy another set of instructions when you have them included in the first pattern you buy. I think that is a brilliant thing to do, and I always encourage my students to think of this option when they are considering making multiples of the same pattern.
I’ve had some quilters express concerns about the curved seams required in this project. To which I tell them Judy has designed these little gems to go together as easily as a hot knife goes through butter…it truly is amazingly simple. To have a student master this curved seam in one try is a huge reason that I am committed to this company and the way these patterns are designed and written. Truly the best in the industry, in MY humble opinion.
Quilting is always a consideration on every project and this is one that can be done easily on your own machine at home. Quiltworx includes a template for quilting these in each pattern packet. It is a suggestion and certainly not required at all, but it’s a great place to start if you want to try your hand at doing it yourself.
There are many different means to attain the same goal, so let me tell you about different options.
One method is to layer several sheets of newsprint type paper under the quilting template. Then, take the tread out of your needle and sew on the quilting lines, resulting in needle punched dotted lines on all the layers beneath the pattern. You can use a pouncing chalk to dust those lines onto each petal or use each paper as a single sewing template. A white chalk on dark fabric is not bad, but then there are the lighter colored petals. I choose not to use a colored chalk on lighter fabrics because it can be problematic when trying to remove the colored chalk.
You could also sew over the punched lines. That isn’t as easy for me to see where I’m going as I sew. These are both good options…just not for me. I need a solid line.
Since there is only one template for quilting but 20 petals to quilt, (5 petals x 4 placemats), I need to either mark each petal separately or make 20 copies of the template. The template is larger than what will fit on my home copy machine, so I’ll need to go another route.
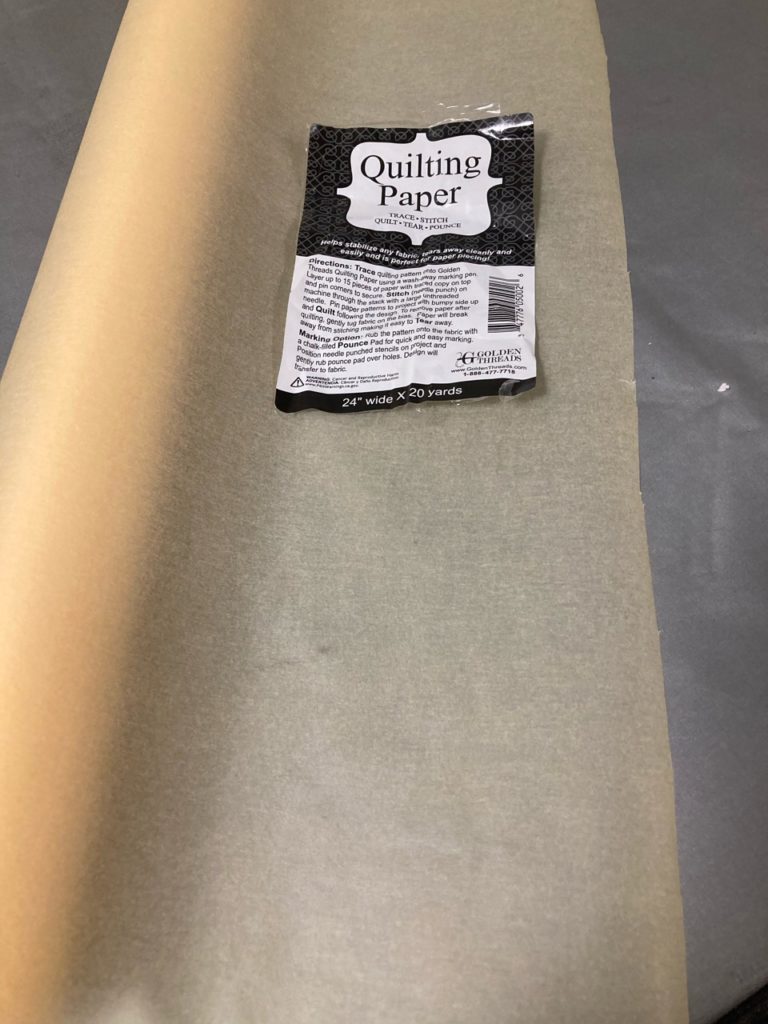
Ta-da! Enter Golden Threads Quilting Paper. Now, I must give credit where it is due, and my student Cheryl is the one who told me about this product and the method she used. I had Clubb’s order me a roll of this paper, and set out to give it a try.
I have, and frequently use the newsprint paper made for the copy machine. It’s a great product. But for this application, I need to be able to see the exact placement of the paper for where I need to quilt. You can easily see through this paper to know where your quilting will be. It’s a thin yet sturdy tissue that does not shred when painters tape is applied to keep it in place. You can use regular tissue paper to do this, just know that it is greatly fragile and any writing utensil you use can, and does pierce the tissue. Also…ink from pens and felt markers penetrate regular tissue. But NOT so with this Quilting Paper. Definitely worth the price, and it’s not that expensive at that.
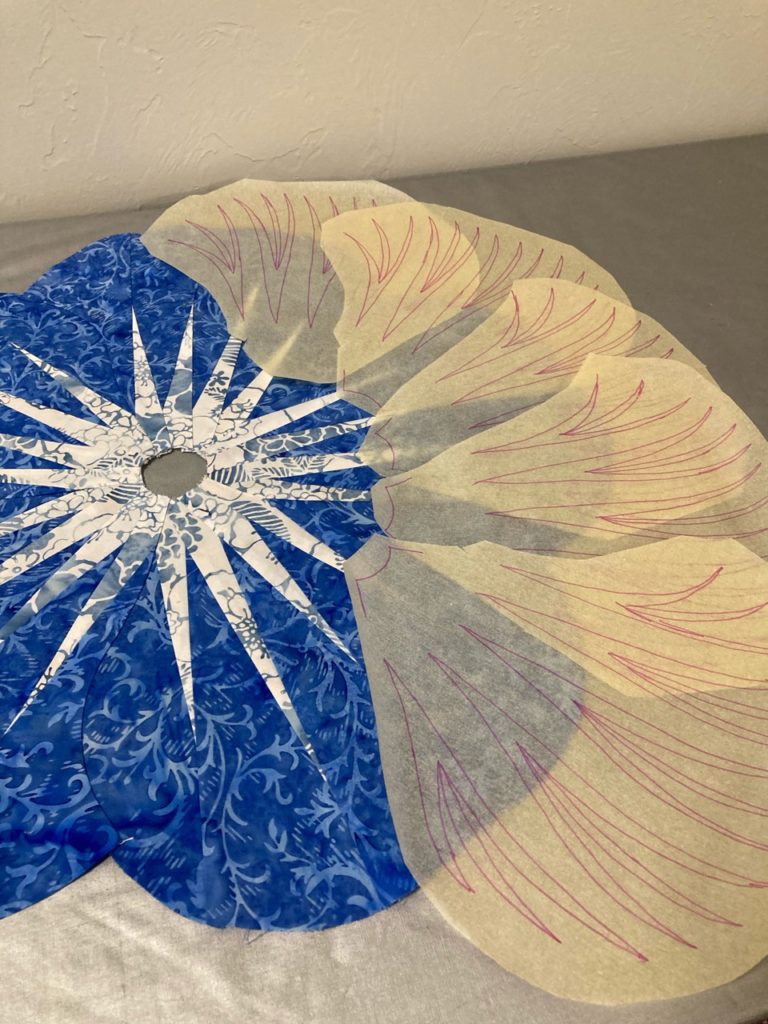
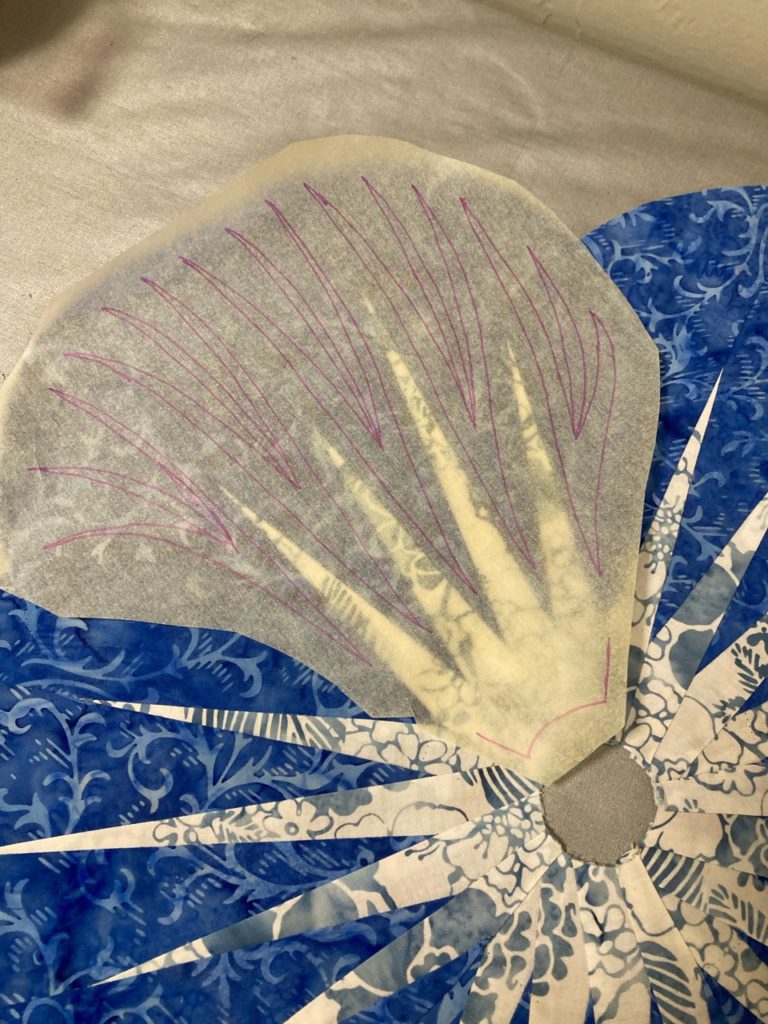
Using the blue flower as an example, I’ve got the 5 templates ready for quilting. Just need to make the “quilt sandwich” for it. Here is the quilting paper laid over the first petal. You can easily see the fabric under the tissue.
I used the bottom curve as a rough registration mark to know how to place each template. This paper also makes it easy to see where the quilting lines will fall so that I won’t put the curved stitching inside the center spikes where I plan to add straight line stitching after the curves are put in and paper removed. This is going to be fun!!
Easy Peasy! Can’t wait to show you all the finished placemats.
It’s a blustery day outside, and Whinnie the Pooh would simply say,” Oh bother”.
Then he and Piglet would go find Eeyore to make sure his little home was still in one place since “It’s a mobile home”. (Said in the very best Eeyore voice.) Then, the whole troupe would gather for a bit of honey and the day would be perfect.
Blustery days are perfect days to tuck inside and do what I love to do. There is a beauty on my long arm and in-between passes as it quilts away to my heart’s content, I’ve got a few other things to putter at. Piecing is one of them. When I mix up the tasks like this, any piecing I work on must be easy to stop and then pick up again without worry of a mishap.
While I can’t show you the top that’s being quilted right now, I can show you this. Just in case anyone else might have need to see how this can be done.
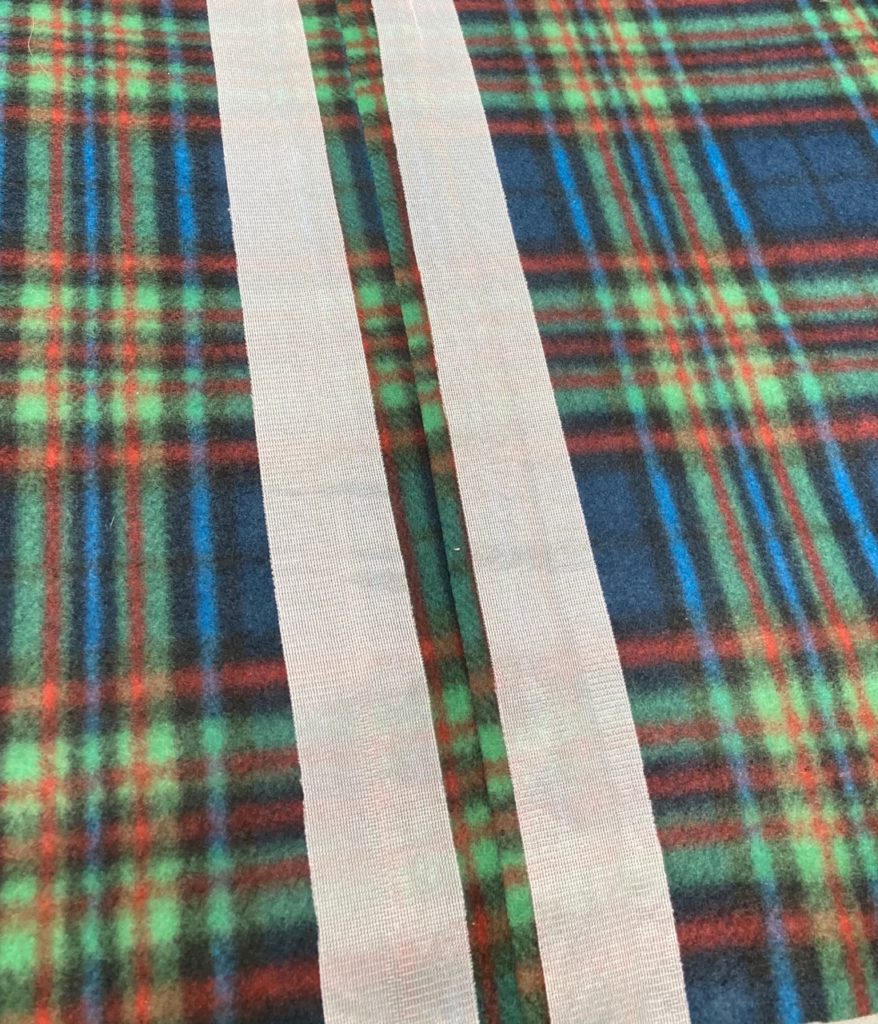
This is the backing for the project at hand. It is fleece, which makes a super cuddly quilt backing, but it needs to be larger. So, piecing is required. Fleece and other bulky fabrics used for backings need a bit more prep and attention before they get loaded onto the frame.
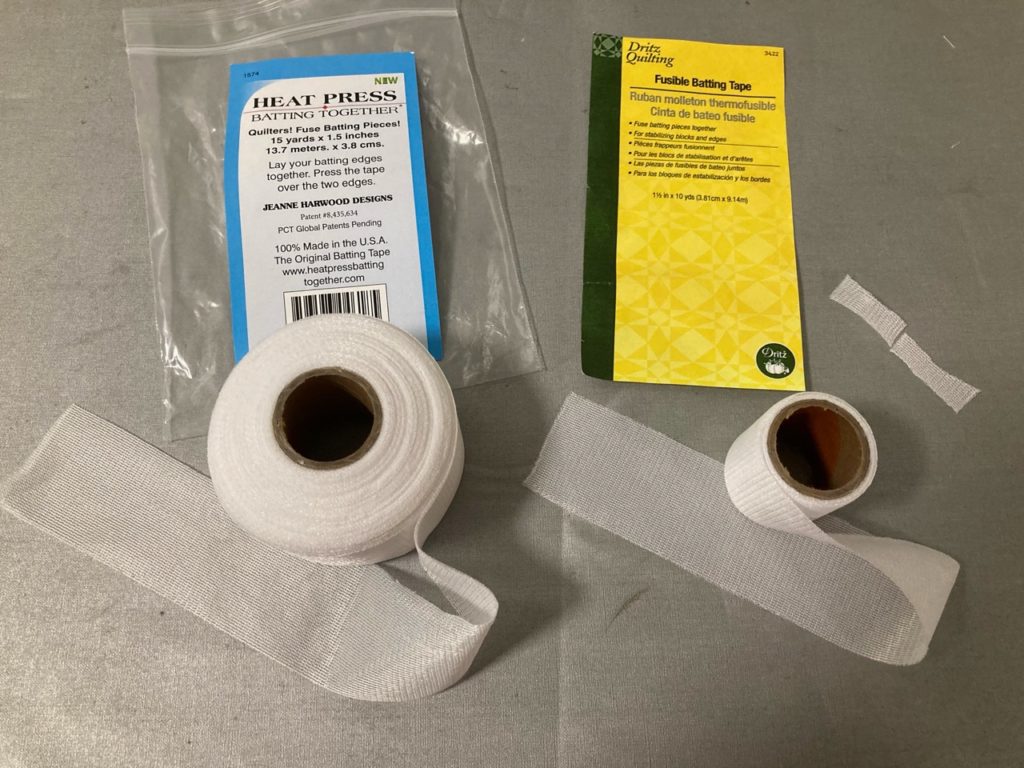
This is what I used as the treatment for the seam on this fleece. I’ve sewn a larger seam allowance than normal…about 1”. Ironed it open. Then to keep the seam allowance flat and manageable, and to avoid any errant folds from happening during the loading and quilting process, I used this lovely product. Fusible batting tape is a fantastic product. These are two different brands…Dritz and Jeanne Harwood Designs. The Dritz is slightly thinner, but that doesn’t matter to me at all. They are interchangeable to me. And I use this product for many, many purposes, not just piecing together a batting. It’s priceless for repairs as well!
The tape is soft, supple, matches the drape of the fabric and you can’t feel it between the layers of the quilt. It’s an incredibly easy way to manage the seam.
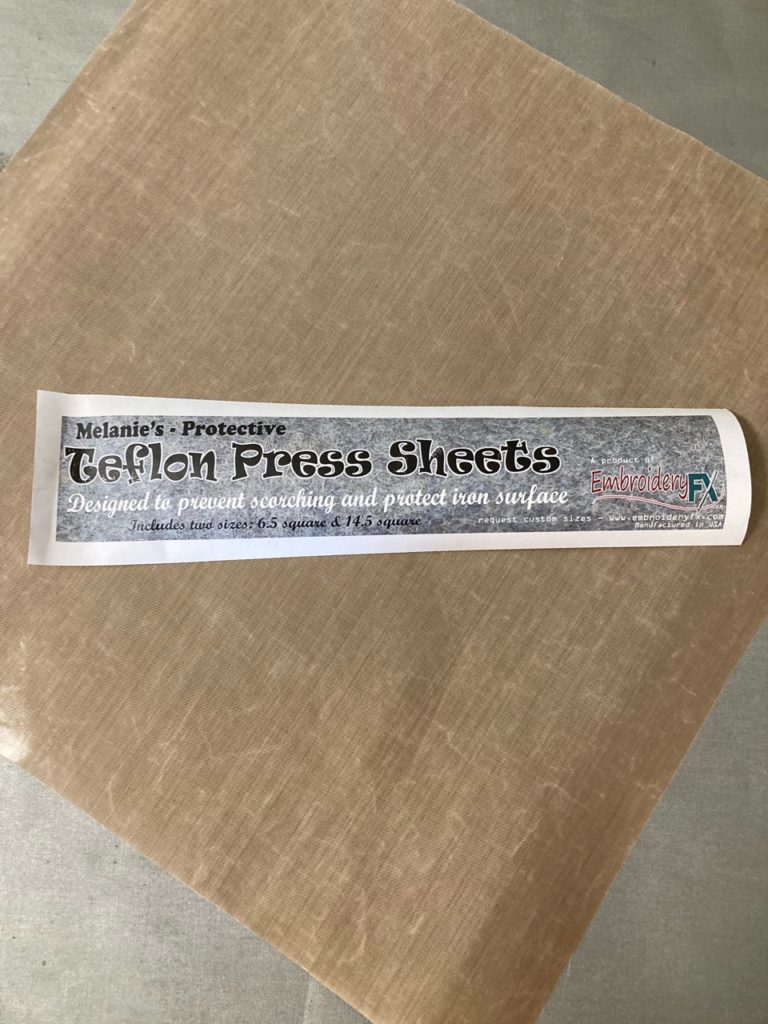
The only other tip I can give about this method would be the heat of the iron. You want to be mindful of the heat of your iron when doing this. You can always test this on a scrap of fleece before you start. You want to make sure the iron is sufficiently hot to make the fusible tape stick where you want it to, while at the same time not leaving press marks on the fleece, or heaven forbid…melt it to the iron causing holes, etc., etc. etc. I don’t test anymore; I just use something to protect all my surfaces. (Ask me how I learned all about this! ;-)) My favorite tool for this is a Teflon Pressing Sheet that I bought years ago when my Brother embroidery machine came to live at my house. There are lots on the market and you simply need to google to find one. Other things that can work just as well and are found in most homes are parchment paper, muslin pressing cloth and even clean brown paper. (Bet you can’t guess how I learned about being careful there is no dirt or ink on the brown paper, lol.) Be creative with what you have access to!
One more piece of advice from a long arm quilter is about backings. Pieced backings are frequently used for a quilt. When using a regular cotton or batik, the bulk of the seam is not a problem…as long as the seam is prepared for a horizontal loading on the long arm. A pieced border that runs in a vertical line to the long arm can cause more of an issue. A vertical seam will cause an increasing amount of bulk in one localized area as the quilt is advanced during the long arm process. That bulk creates an increasing and significant bulge in the layers which leads to puckers, tucks and wrinkles which can then be quilted into the body and the back of the quilt. Many times, unnoticed until the quilting is completed and off the long arm. However, if the seam is horizontal, (running from side to side), that same bulk is sewn over and then advanced across the bars holding the quilt, all at the same time, and only once. Everything is equal with the same amount of bulk increase all together from side to side with no issues.
Today, the project that is under my needle as the long arms hums away is this!
I love how this Ganache is coming together! 5 rows here, with 3 more to add.
It’s the Moda Bakeshop, Recipe # 5 called Ganache that I first mentioned in my post from January 25th. If you haven’t had a chance to read this one, you can scroll back to when it first posted and learn all about these quick and easy patterns.
I’ve been making daily progress in between different things. All the units are laid out and I’m sewing them together as blocks, then attaching the side sashing. When all this is done, I’ll do my last rearranging of blocks to make sure everything is the way I want it. After that, the rows are sewn together, with the horizontal sashing added. It’s coming together quite nicely.
Those are the highlights for today, friends. Hope your midweek finds you well and inspired!!
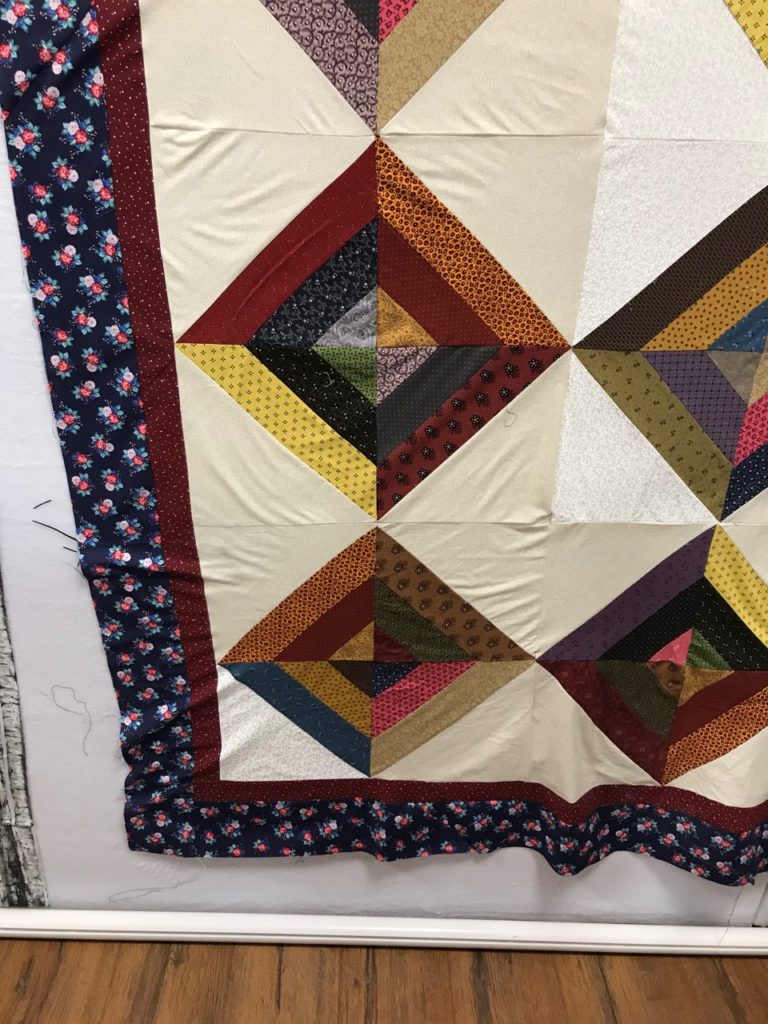
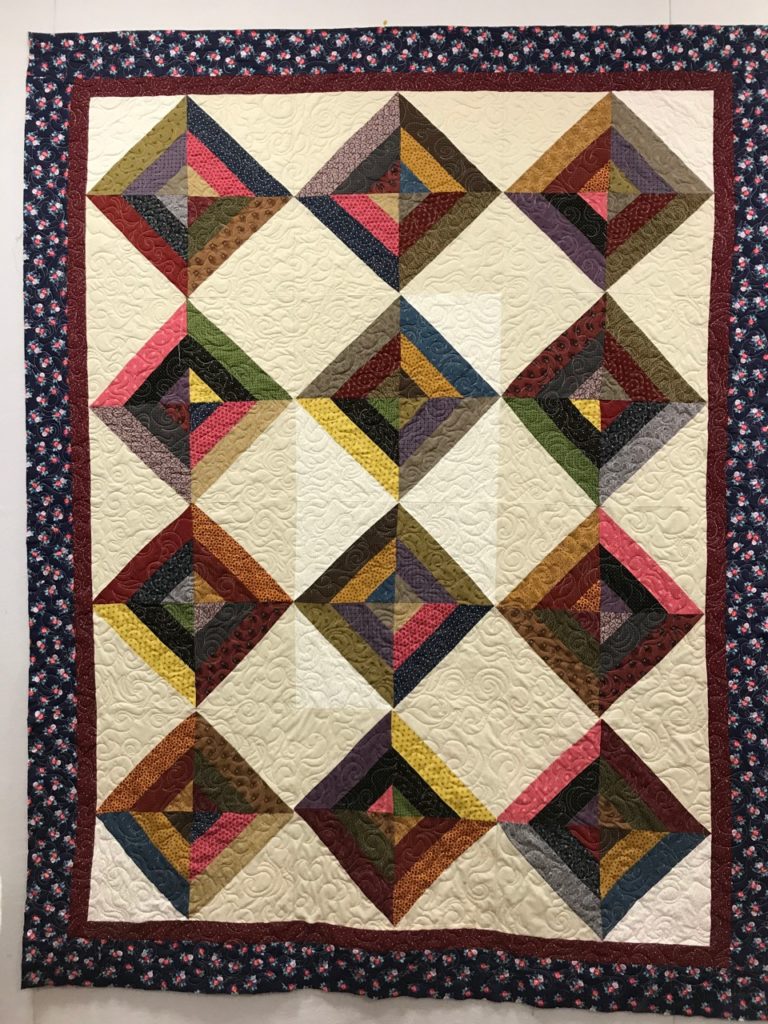
You wouldn’t believe it from the picture here, but this is a quilt from hell, aka The Demon Quilt.
Now that I’ve got your attention, let me begin by giving acknowledgement and thanks to the creator of our topic of blogging discussion. I have been given permission by the owner of the quilt to use this project as a teaching tool to demonstrate techniques used to correct and mitigate some of the effects of assembly.
Normally, I do not show pictures of my customer’s quilts, mention them, or bring attention to them out of respect for their privacy. There are exceptions to everything, and this quilt is one worth excepting.
My goal for this blog post is to point out problem areas in which all quilters find themselves, and then discuss what can be done to correct issues that occur.
Background information starts with the following facts: This was purchased as a kit. Kits are not inherently bad, but they can lead to problems unforeseen until you’re in the middle of a project. Cutting errors in the kit led to the need to re-cut fabric that was supplied, and missing fabric required the purchase and sub-cutting of additional fabric.
These are just a few of the issues that can occur. Other hiccups occur when pattern instructions are poorly or incorrectly written, missing assembly steps and even heavy reliance on pictures occur without written detail.
The main thing to remember is this…not all mishaps are the piecers fault
The next most important thing to remember is key to both finishing the project being pleased with its outcome…. The key—ALL things can be fixed.
Let’s get started!
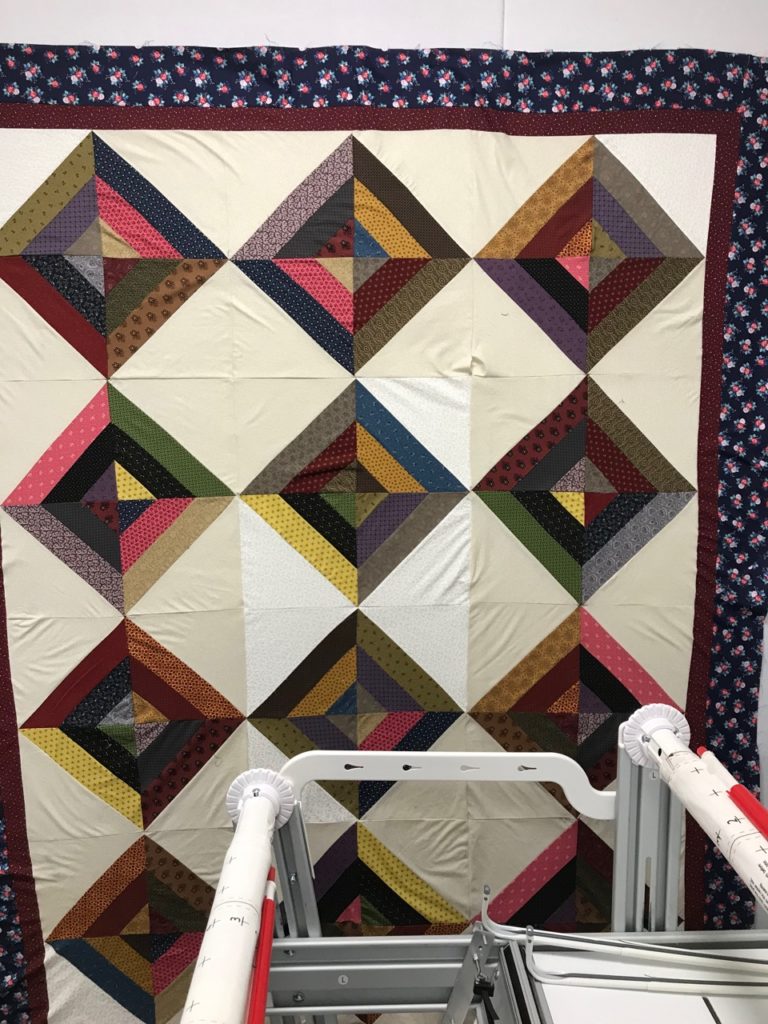
Take another look at the finished project. Its outer border has a bit of a wave to it, but nothing compared to its beginning. And the next two pictures will show some of the other problem areas that were greatly calmed.
Just a bit of a wave along the bottom border. Not bad at all.You can see a number of areas that need attention…excess fabric in the blocks and lots of extra in the border.You can see a number of areas in this picture…please excuse the long arm frame in the picture.
So now let’s get into the meat of the issue…How do you begin to correct the problem areas?
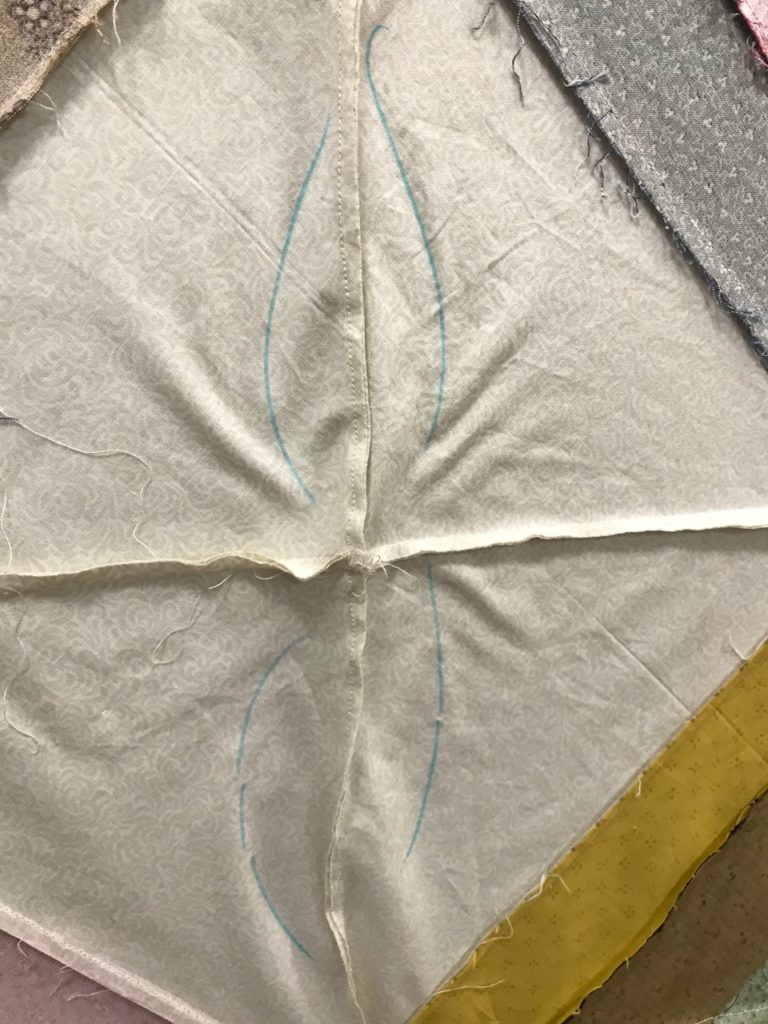
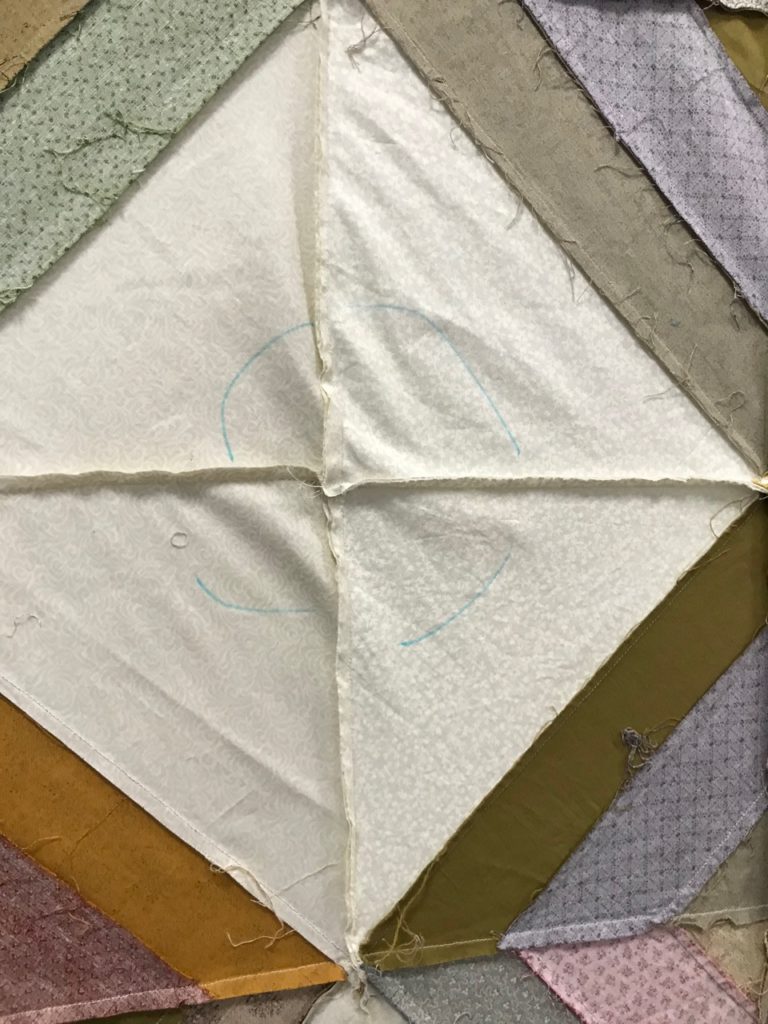
Long story short…turn the top over and examine the back. Then, get out a water-soluble pen and start marking. This must be done first to understand the order of correction. Every person has their own “shorthand”, so mark things per what makes sense to you.
The key to looking at the back of the quilt is that you can immediately see the seam allowances and begin to work through the problems areas.While the horizontal seam looks good, the vertical areas on either side of that seam need to be taken in a bit. This area shows a bit of excess around the intersection corners. You start along one seam then move on to its counterpart to bring it all flat.Here you can see the vertical seam needs to be taken in, and the seam along the border edge needs attention between the two straight lines.This notation shows the direction the adjustment needs to be made and the specific area of concern.This picture shows the area and amount of fabric to be adjusted.
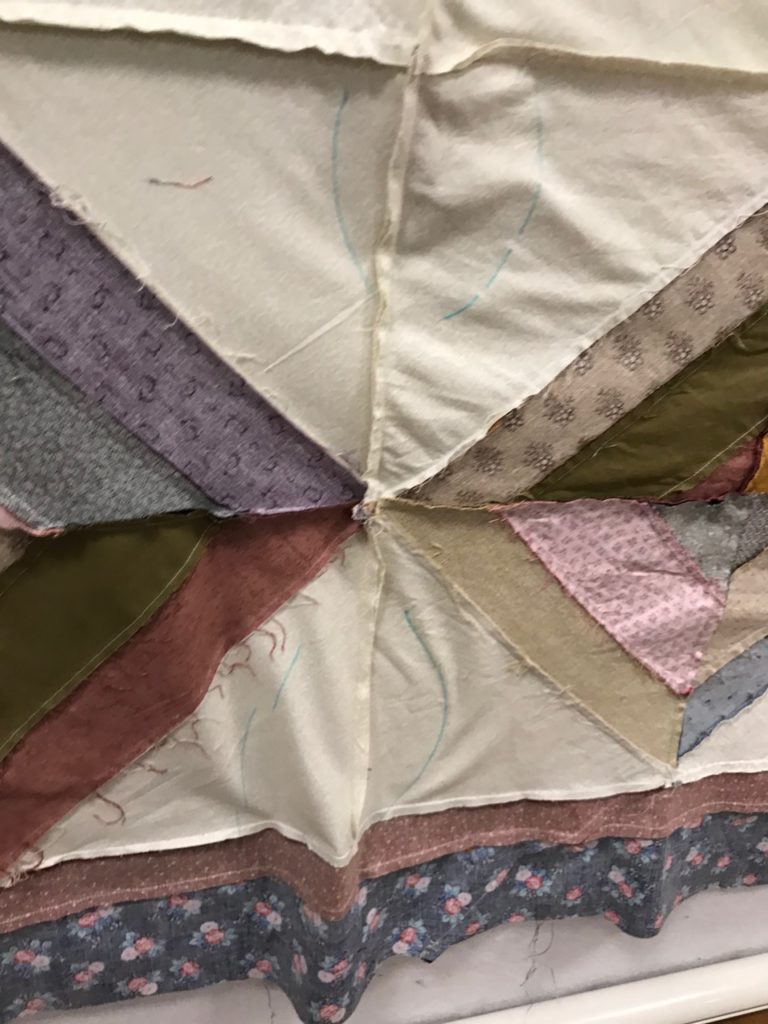
I marked areas that need to either have too much fabric, or areas that have seam allowances that need to be corrected or closed. Markings also include length of area to correct. You only need to adjust the affected area.
When these corrections are determined, you start in the center and work your way out to the edges, one area at a time. Many times, these corrections have counterbalancing effects and can, but not always, have ripple effects that need further attention. But without doubt, if the borders don’t already need attention, the adjustments in the body of the quilt can cause adjustments in the border.
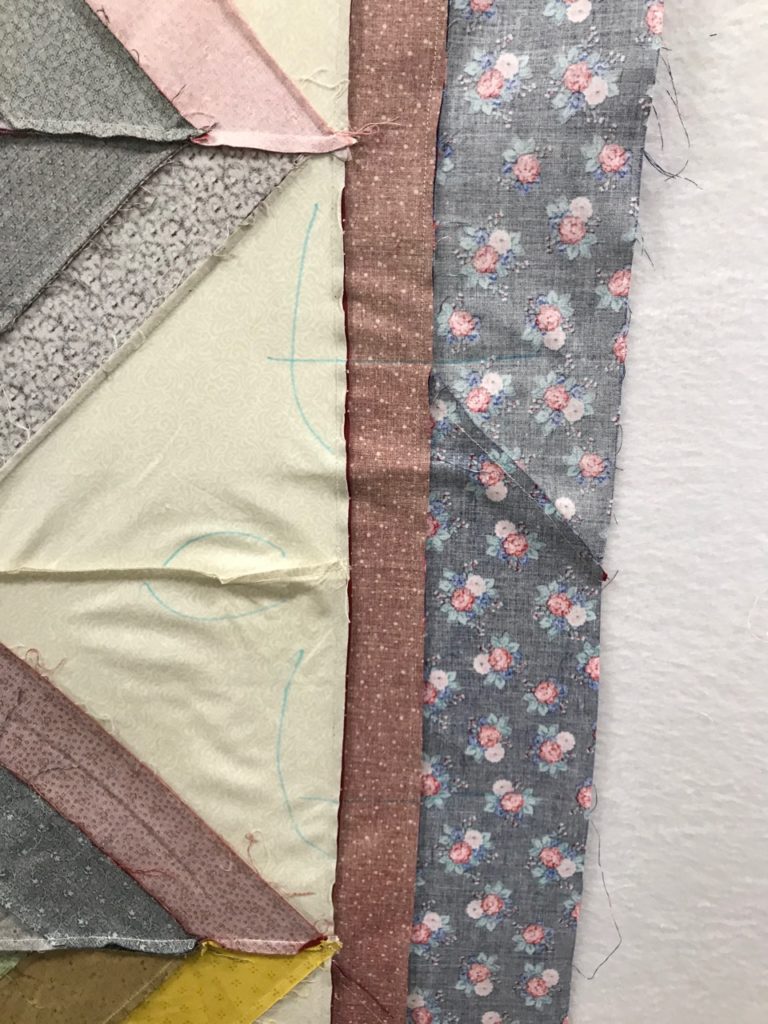
For this quilt, once the body was corrected, all the borders were also removed, re-measured, shortened and reattached.
Then the quilting. Not all the corrections could be solved by structural sewing. The remaining excess was slight enough to be absorbed into quilt with a specific technique. Think of it as using “C’s” … forwards and backwards in execution, and then quilting the encircling areas down. The C and backward C are shapes that literally capture the fabric, sew it into a permanent place and then sew down what’s captured so the needle/pressure foot cannot push anything forward in its movement.
So, when this question is asked…” Can you quilt it out?” The answer is always, “No, but I can quilt it in permanently.” It can be seen as a flip answer, but it’s the absolute truth. Long arm quilters have certain methods to improve and mitigate certain issues, but bottom line is, there are definite limits to how much can be rectified. When you can employ more than one front of attack, then your chances of having a good finished project greatly improve.
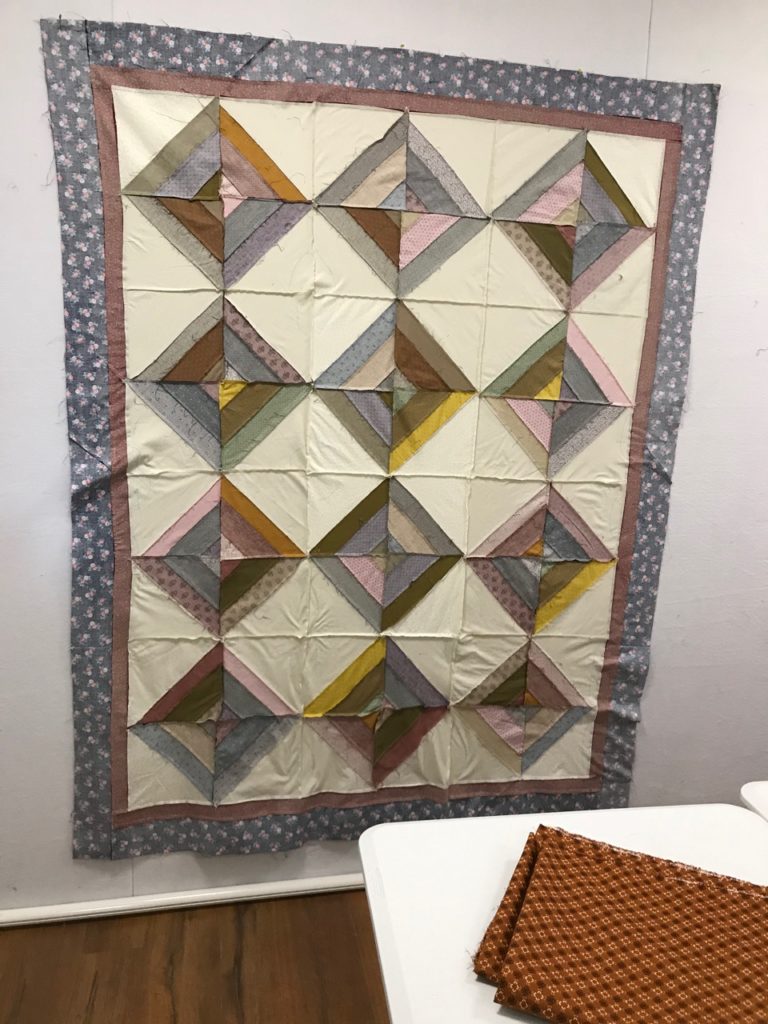
So, the story concludes with another picture of this non-demon quilt. I think it turned out well. And is praiseworthy as well.
Ta-Da!!! It’s finished and has great visual appeal!
Biggest bit of advice here is this: When someone compliments a quilt that you know was a problem child…You get to say only this…” Thank you”. And under no circumstance do you go into the litany of its problems. Don’t diminish their enjoyment and perception of what you’ve worked on. Let them praise it. And know the work and efforts of correcting its issues were worth it.
So, don’t be leery of taking out your own problem quilts and giving them another look with a critical eye that looks for ways to fix the unsightly areas.