Not only has Mission UFO launched…it has landed with a beautiful finish!
Last week Mission UFO was begun. We meet on Tuesdays and Thursdays at my home classroom/studio and anyone can come. The exciting thing is that in just a few together we are seeing some excellent finishes being made. For more information, contact me for details and you too can join in the fun!
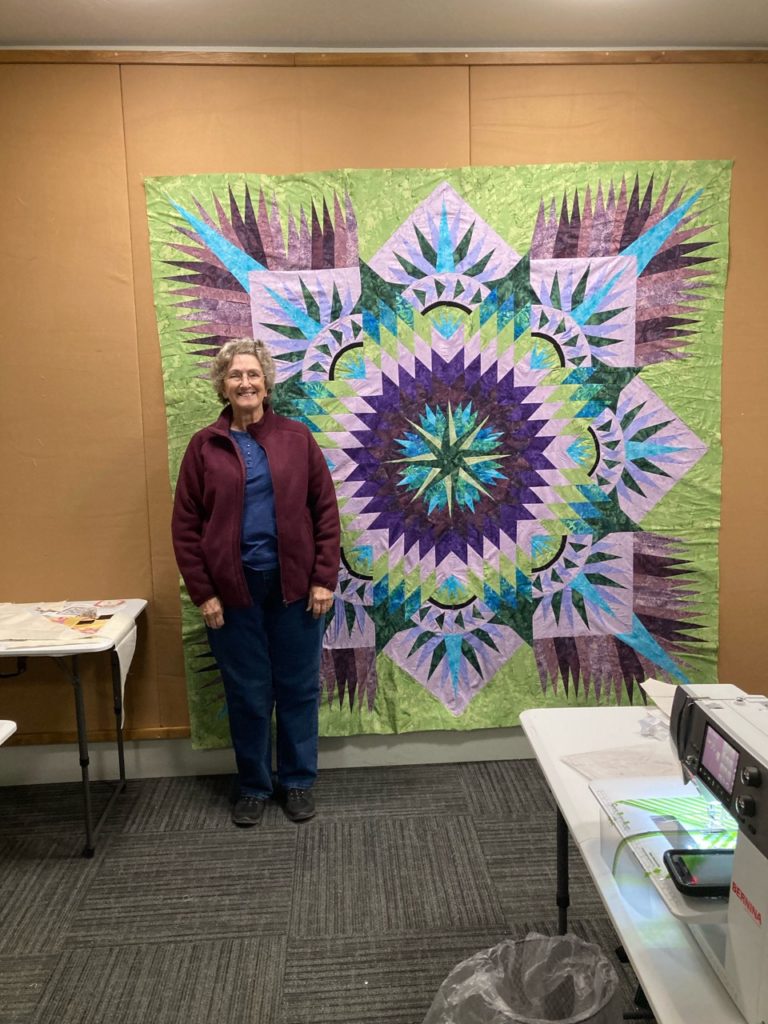
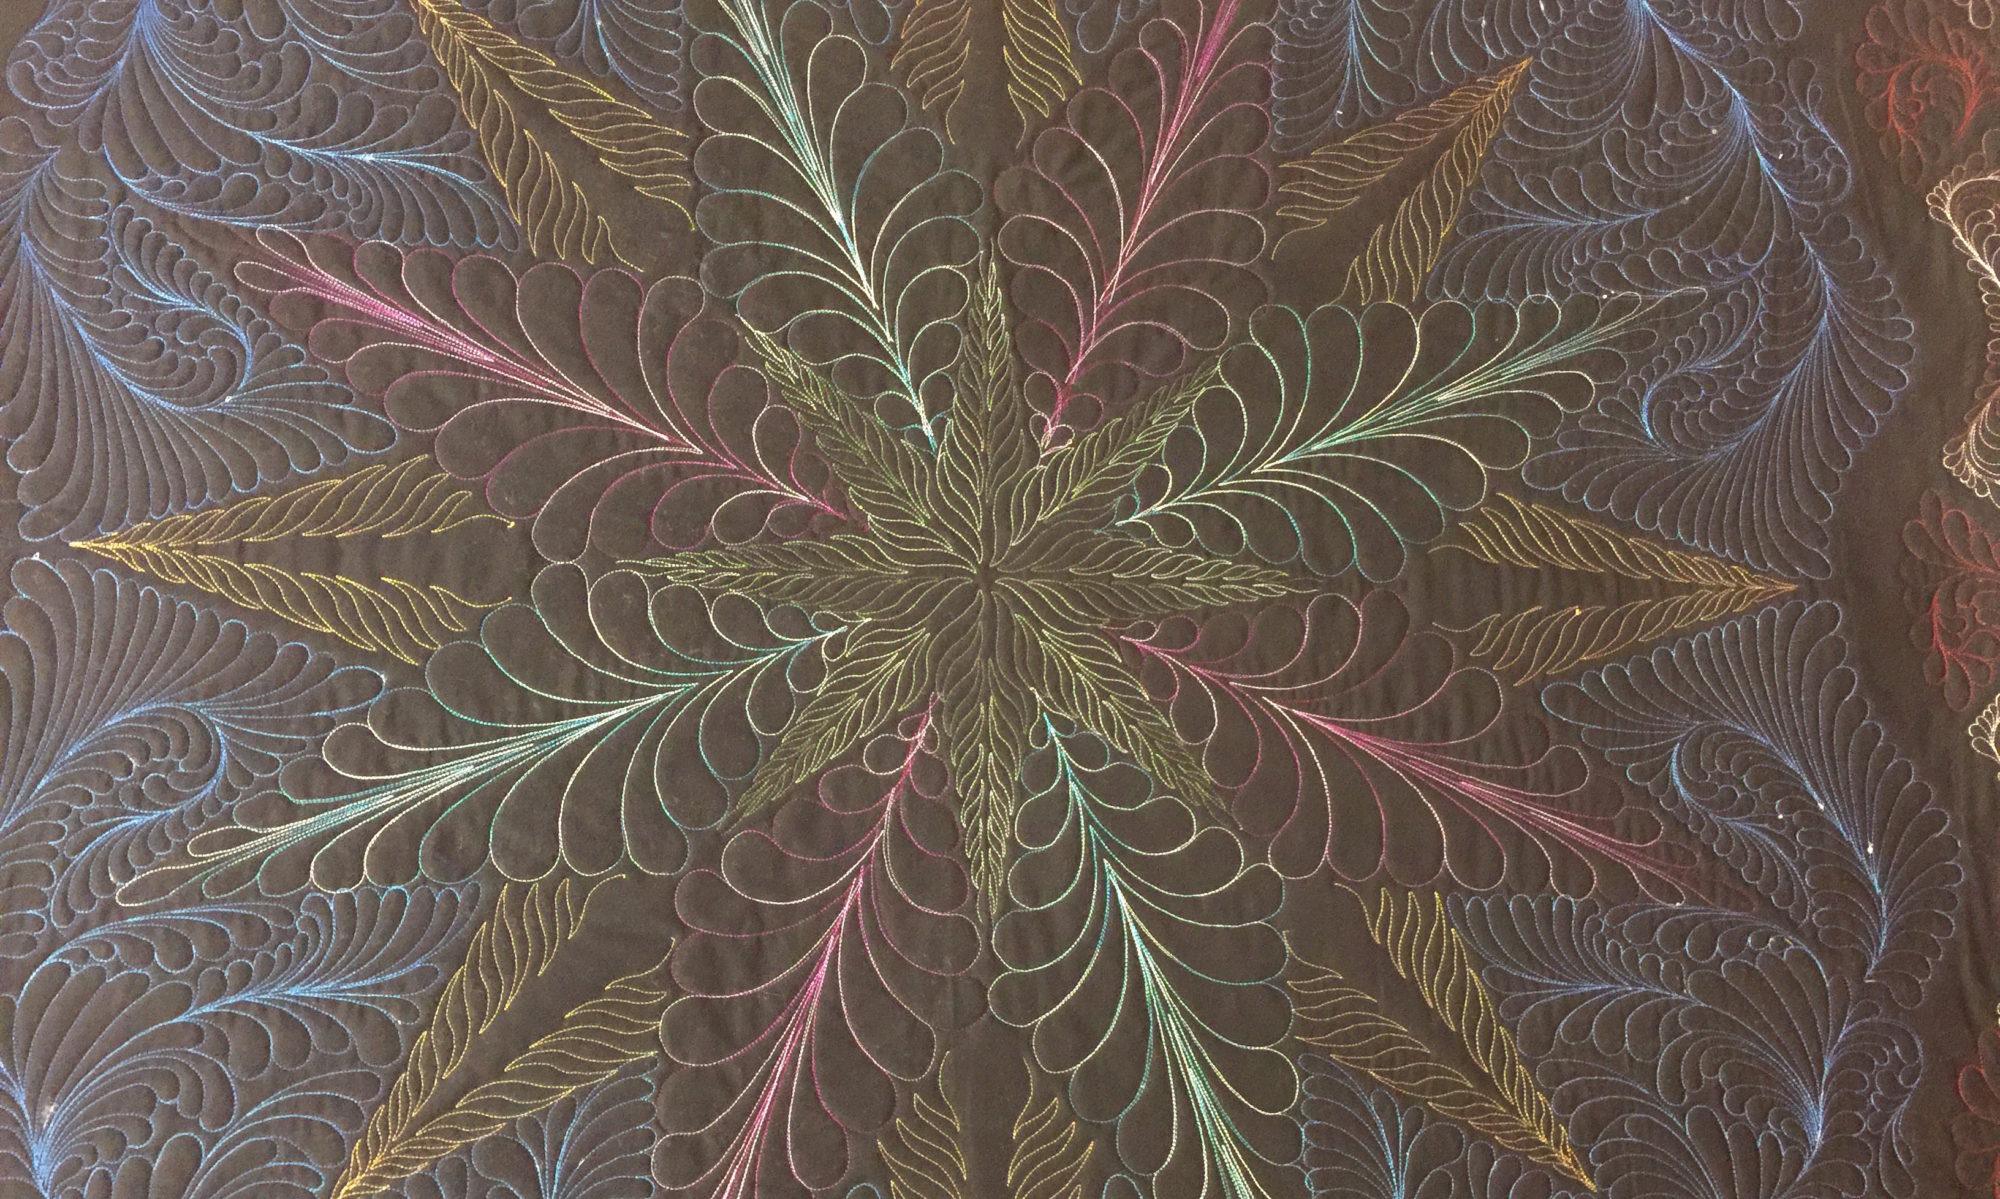
Jean has been working on this project for a couple of years, and it is a wonderful finish for her. I’ve been with her every step of the way and must say, it’s been a fun adventure. She has already made nice progress on a second quilt of this same pattern in a different color way. We’re both excited to see how her next one comes together.
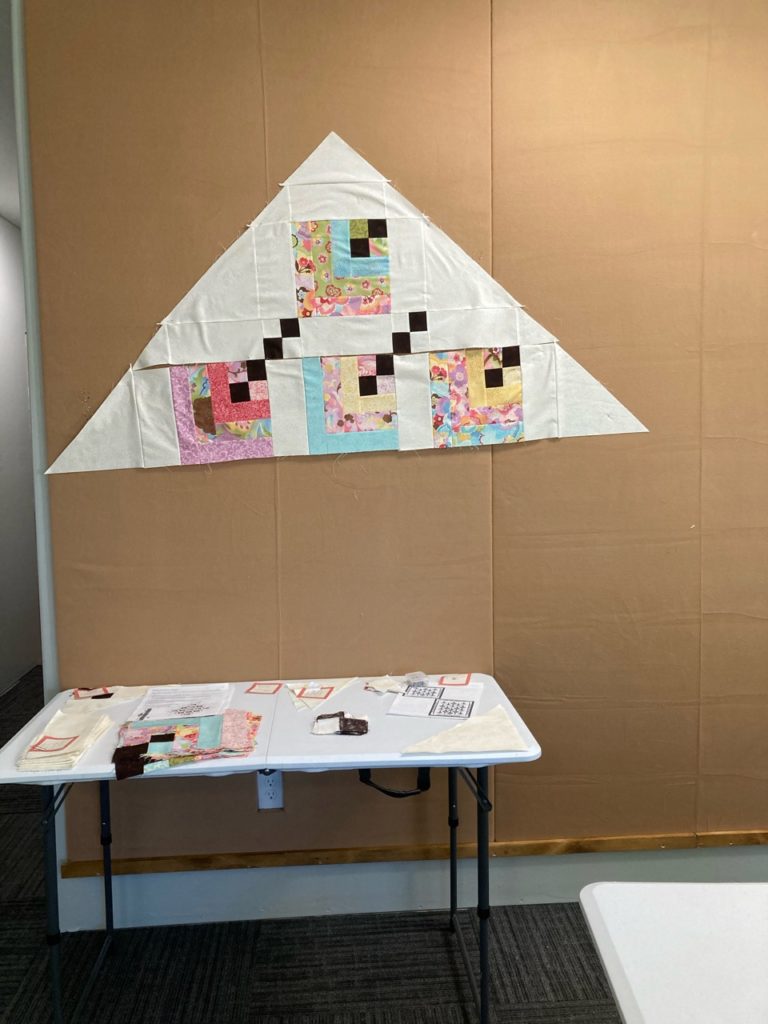
Here is Cindy’s progress on her Hanging Gardens project. She’s completed all her blocks and is now laying them out row by row and sewing them together. This a trickier build since it’s constructed on point. She’s doing a terrific job and it won’t be long before the top is completed.
I’m so excited for both ladies!
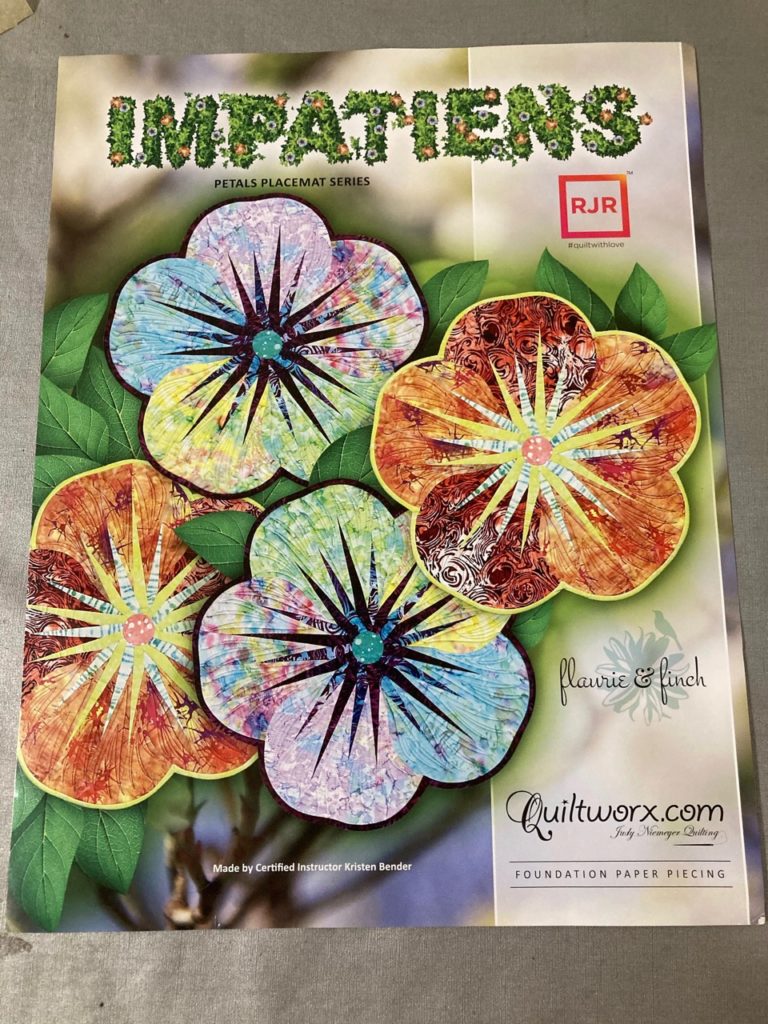
For me, one of the piecing finishes I’ve marked off my UFO list is the Impatiens placemats by Quiltworx. This is such a sweet pattern, and the color ways you can use are endless! This five-petal flower can be made with just lights and darks of the same color as I’ve done with mine shown below. They can be made with a different color in each petal with centers all the same. You can even mix up the colors within the petals to be two of one color and three petals of another then group them to resemble a pansy, which is one of my favorite flowers. The combinations are endless. And they make fabulous gifts.
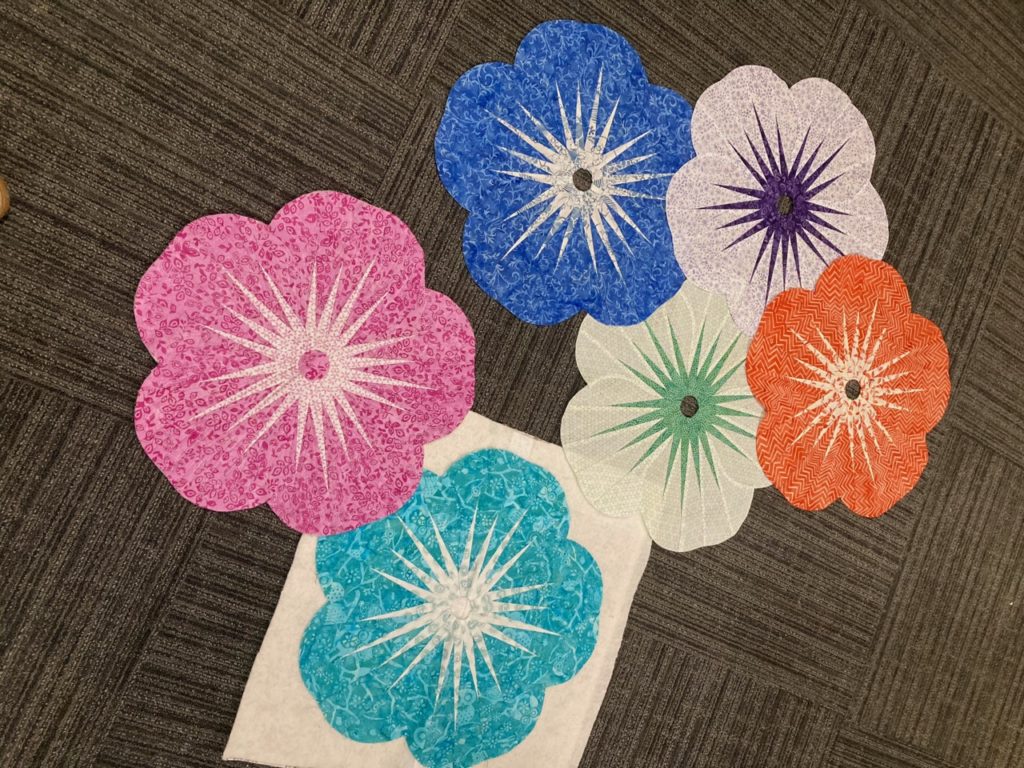
The Impatiens pattern comes with enough sewing papers to make a set of 4 placemats. To make larger sets of placemats, you simply need to buy more sewing papers. Additional sets of papers are called “Replacement Papers” and come with everything you need to make more items…minus the instructions. No need to buy another set of instructions when you have them included in the first pattern you buy. I think that is a brilliant thing to do, and I always encourage my students to think of this option when they are considering making multiples of the same pattern.
I’ve had some quilters express concerns about the curved seams required in this project. To which I tell them Judy has designed these little gems to go together as easily as a hot knife goes through butter…it truly is amazingly simple. To have a student master this curved seam in one try is a huge reason that I am committed to this company and the way these patterns are designed and written. Truly the best in the industry, in MY humble opinion.
Quilting is always a consideration on every project and this is one that can be done easily on your own machine at home. Quiltworx includes a template for quilting these in each pattern packet. It is a suggestion and certainly not required at all, but it’s a great place to start if you want to try your hand at doing it yourself.
There are many different means to attain the same goal, so let me tell you about different options.
One method is to layer several sheets of newsprint type paper under the quilting template. Then, take the tread out of your needle and sew on the quilting lines, resulting in needle punched dotted lines on all the layers beneath the pattern. You can use a pouncing chalk to dust those lines onto each petal or use each paper as a single sewing template. A white chalk on dark fabric is not bad, but then there are the lighter colored petals. I choose not to use a colored chalk on lighter fabrics because it can be problematic when trying to remove the colored chalk.
You could also sew over the punched lines. That isn’t as easy for me to see where I’m going as I sew. These are both good options…just not for me. I need a solid line.
Since there is only one template for quilting but 20 petals to quilt, (5 petals x 4 placemats), I need to either mark each petal separately or make 20 copies of the template. The template is larger than what will fit on my home copy machine, so I’ll need to go another route.
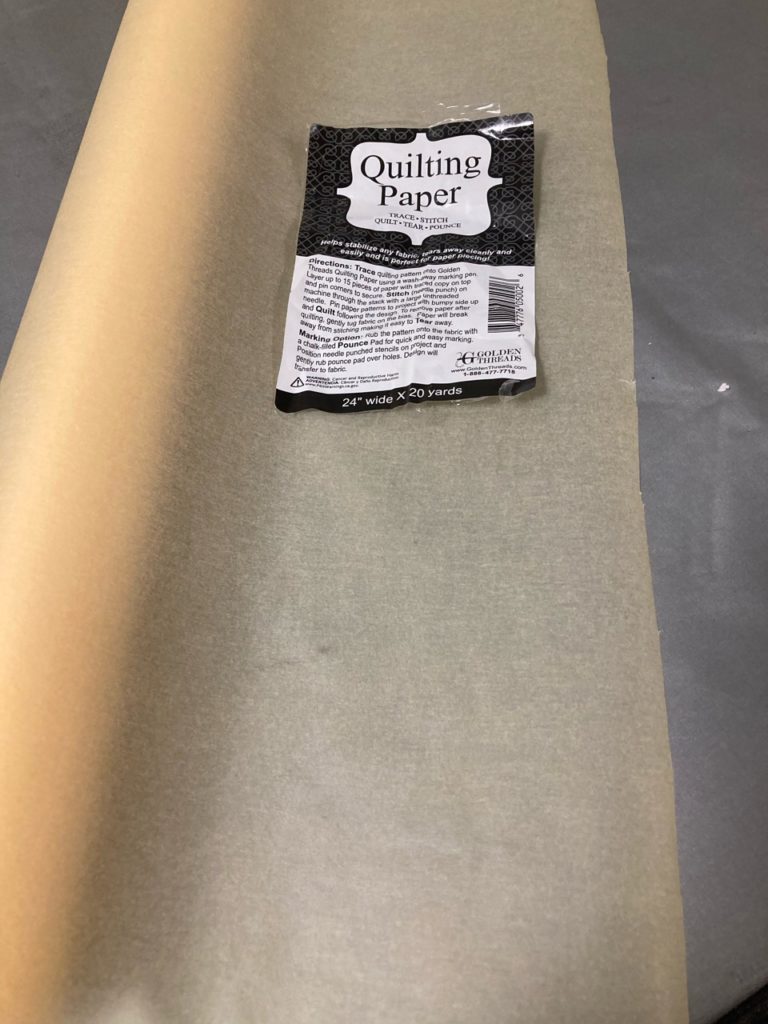
I have, and frequently use the newsprint paper made for the copy machine. It’s a great product. But for this application, I need to be able to see the exact placement of the paper for where I need to quilt. You can easily see through this paper to know where your quilting will be. It’s a thin yet sturdy tissue that does not shred when painters tape is applied to keep it in place. You can use regular tissue paper to do this, just know that it is greatly fragile and any writing utensil you use can, and does pierce the tissue. Also…ink from pens and felt markers penetrate regular tissue. But NOT so with this Quilting Paper. Definitely worth the price, and it’s not that expensive at that.
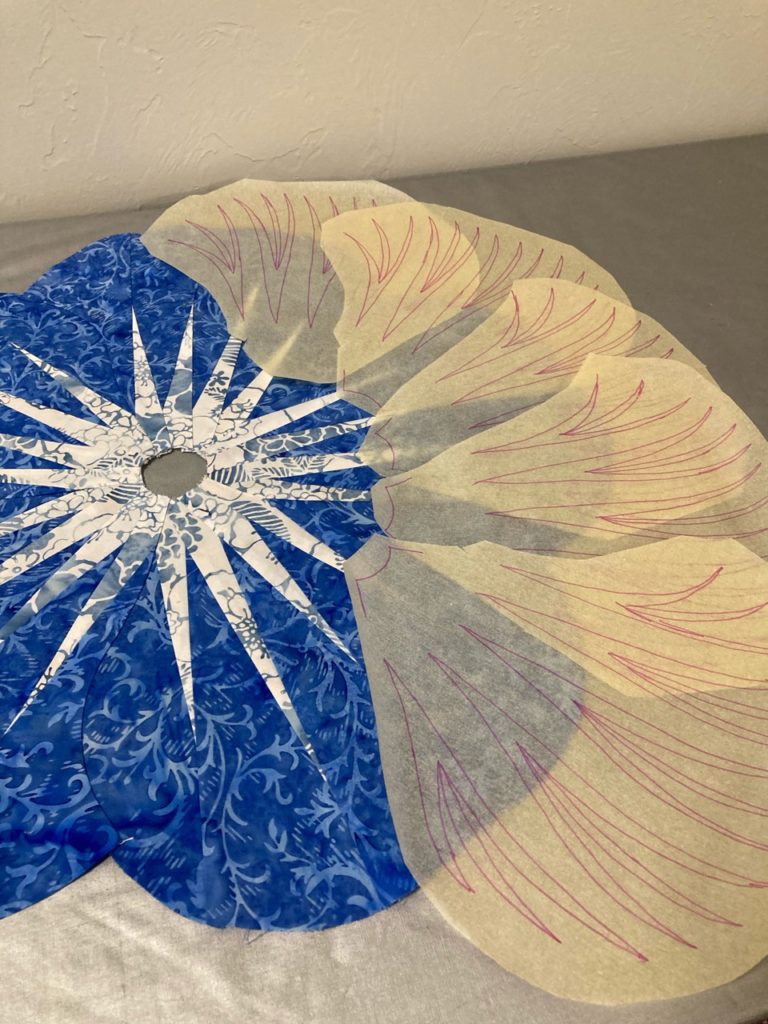
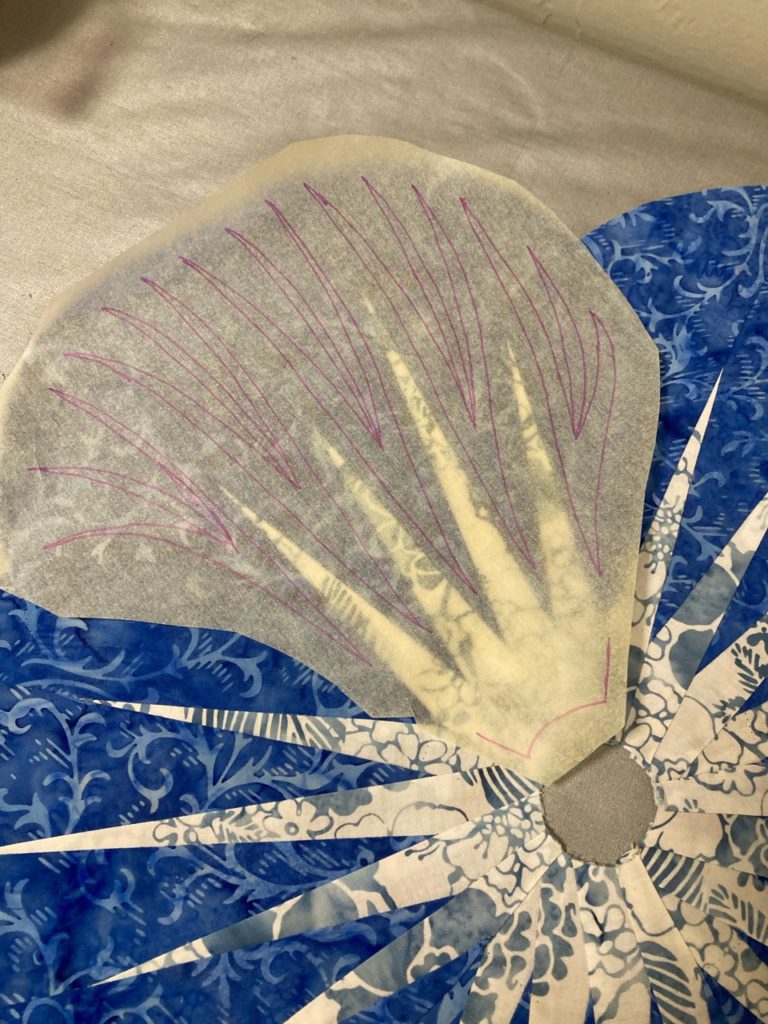
I used the bottom curve as a rough registration mark to know how to place each template. This paper also makes it easy to see where the quilting lines will fall so that I won’t put the curved stitching inside the center spikes where I plan to add straight line stitching after the curves are put in and paper removed. This is going to be fun!!
Easy Peasy! Can’t wait to show you all the finished placemats.
Until next time, may your bobbin never be empty!
I really like the Hanging Gardens top. She is using my colors. Hope we can see it finished. Also a big Congratulations to Jean for her Prairie Star. It’s wonderful!! So love reading your blog Melody. And I have your Vanilla 🥰
P. S. I posted a comment at 7:20 PM but server showed 2:20 AM. I up sometimes at that hour, but not today.
Congratulations Jean on the Prairie Star quilt. The colors are beautiful.