It’s been an entire year since I last posted on this blog.
I had such good intentions of sticking with my plan of regularly posting and sharing the quilty happenings of my world. But ya know, life kinda had a few other plans for my day-to-day routine.
They say a picture tells a thousand words. And the occurrences over the past year have brought lots and lots of pictures. So rather than try to catch you up with lots of words, I thought some strategically placed pictures would do a lot of the talking for me.
Most of the past 12 months had really good things happening in them, but a few had some stinky moments too. I’m happy to say all the stinky stuff is resolved, and the really good things are still happening. So, let’s go for a tour and you can see the highlights of what I’ve been doing!
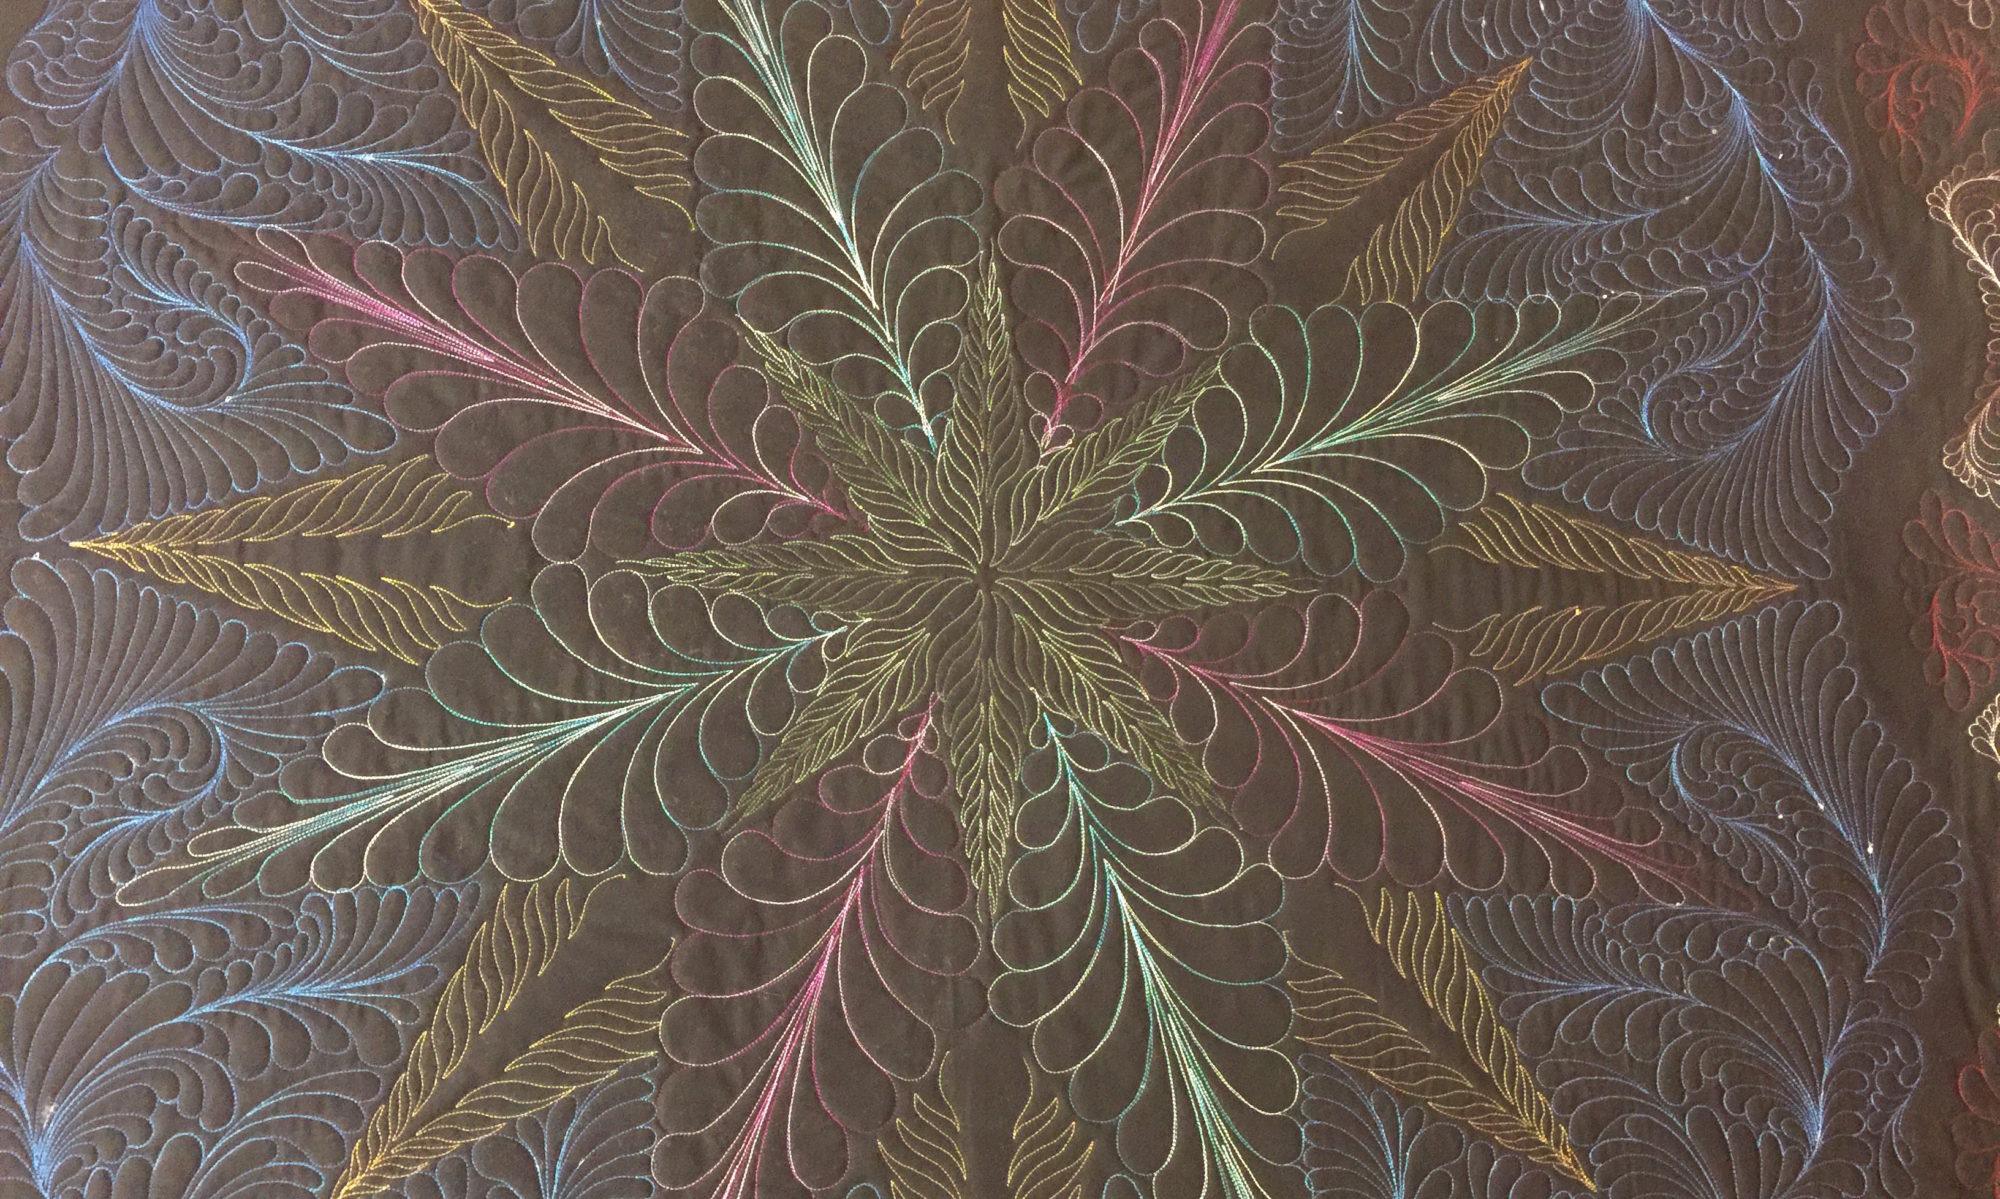
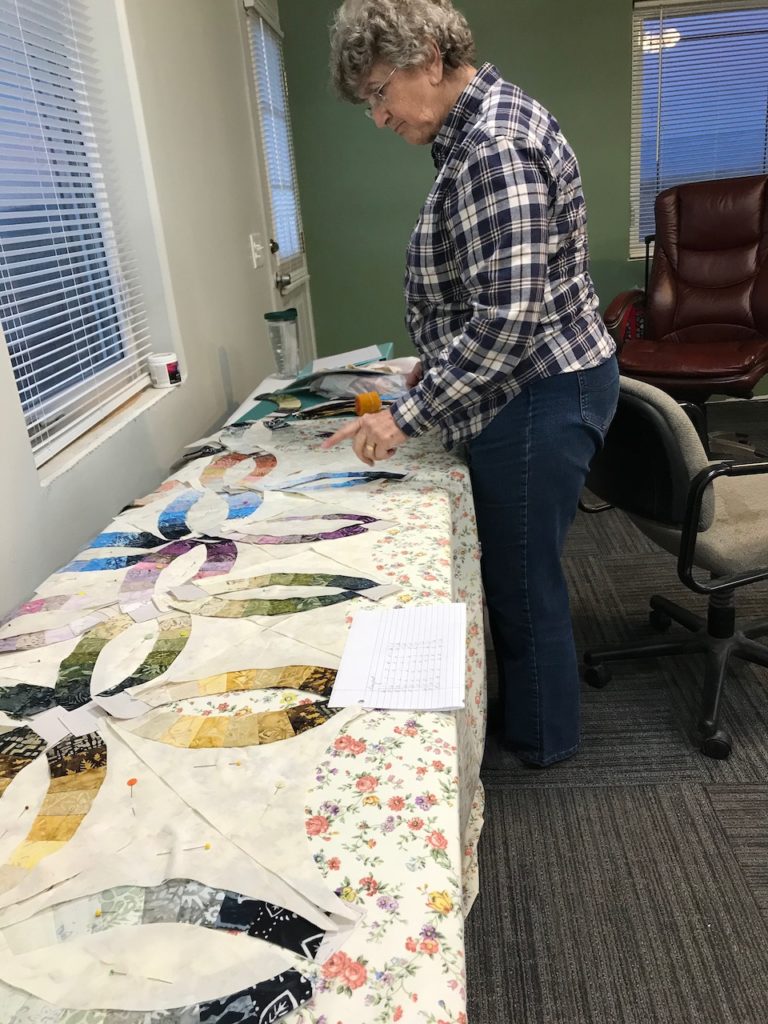
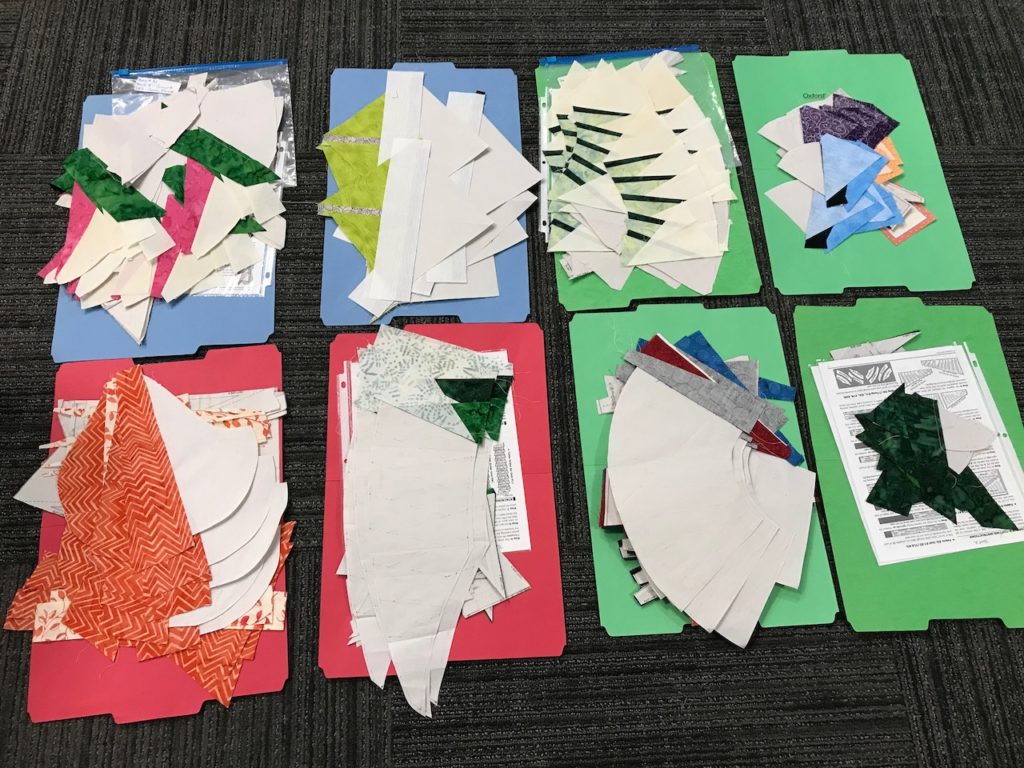
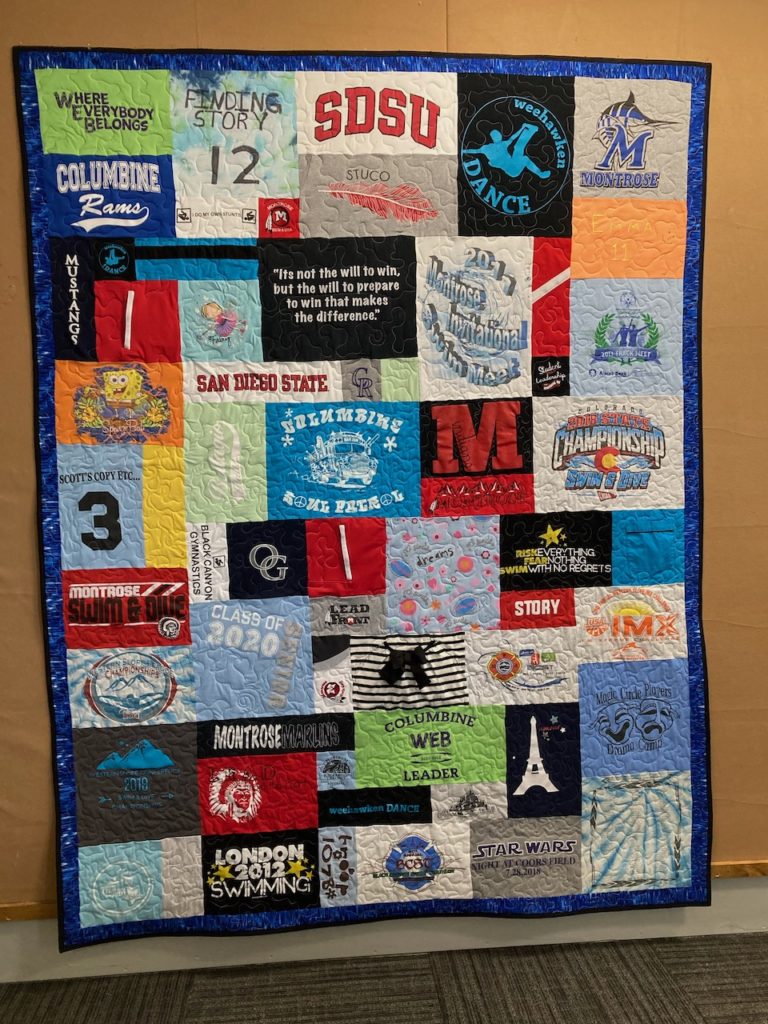
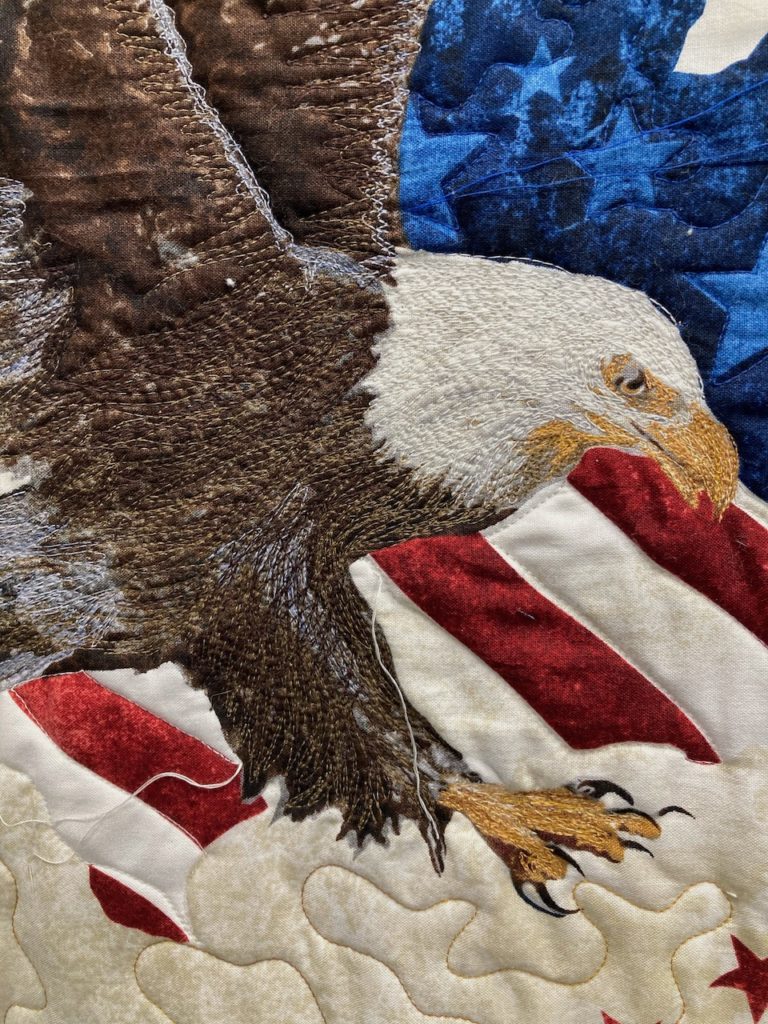
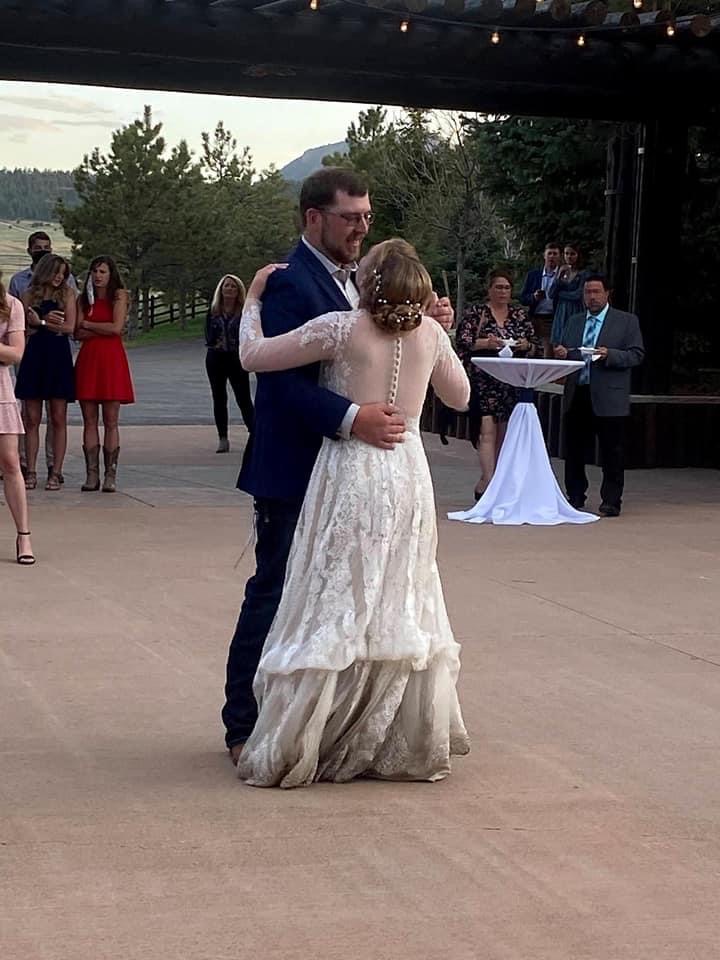
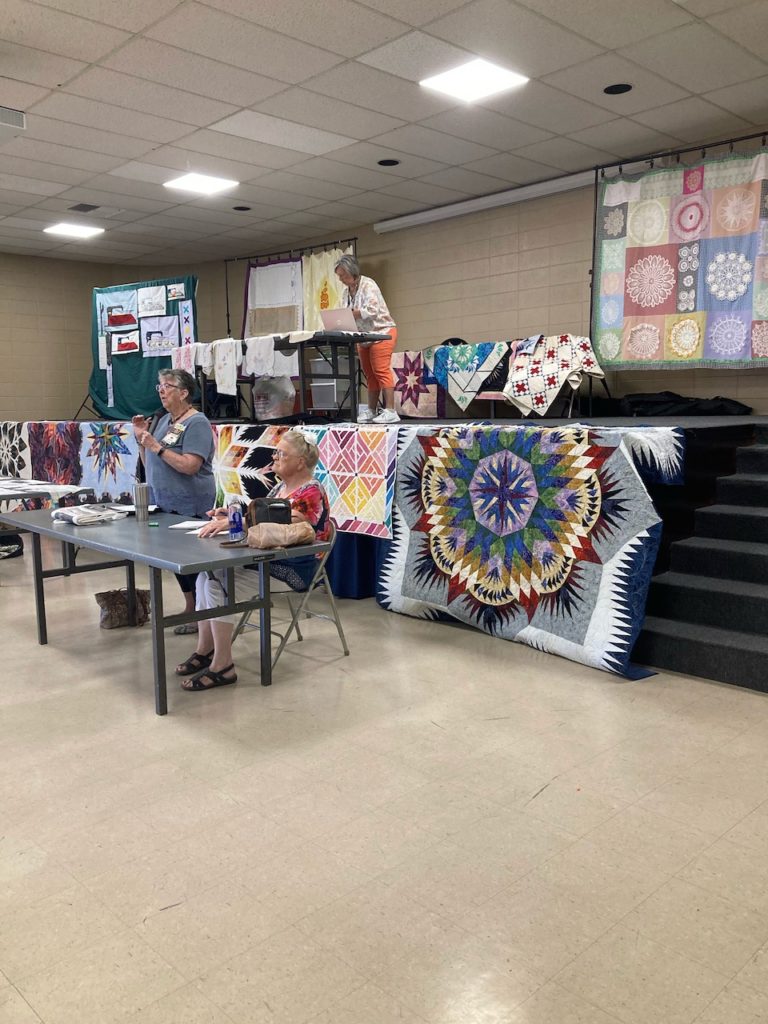
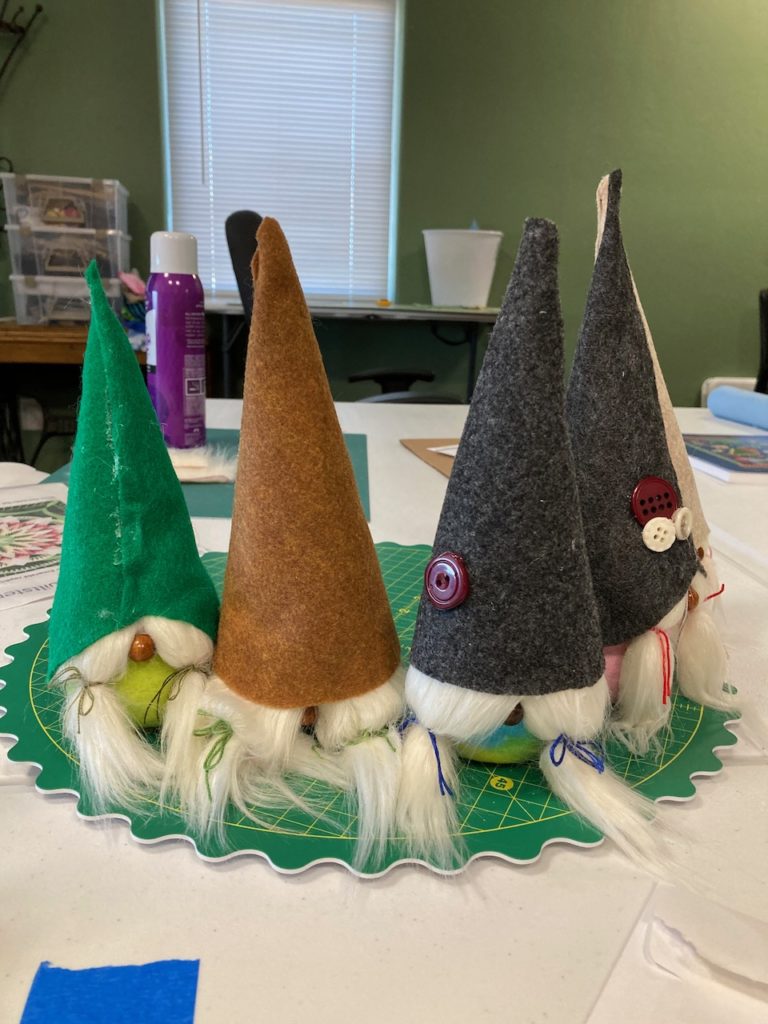
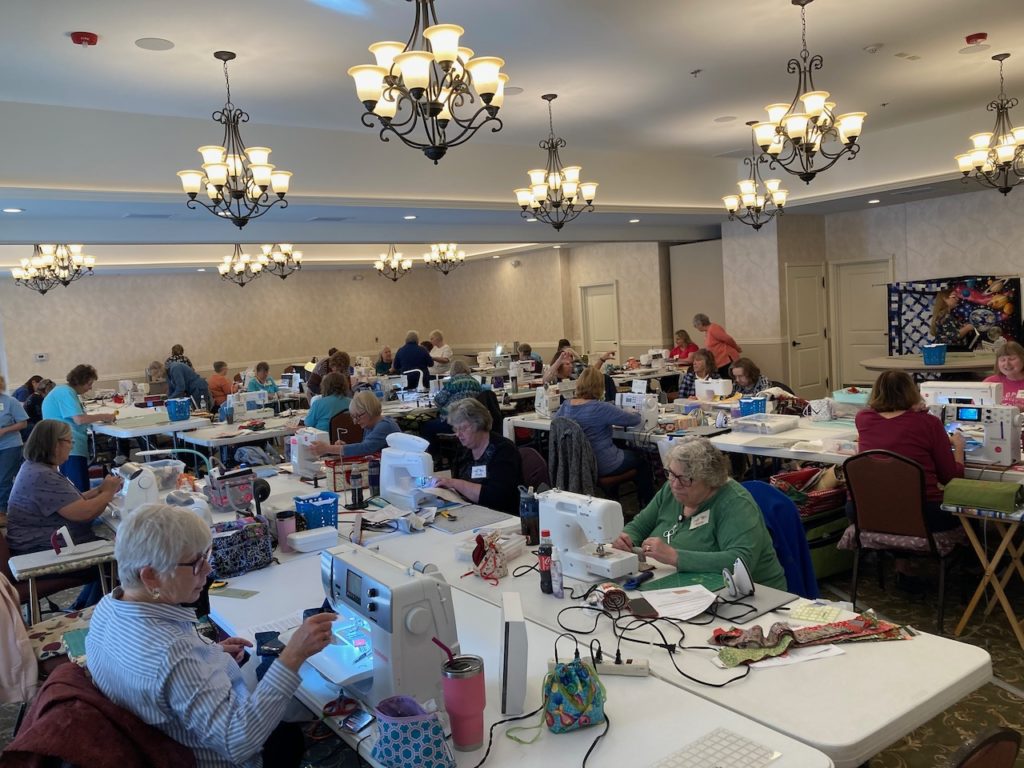
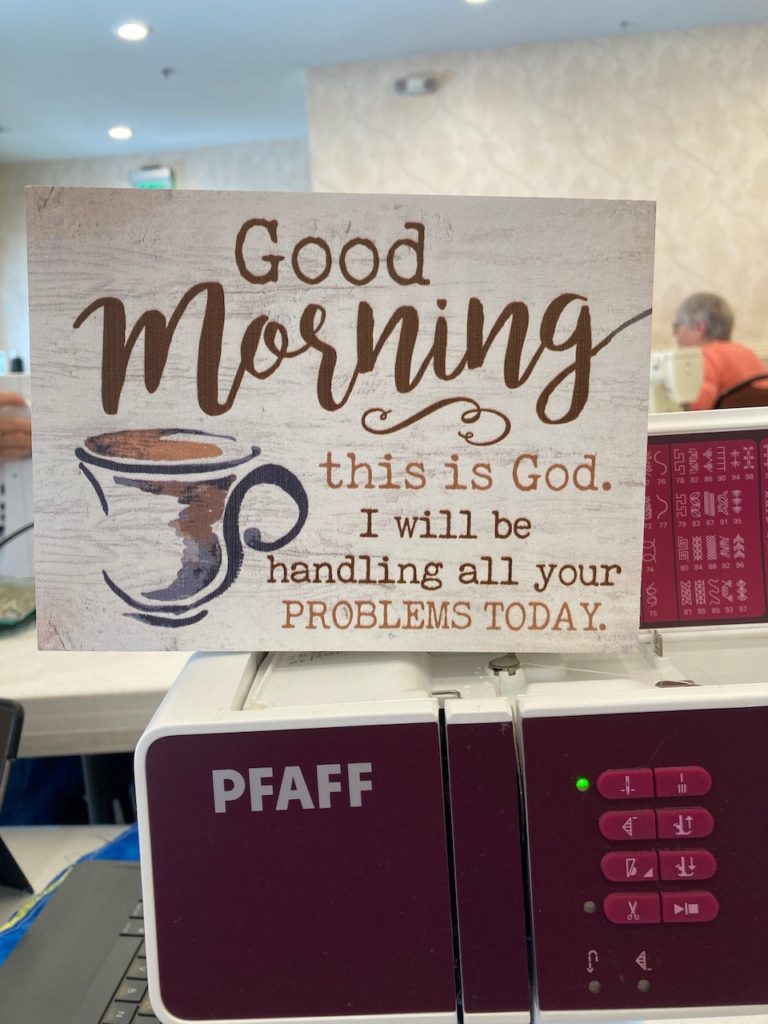
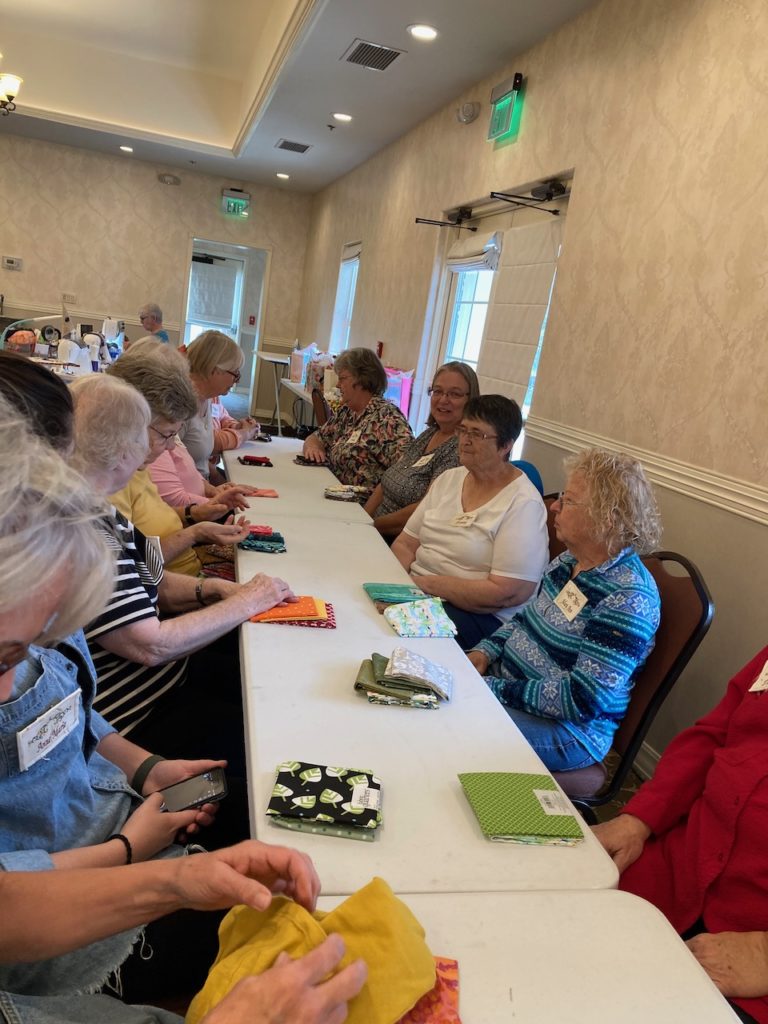
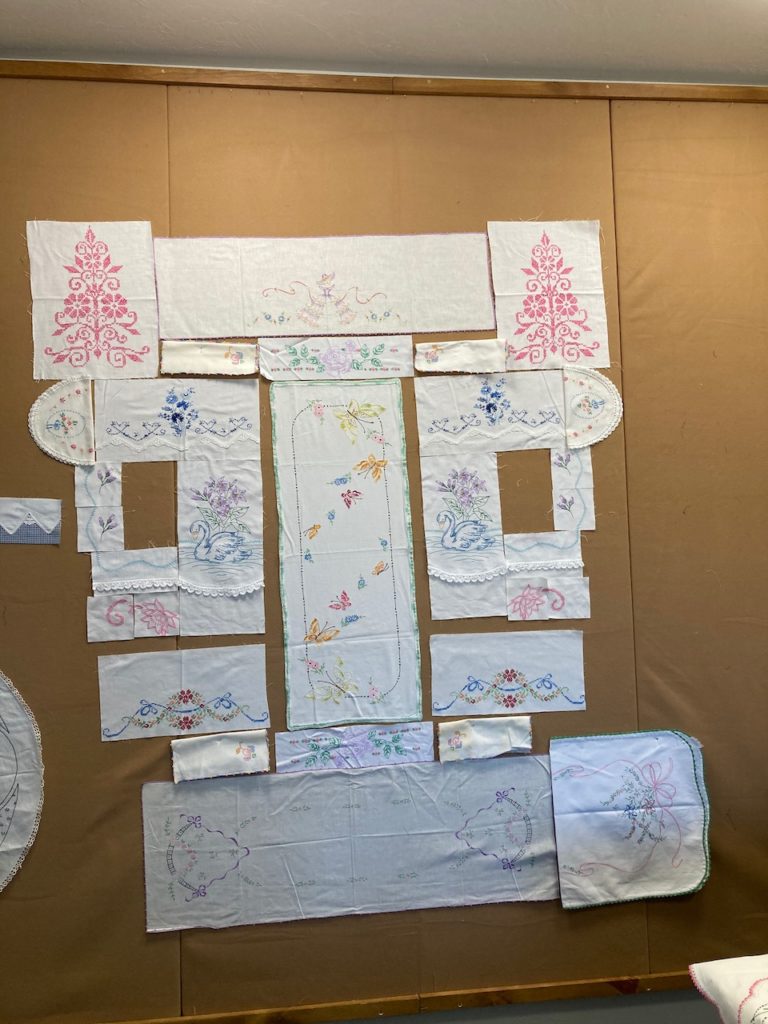
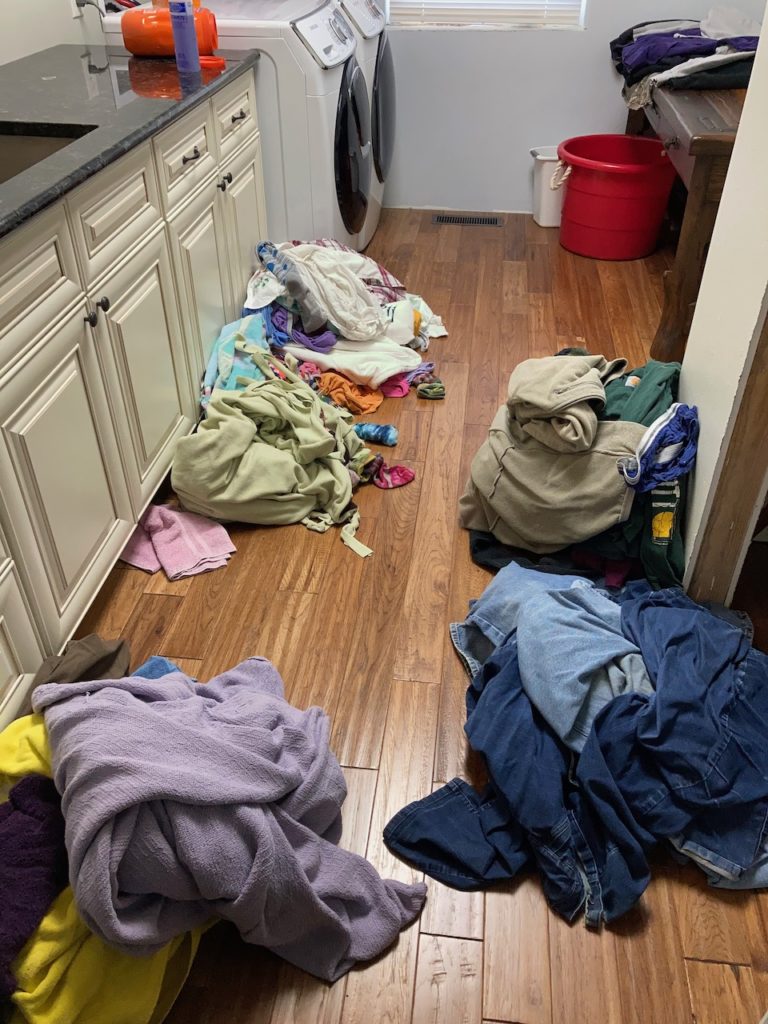
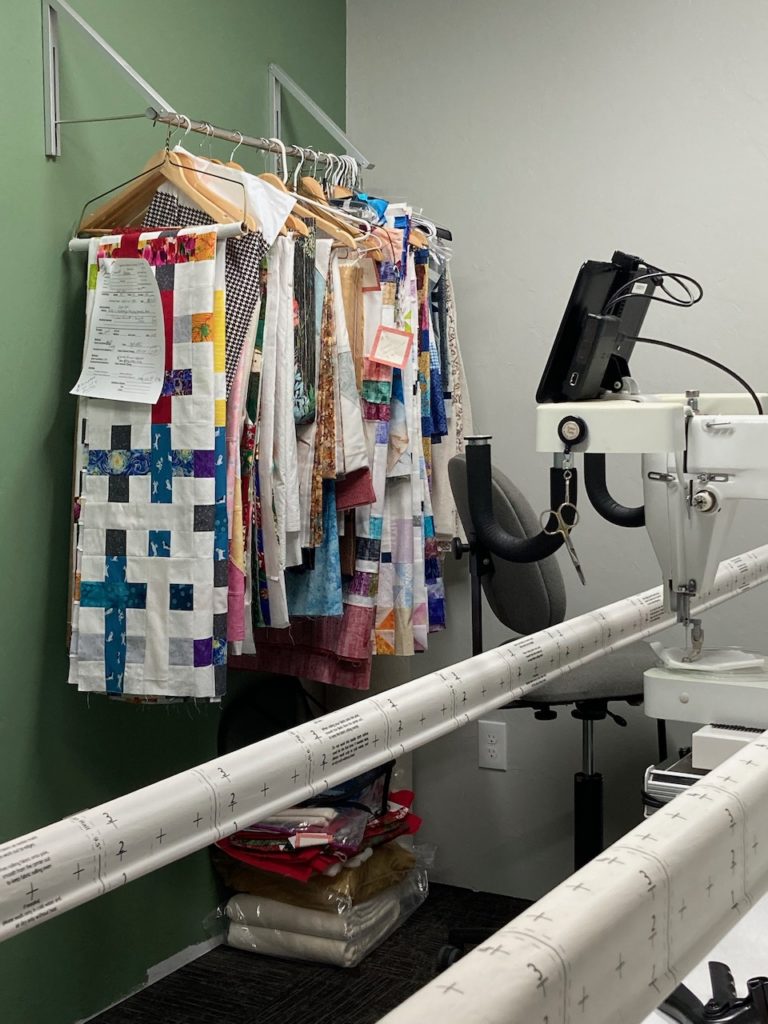
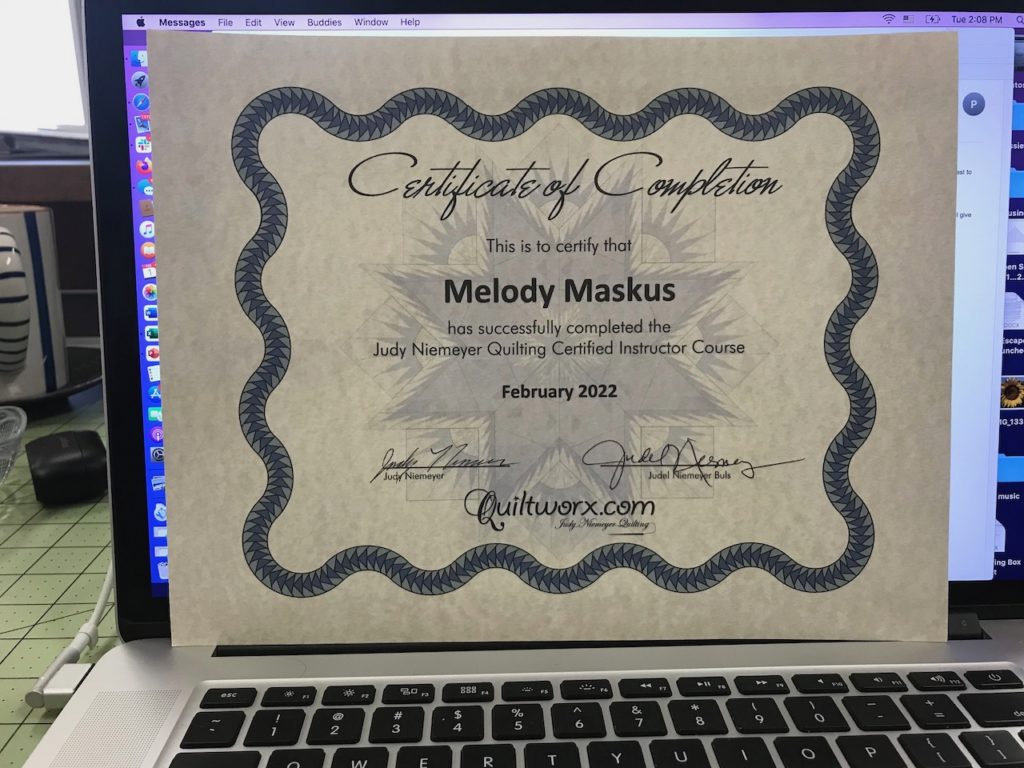
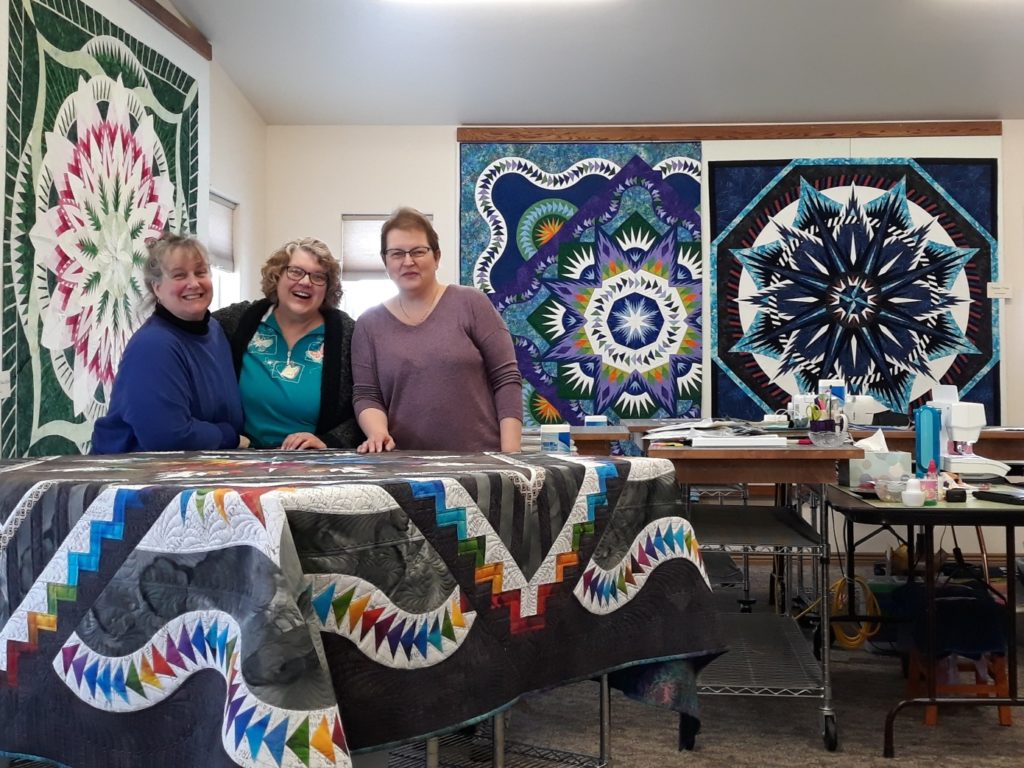
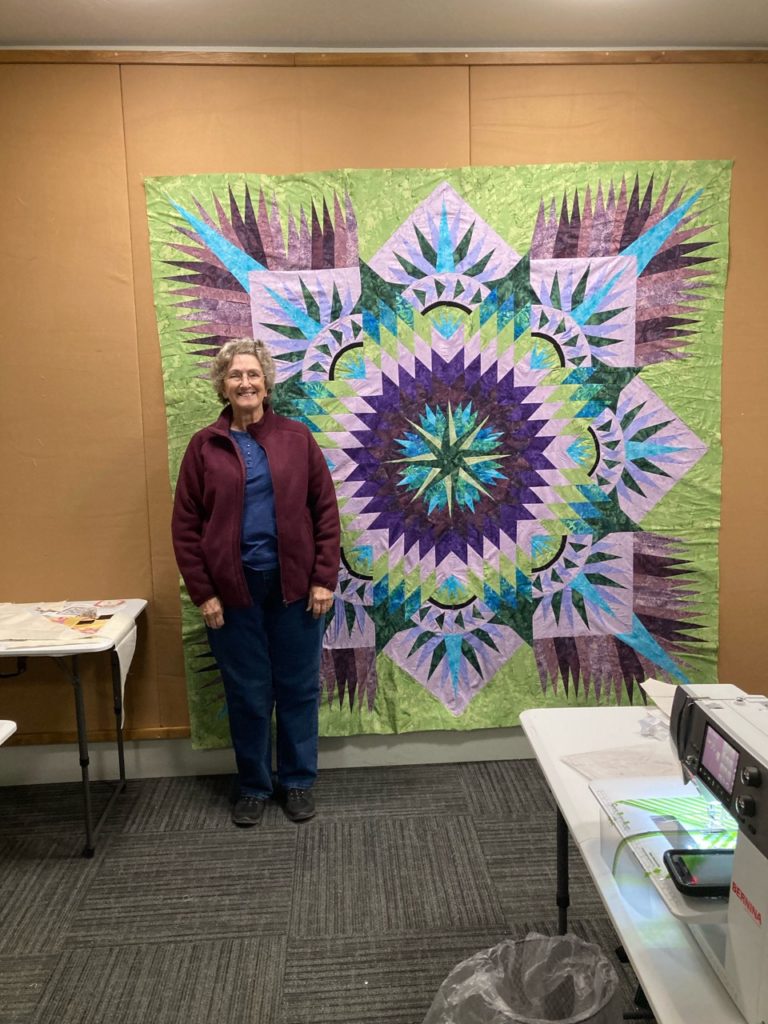
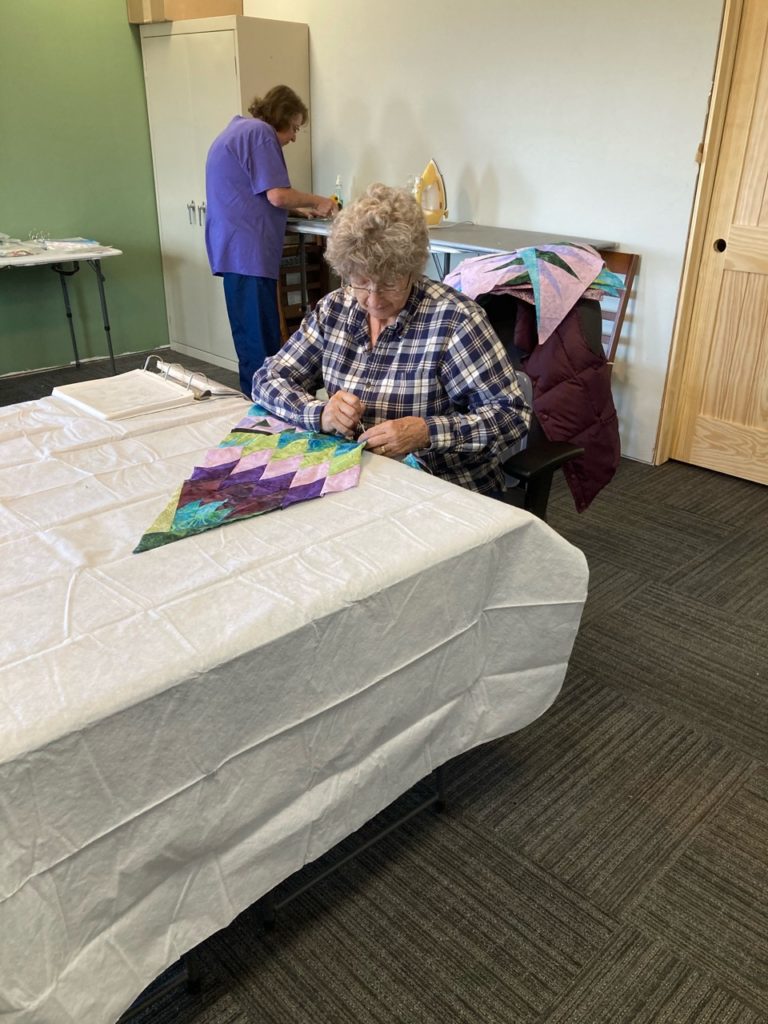
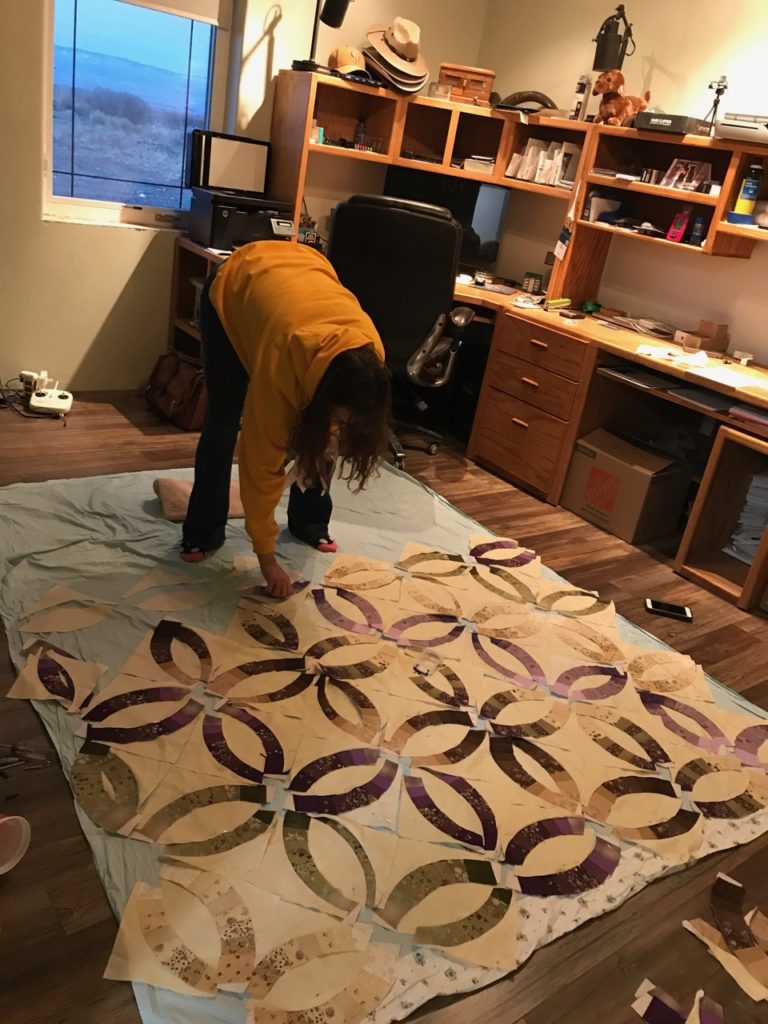
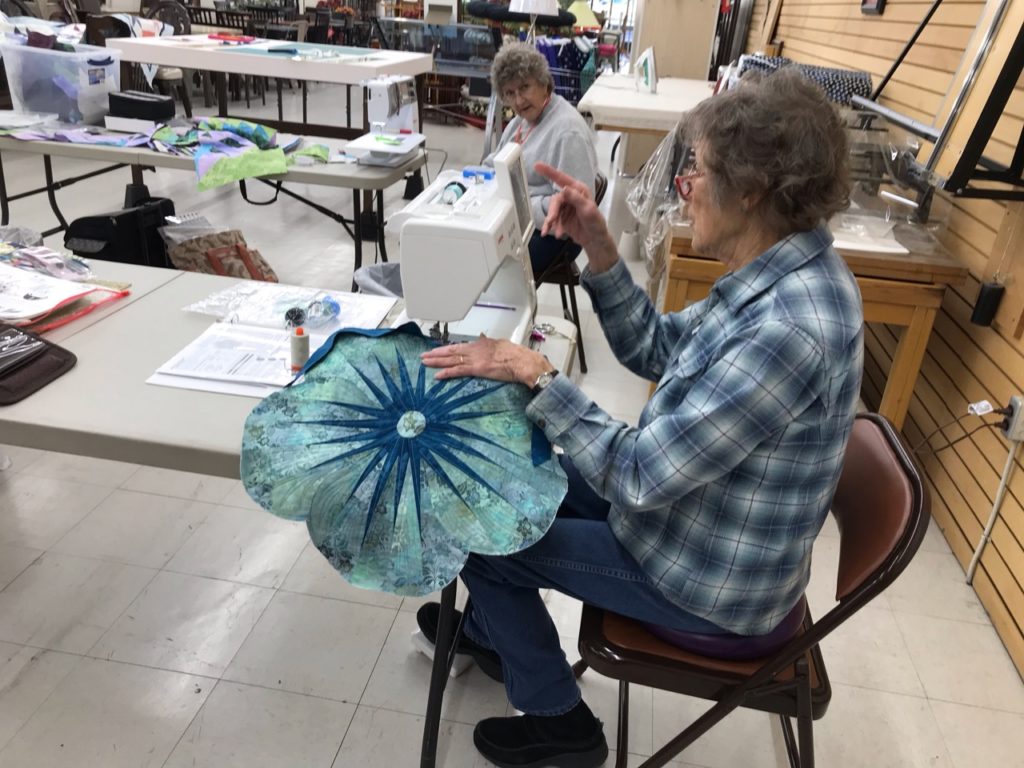
Lots of classes happened over the year in my home classroom. Here is Jean as she is working on her “Grandma’s Wedding Ring”. We put a couple tables together then laid a sheet over them. As she placed each section in the proper place, she would pin it to the sheet. At the end of the day, she gently rolled and folded up the sheet to take home. Once there, she could unfold the sheet and continue working without loosing anything or have anything out of place. Works really well when there isn’t a design wall handy, and placing things on the floor isn’t an option for laying things out.Whenever I get a chance to do some piecing, I like to use my folder system. I call it “Power Quilting”. Each folder is a layer, and is a specific section of a quilt. 8 layers shown, representing 3 different patterns being worked on at the same time.One of several T-shirt quilts I was commissioned to make over the past year. These are always so much fun to make and always a delight to see the recipient’s face upon the “reveal”. I even hid for a weekend. Well…not really. I turned off all my devices and just sewed at my desk and put this together. It was so therapeutic for me. Sewing is my happy place. The top is all completed now and waiting to be long arm quilted. Mine are always last in the queue, which is why there are so many waiting. This sweet quilt is a Moda Bake Shop quilt. Recipe card # 5, named Ganache.I also was able to do a bit of thread painting on a quilt made by a very special friend for her father. Just a couple long threads to clip to finish. It was such an honor to work on this beautiful tribute.What a happy moment this was! Our son and his beautiful bride on their wedding day!I was able to do a couple of trunk shows as well. The guild meeting for Sunset Slope Quilt Guild is about to start so there are a few ladies buttoning up a couple things. While I’m not in the photo, all the quilts you see are mine. The topic was “Vintage Linens” where I talked about how to take vintage, hand embellished linens and turn them into a quilt. They got to see my Quiltworx portfolio as well.These cute little gnome girls are waiting for their hats to be embellished. These, and about 35 more, were fairy gifts for the ladies at one of the two retreats I held over the last 12 months. They were so adorable and such a lot of fun to make!And here is the evidence of the retreats I hosted. 37 women at this retreat! We filled the Ball Room of the Wine Country Inn located in Palisade, CO for an entire weekend. 31 ladies attended the next one held 5 months later. SO MUCH FUN!This is such a special gift I received from one of the ladies attending my November retreat. It goes where ever I am working…always within eye sight so I can keep things in the proper perspective all the time. Such a comfort!Here we are at retreat about to play one of the two games we always enjoy. CLR — Center, Left, Right. Everyone starts with 3 FQ’s (fat quarters of fabric) and the winner takes all. HUGE amount of laughing and carrying on was done by all.Here is a Vintage Linen quilt in the “puzzling” stage. It’s now a finished top…or maybe I’ll put another border around it. Still in progress.And you know…there were MOUNTAINS of laundry to do over the past year…mountains and mountains of it. And dishes too. But I won’t show you those. Eeewwww…..no, just the mention of them is enough. But regular housework happened a lot too.Thought you’d like a peek at my long arm queue. Most are for customers, waiting their turn to go on the frame. And a few of my own at the end of the line. It’s a never ending stream of them of which I’m always grateful to have cross my threshold.And this happened! THIS is the culmination of nearly 5 years of hard work and persistence. I did it! It felt like I graduated from college. I’m still pinching myself. It’s now in a frame and sitting close to my desk where I can look at it every time I sit down. Classes – both in-person and via Zoom at my home classroom and at various quilt shops, trunk shows, guild presentations, long-arm quilting and blogging ALL circle around this piece of paper and what it represents…my absolute love of quilting and teaching. I Have Arrived!These sweet ladies “arrived” with me!! Donna, Cynthy, and I are the newest Quiltworx Certified Instructors. We had an amazing week together as we finished our certification training and all it entailed. In the background you can see my Dinner Plate Dahlia on the left, and two of Donna’s beauties…Glacier Star and Mariner’s Compass. In front of us is Alchemists Crystals playing peek-a-boo. It is a stunner and I can’t wait to make it so I can teach it!!
Thanks for taking a whirlwind tour through the past 12 months of my day-to-day life. Are you tired yet?? I am! Maybe I’ll take a nap before I start on the next 12 months. Eeehhhh…maybe not. I’m having too much fun!
But until next time, may your bobbin never be empty!
I don’t know who sings that song, or when it was recorded. In fact I know very few of the lyrics. But what I can say, it that I’ve got that tune on a loop inside my head, and everything is looking pretty good right about now.
Today was Mission UFO day in the classroom, and I just had a couple of women to sew with today. But boy howdy did we get a lot of things worked on. It was a terrific day, and there are lots of pictures to share.
So while I’ve got dinner in the oven, (and it smells super tasty), let me show you what was finding it’s way under needles and onto the design wall.
Hmmm? What’s for dinner? It’s Keto Stuffed Peppers, one of Gary’s favorites, and super easy and quick to throw together. Ground beef, riced cauliflower, 2 eggs and 1 can of tomato sauce with salt and Mrs. Dash all mixed up and scooped into green peppers that have been halved and cleaned of seeds. A generous squirt of ketchup across the top, placed into a baking dish with ½ cup of water in the bottom of the dish to keep it from scorching, then bake at 350 for about an hour and out it comes ready to eat. And just to cover all the bases, I get most of my Keto recipes from www.ruled.me — so easy on a class day!
Anyway, let’s get to the best part of the day…show and tell from the classroom!
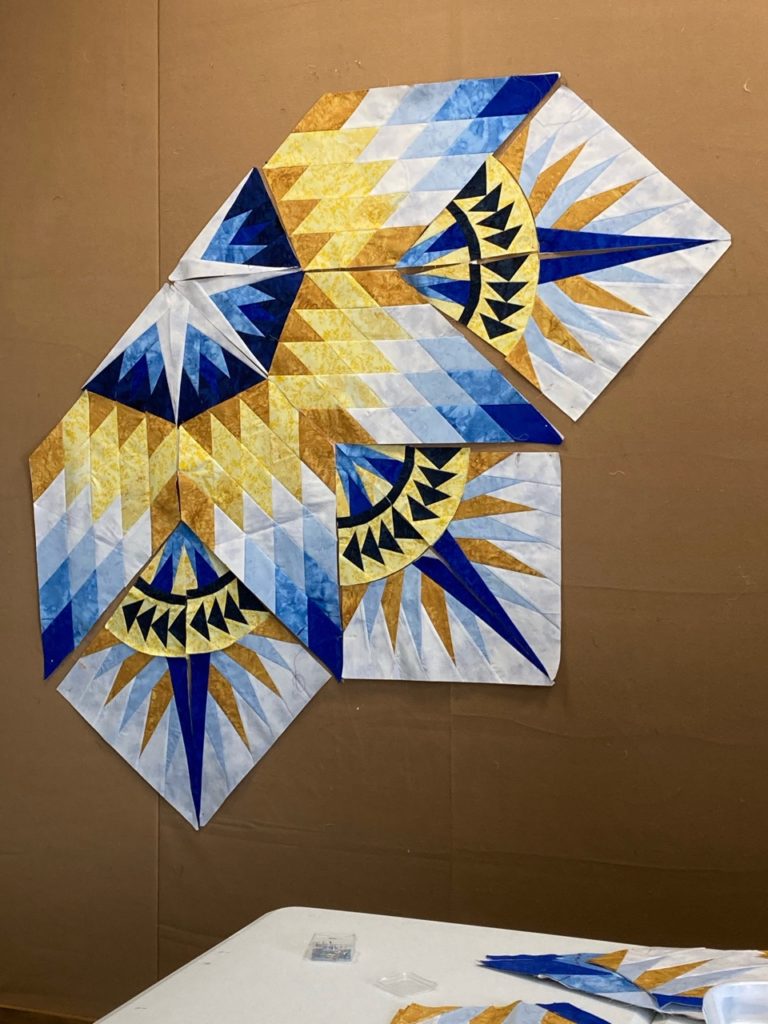
Jean has been hard at work on her second Prairie Star. Yes, you heard that correctly…her Second! Beautiful color way for this one! And she is doing a terrific job of working through it too! I can’t tell if I’m more excited for this one, or if she is, but it’s amazing!
Vicki finished her Rainbow of Jewels—Mirage Quilt by Laurie and now it’s off to the long arm quilter. She’s started another one called Dragonfly Lanterns. It’s a cutie that’s just beginning to take shape. Terrific project!
Here are the first few blocks for Vickie’s Dragonfly Lanterns. A really great pattern/kit for a young little fella.
Jean also wanted to get some help on squaring up the blocks she made for this quilt, called Watercolor Garden. It’s a simple little block made for a quick quilt for her granddaughter. Another winner.
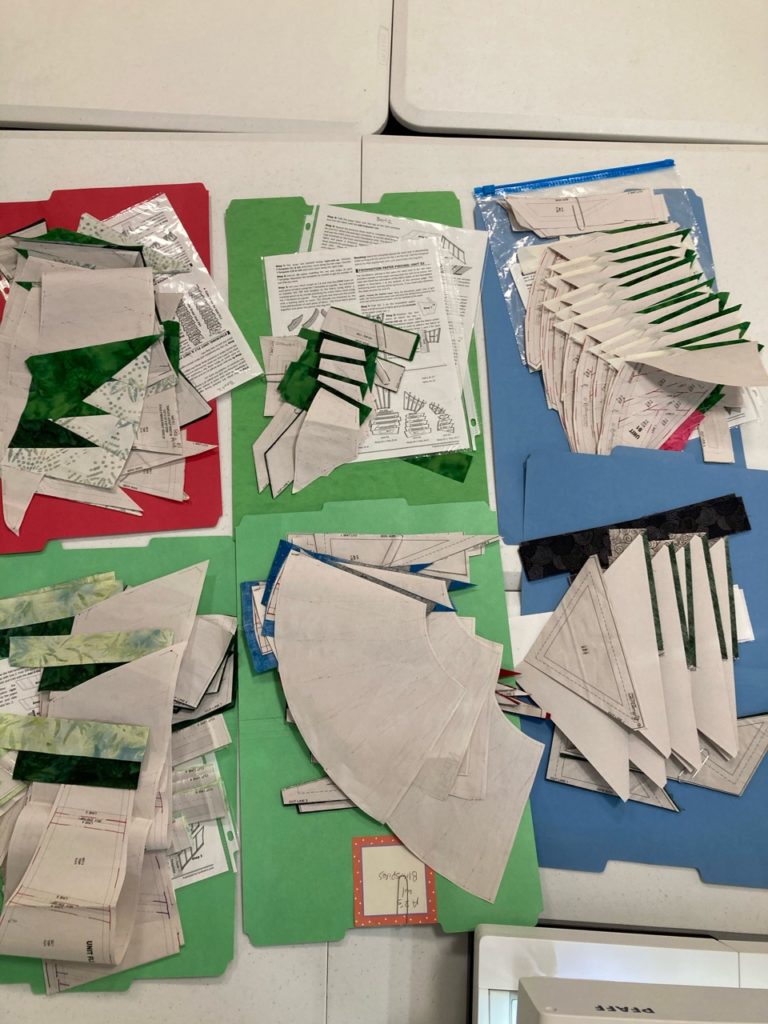
And for me, I’ve got the stacked folders happening today. That, plus some quilting on my domestic machine to finish off some Impatiens placemats. With a lot of repetition for this quilting, I like to mix in a little regular piecing to break up the process. One layer of folders, then a petal, another layer of folders, than a petal, and so on until all the way through the folders.
These are my folders, laid out for a quick view. Three different patterns between the six folders. I really enjoy working this way…helps to make quite a bit of progress every time I’m able to sit down to sew.Here’s the setup for the first petal of an Impatiens placemat. 2 placemats down and only 4 more to go!
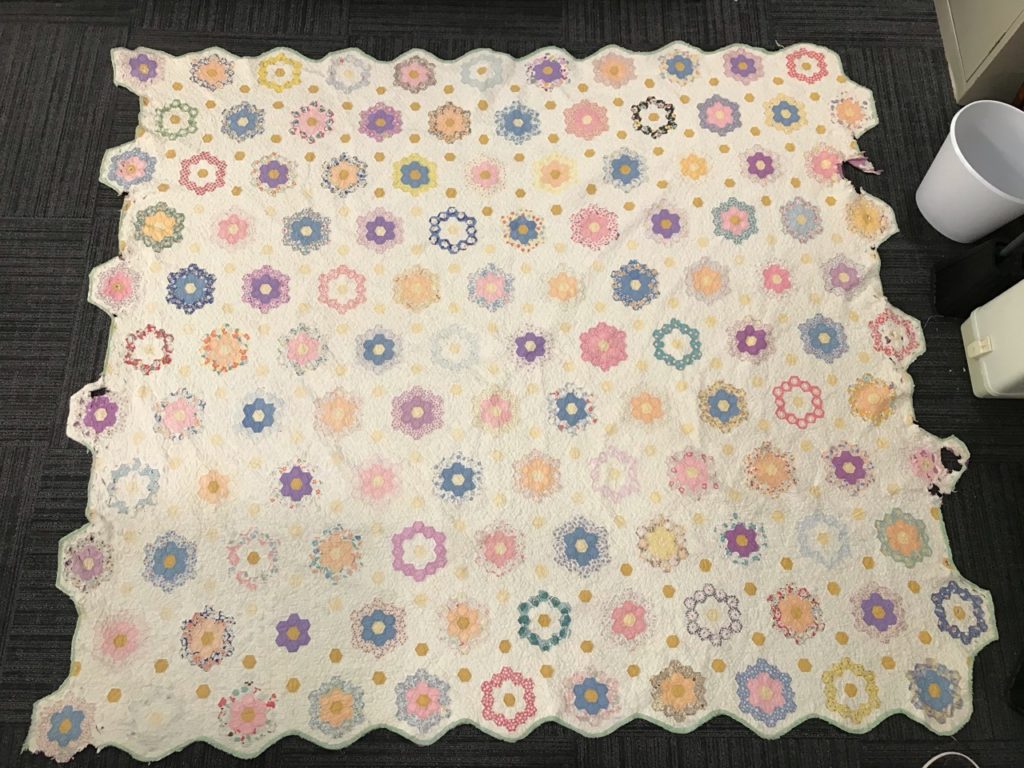
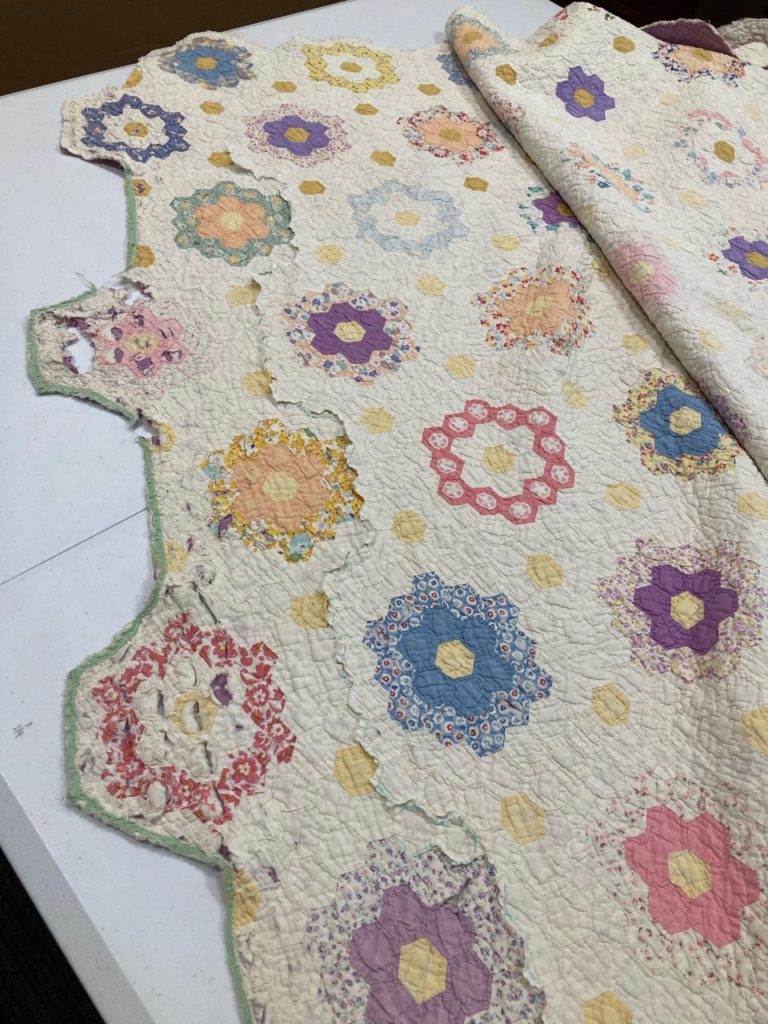
Then for seatwork this evening, I’m working on this vintage quilt that needs a bit of repair.
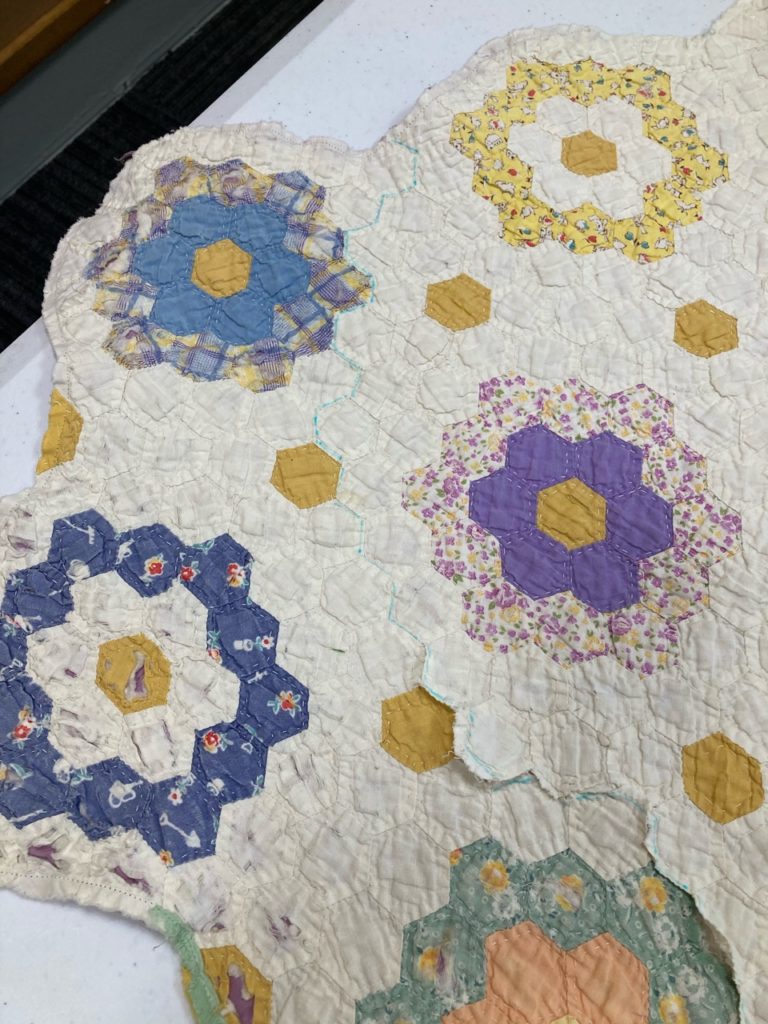
Remember this? I blogged about this and what work would need to be done.I’ve got a nice start on removing the first damaged side. Using a water soluble pen, I marked the path needed to remove the damaged section. It’s a bit slow going but will be well worth the effort to bring this darling quilt back to whole.Not much to finish on this side. I always love digging into a vintage quilt…there is so much to learn from each piece. This one is entirely hand pieced AND hand quilted. Interestingly, the quilting thread, which is cotton, is significantly stronger and more heavy than both the fabric and the piecing thread. Several of the hexie flowers are fussy cut as well. Definitely enjoying this one.
Lots of good things happened today. It really was a good day…Oh Happy Day!
I was rearranging a bookshelf today and I came across a UFO, tucked away in a notebook that I’d forgotten all about. Imagine that!
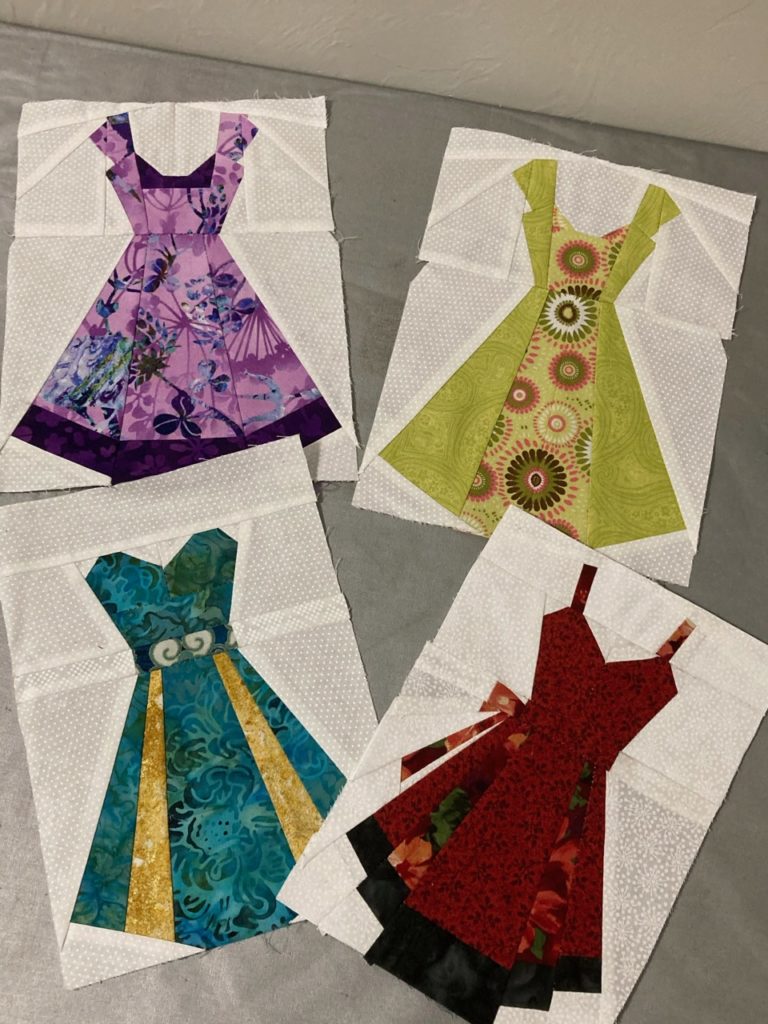
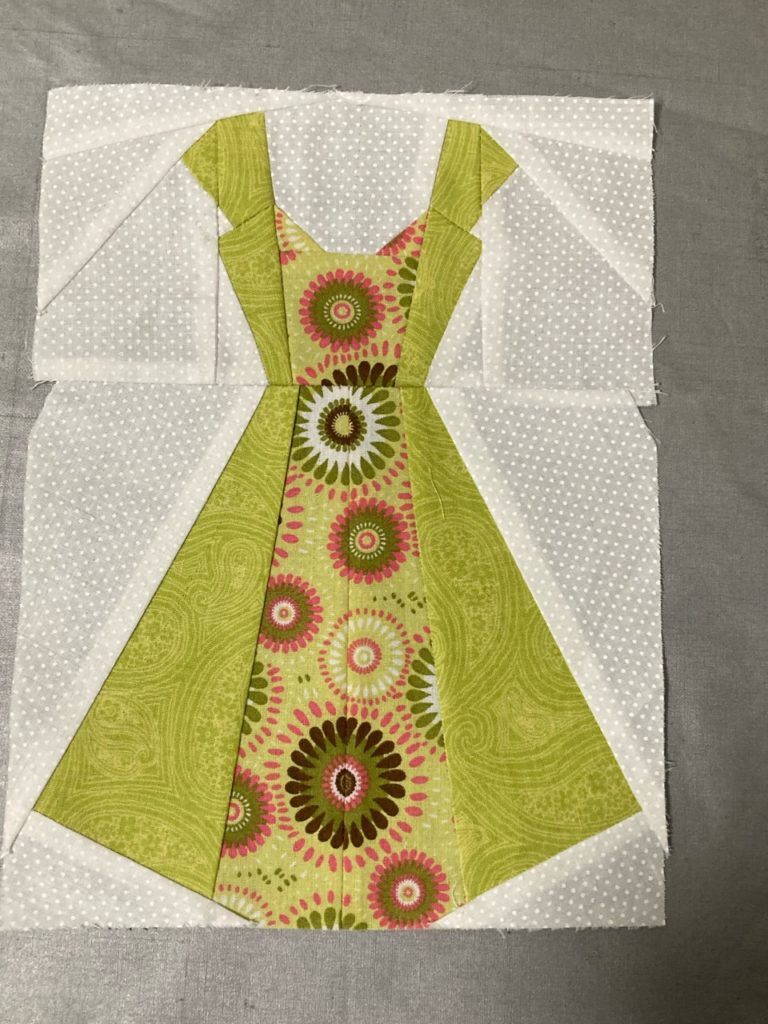
Here they are! I get the biggest smile on my face when I see these. Such fun fabrics and sweet looking dresses. I have a hard time deciding which is my favorite.
It’s a shame these little cuties are still unfinished, but I plan to rectify that toot sweet! I think the reason they are still in the block stage and not completed is that I simply couldn’t decide how to set them. Should I make them each into single little wall-hangings to be spread out in a couple rooms? Should I group them into pairs? Or should I put them all together in a group of four—wait—should they be place in a line horizontally…or vertically…or maybe in a square with two rows of two????
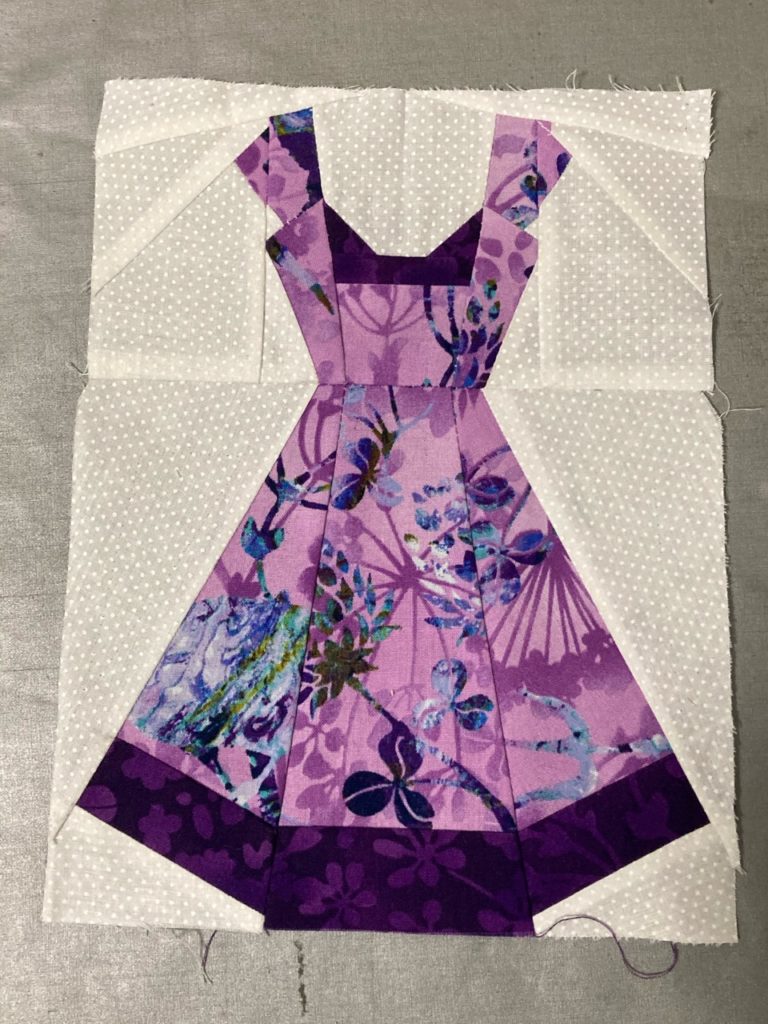
Obviously this little girl needs a trim to square up the sides, but how fun are these fabrics together?? I was so determined to use the big print as the center panel, I had to match together a couple pieces in order to get a big enough piece to use. Not too bad at that. Flashy and feminine all at the same time.And this one is just so ready for a dinner party. I would loved to wear something like this back when I had a figure to match. Who says you can’t mix batiks with regular cottons.
I’ve been stumped, evidently for years over the very same questions.
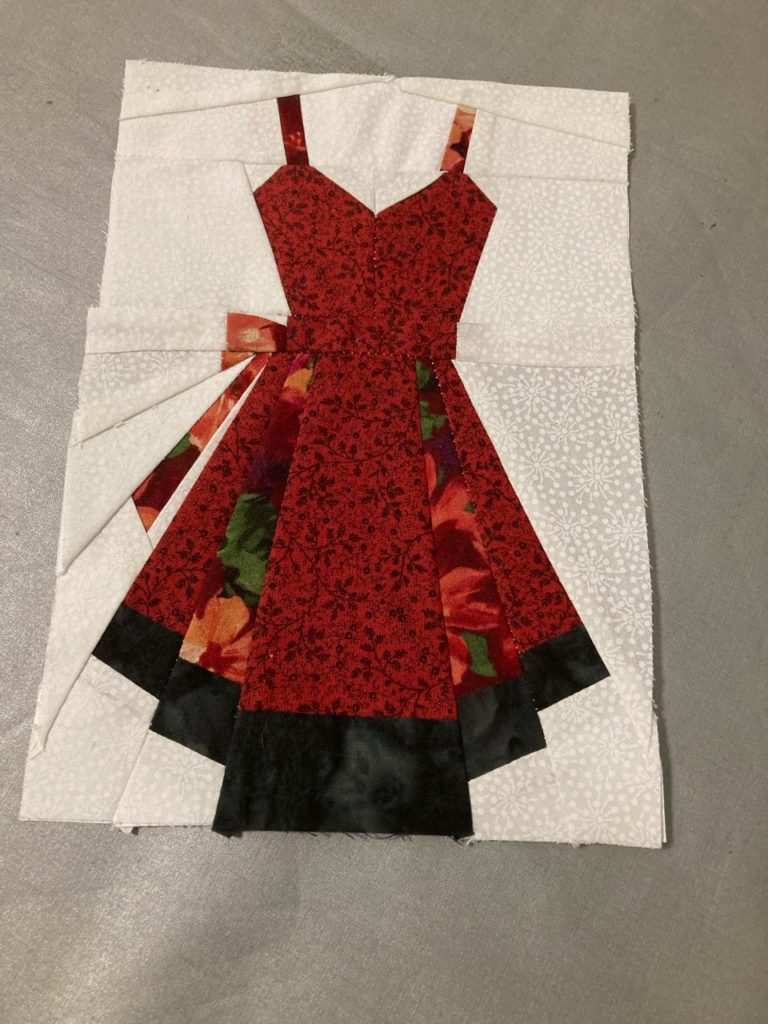
Maybe this one is my favorite…red IS my favorite color after all. Then again…maybe not….And then there is this lovely. Yes, red is my favorite color, but this one just makes me hum. It’s so awesome when something makes my heart sing.
I think the answer is just going to have to be…yes! To all those options! Which means of course, that I’ll have to make more.
Hmmm…. maybe not.
Now I love paper piecing. You could even say that I’m a bit crazy over paper piecing. But I’ve learned a thing or two about these types of patterns over the years. And the bottom line is that you get what you pay for.
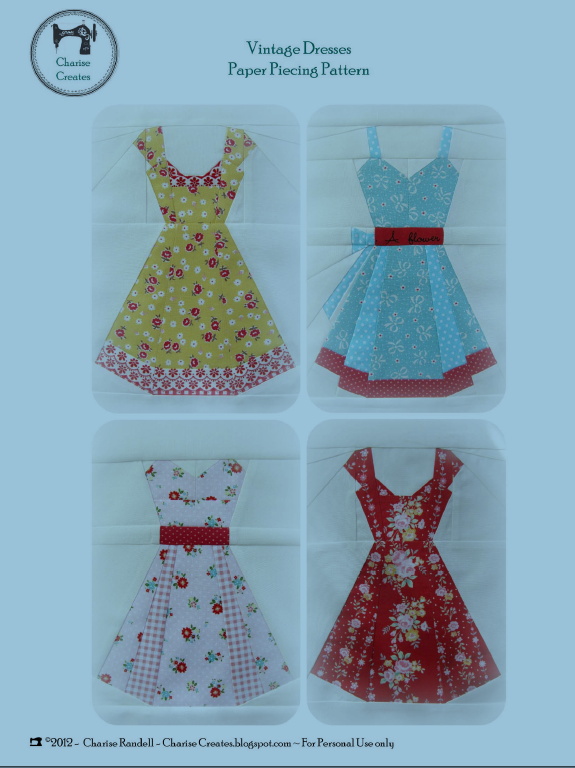
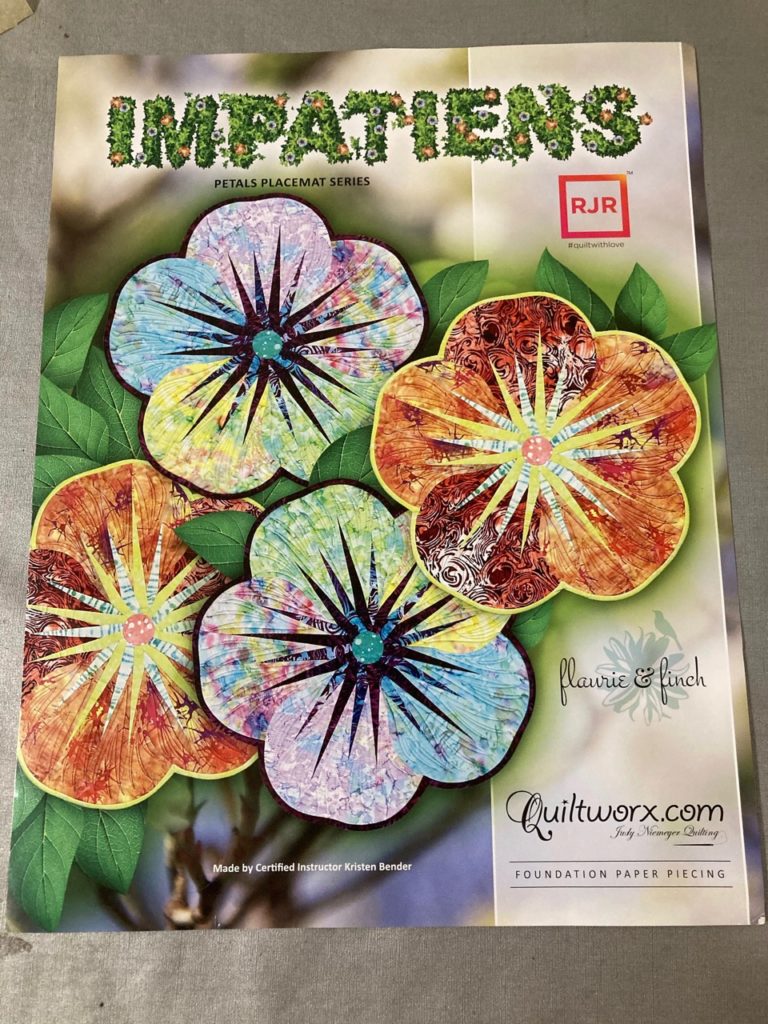
This is the pattern cover sheet that originally caught my attention. The cover samples are quite cute, but I have to admit that I like mine better. I wish the patterns were just a tad bit better, but I can’t be unhappy with the end product. I haven’t seen any of this designers more recent work, but I hope she’s still at it and going strong.
These adorable little dresses were purchased from a pattern designer from her on-line shop, just sure if it was Craftsy or Etsy. And she’s got several others that I also bought. Sweet, sweet little projects, and very reasonably priced. And! The patterns can be printed on your home printer with great success.
So, here’s my little bit of unhappiness with these patterns. There are no seam allowances written into the pattern. Definitely not the end of the world…not by any means at all! But it does make sewing these patterns a little easier to mess up without that little added bit on the pattern.
Her graphics are good…and the instructions are succinct in their explanation of what to do. I just think one little additional thing put on the pattern would make the construction just a tad easier.
I don’t mean to sound like a paper piecing snob. But I think I’m just really used to how Quiltworx puts their patterns together. And I suppose that would be why I’m working towards becoming a certified instructor for Judy Niemeyer and company. From their entry level patterns to their advanced level patterns, they build upon skills every step of the way. And it’s more than impressive.
But for now…I’m going to raid my scrap tubs and see about pulling out some fabrics that I’ve been eager to put into something small and quick just for me. I think these little cuties are going to see some needle time real soon!
Not only has Mission UFO launched…it has landed with a beautiful finish!
Last week Mission UFO was begun. We meet on Tuesdays and Thursdays at my home classroom/studio and anyone can come. The exciting thing is that in just a few together we are seeing some excellent finishes being made. For more information, contact me for details and you too can join in the fun!
Jean and her Prairie Star. What a great moment! Some happy tears were shed for this lovely success.
Jean has been working on this project for a couple of years, and it is a wonderful finish for her. I’ve been with her every step of the way and must say, it’s been a fun adventure. She has already made nice progress on a second quilt of this same pattern in a different color way. We’re both excited to see how her next one comes together.
Mission UFO at its finest! It’s such a rewarding experience when projects that have been put aside are brought out to reach their conclusion. The sense of accomplishment is such a nice reward.
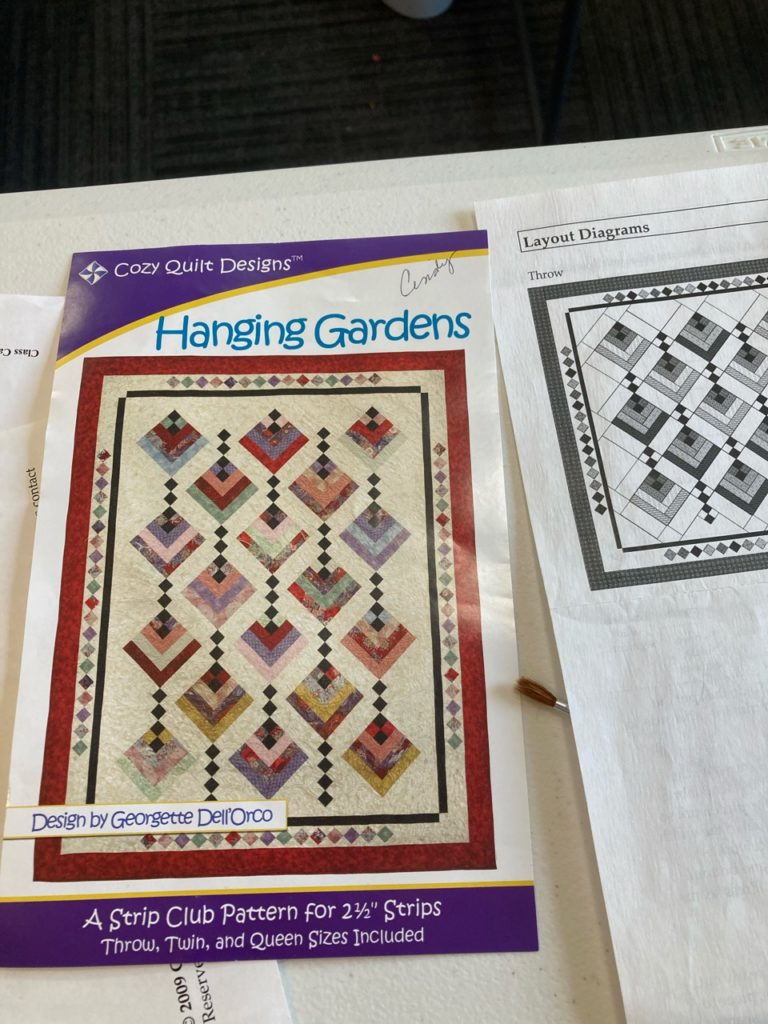
Here is Cindy’s progress on her Hanging Gardens project. She’s completed all her blocks and is now laying them out row by row and sewing them together. This a trickier build since it’s constructed on point. She’s doing a terrific job and it won’t be long before the top is completed.
I’m so excited for both ladies!
Here is the cover photo of the Impatiens pattern.
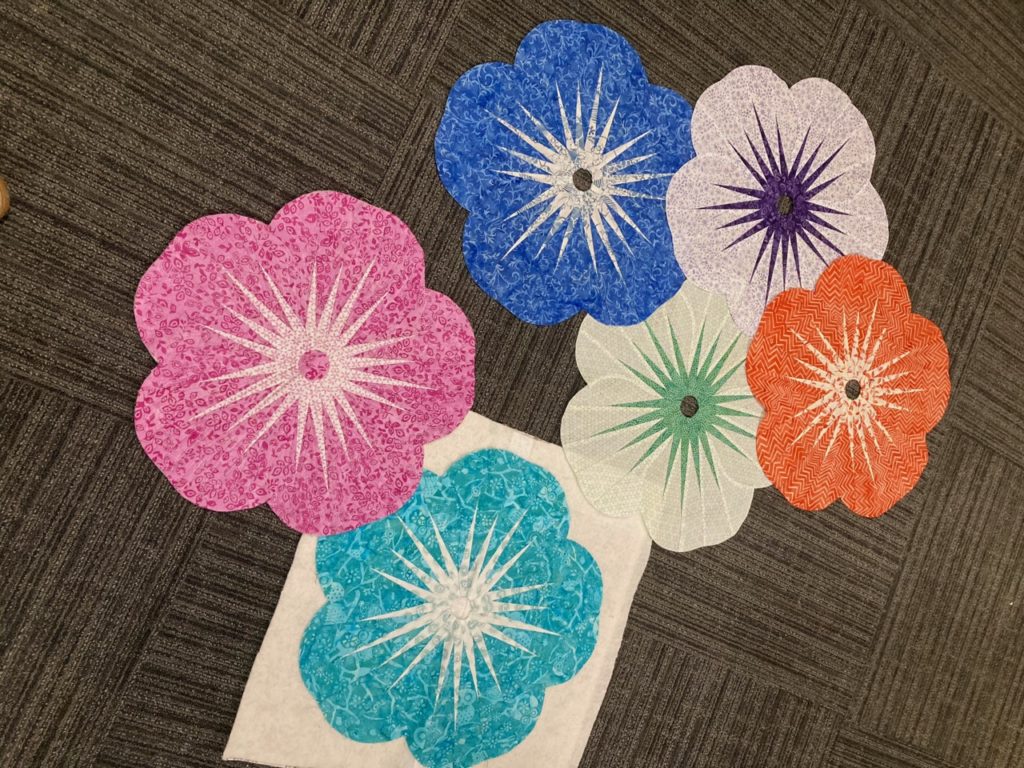
For me, one of the piecing finishes I’ve marked off my UFO list is the Impatiens placemats by Quiltworx. This is such a sweet pattern, and the color ways you can use are endless! This five-petal flower can be made with just lights and darks of the same color as I’ve done with mine shown below. They can be made with a different color in each petal with centers all the same. You can even mix up the colors within the petals to be two of one color and three petals of another then group them to resemble a pansy, which is one of my favorite flowers. The combinations are endless. And they make fabulous gifts.
Here are my lovely flowers. The pink one is waiting for her binding, and the little teal lady is prepped to quilt. The other four will follow their friends shortly.
The Impatiens pattern comes with enough sewing papers to make a set of 4 placemats. To make larger sets of placemats, you simply need to buy more sewing papers. Additional sets of papers are called “Replacement Papers” and come with everything you need to make more items…minus the instructions. No need to buy another set of instructions when you have them included in the first pattern you buy. I think that is a brilliant thing to do, and I always encourage my students to think of this option when they are considering making multiples of the same pattern.
I’ve had some quilters express concerns about the curved seams required in this project. To which I tell them Judy has designed these little gems to go together as easily as a hot knife goes through butter…it truly is amazingly simple. To have a student master this curved seam in one try is a huge reason that I am committed to this company and the way these patterns are designed and written. Truly the best in the industry, in MY humble opinion.
Quilting is always a consideration on every project and this is one that can be done easily on your own machine at home. Quiltworx includes a template for quilting these in each pattern packet. It is a suggestion and certainly not required at all, but it’s a great place to start if you want to try your hand at doing it yourself.
There are many different means to attain the same goal, so let me tell you about different options.
One method is to layer several sheets of newsprint type paper under the quilting template. Then, take the tread out of your needle and sew on the quilting lines, resulting in needle punched dotted lines on all the layers beneath the pattern. You can use a pouncing chalk to dust those lines onto each petal or use each paper as a single sewing template. A white chalk on dark fabric is not bad, but then there are the lighter colored petals. I choose not to use a colored chalk on lighter fabrics because it can be problematic when trying to remove the colored chalk.
You could also sew over the punched lines. That isn’t as easy for me to see where I’m going as I sew. These are both good options…just not for me. I need a solid line.
Since there is only one template for quilting but 20 petals to quilt, (5 petals x 4 placemats), I need to either mark each petal separately or make 20 copies of the template. The template is larger than what will fit on my home copy machine, so I’ll need to go another route.
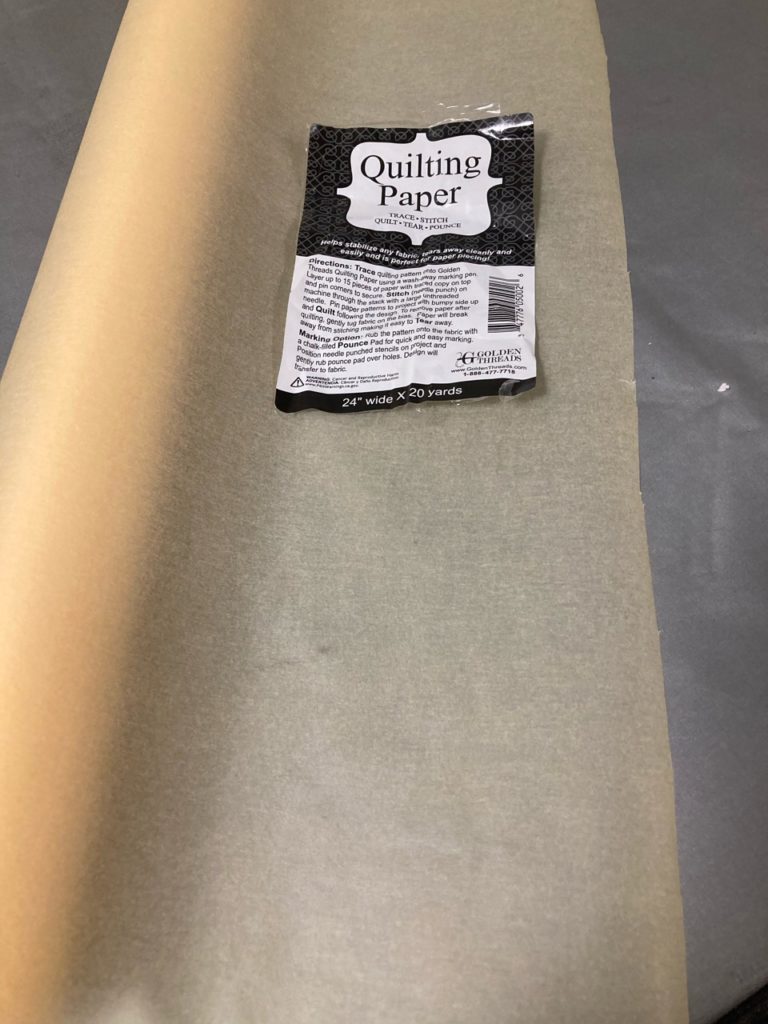
Ta-da! Enter Golden Threads Quilting Paper. Now, I must give credit where it is due, and my student Cheryl is the one who told me about this product and the method she used. I had Clubb’s order me a roll of this paper, and set out to give it a try.
I have, and frequently use the newsprint paper made for the copy machine. It’s a great product. But for this application, I need to be able to see the exact placement of the paper for where I need to quilt. You can easily see through this paper to know where your quilting will be. It’s a thin yet sturdy tissue that does not shred when painters tape is applied to keep it in place. You can use regular tissue paper to do this, just know that it is greatly fragile and any writing utensil you use can, and does pierce the tissue. Also…ink from pens and felt markers penetrate regular tissue. But NOT so with this Quilting Paper. Definitely worth the price, and it’s not that expensive at that.
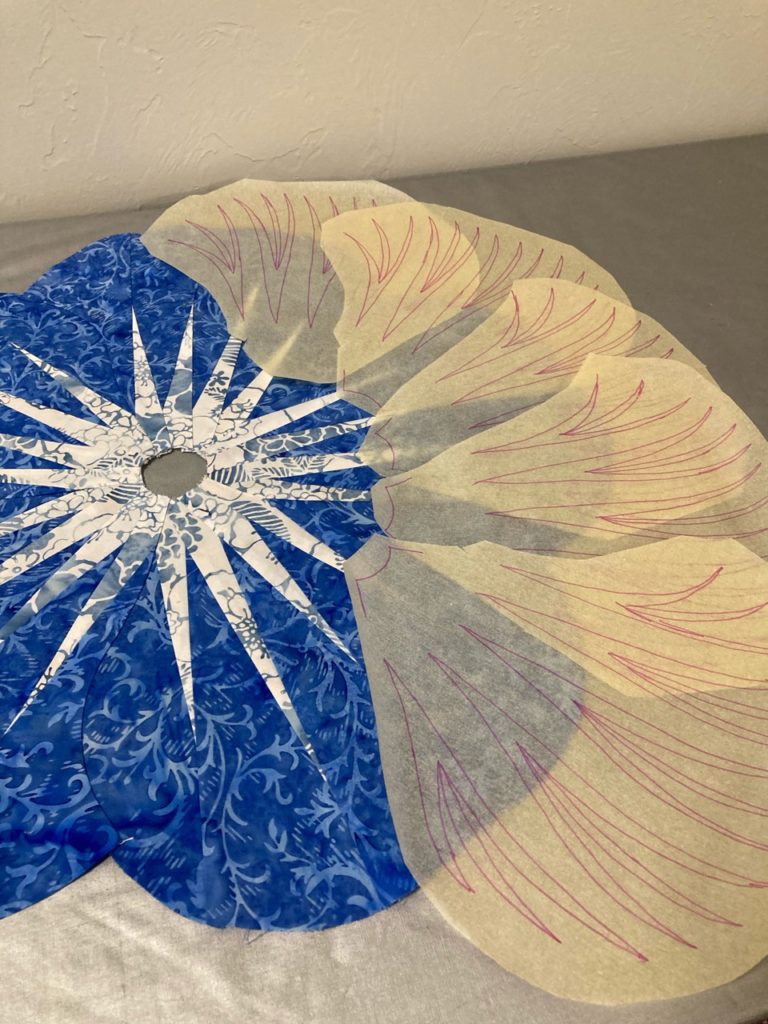
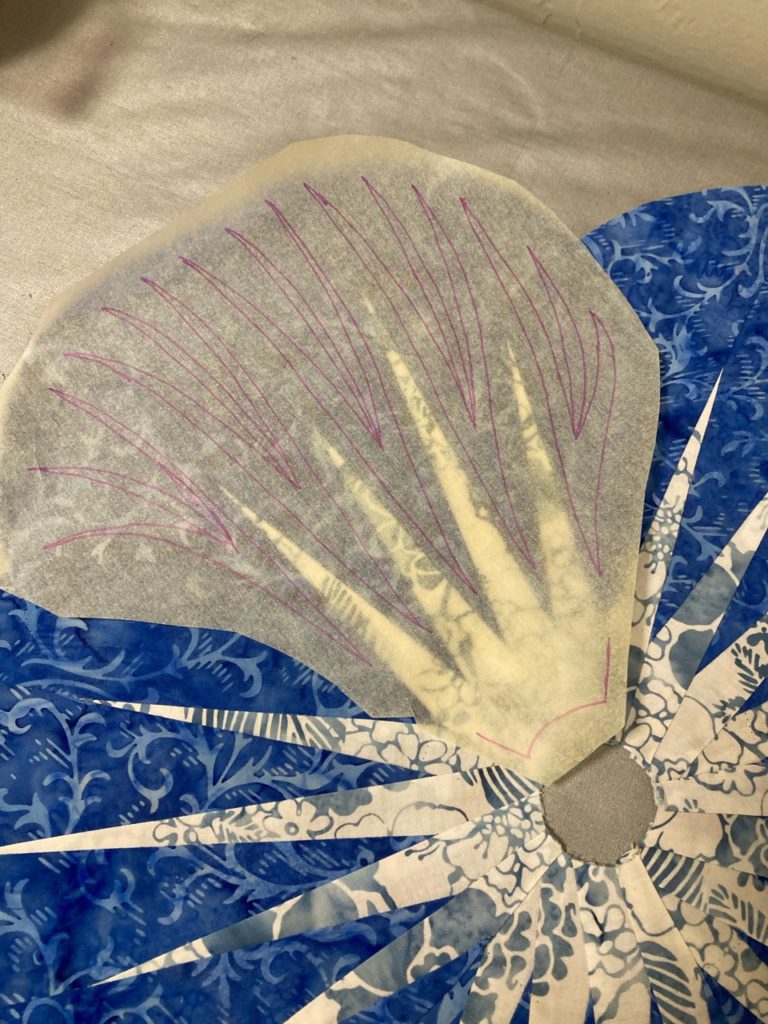
Using the blue flower as an example, I’ve got the 5 templates ready for quilting. Just need to make the “quilt sandwich” for it. Here is the quilting paper laid over the first petal. You can easily see the fabric under the tissue.
I used the bottom curve as a rough registration mark to know how to place each template. This paper also makes it easy to see where the quilting lines will fall so that I won’t put the curved stitching inside the center spikes where I plan to add straight line stitching after the curves are put in and paper removed. This is going to be fun!!
Easy Peasy! Can’t wait to show you all the finished placemats.
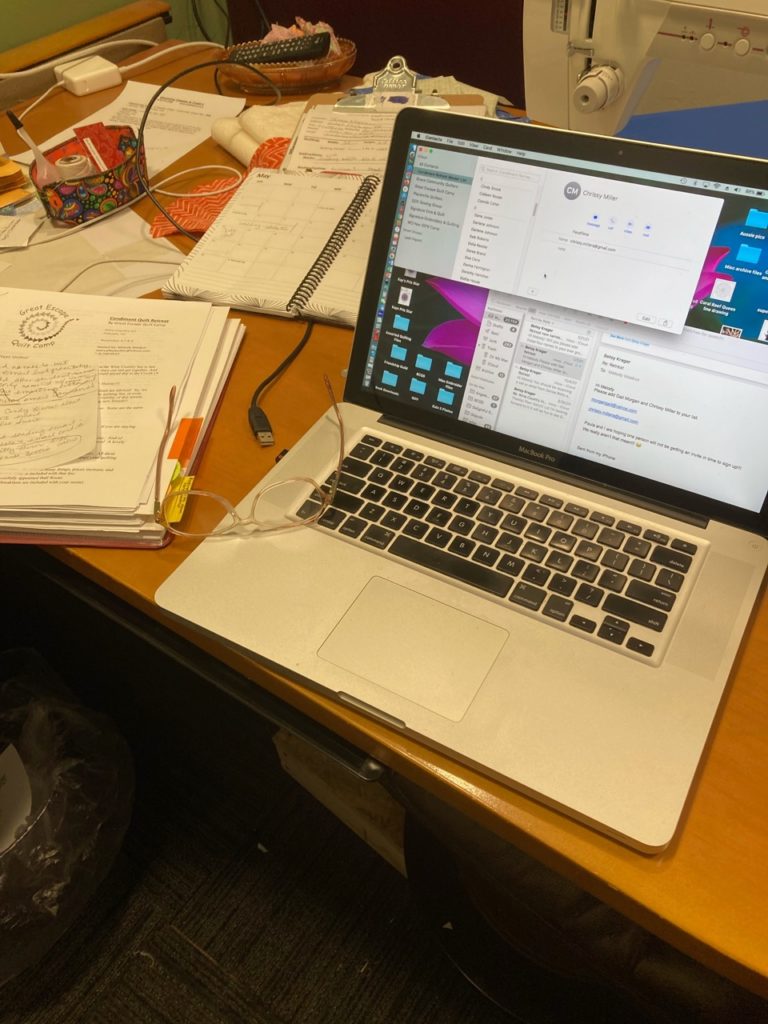
Ever wonder what it looks like around people that wear more than one hat? Here’s my desk today. It’s a paperwork kind of day.
Paperwork and writing…writing letters and making lists and menus and blog content and…. you get my drift.
I don’t mind it so much. In fact, I like it. And I’m liking it more and more the longer I blog. You see, I’ve always wanted to write a blog. And even more than that…I’ve always wanted to write a book. Crazy, huh? Maybe so, but why not?! Lol…as if I didn’t already have more hats to wear than the average bear. This crazy idea of writing a book started when I was in high-school and the theme always stemmed around my love of the old west. Now, quilts are a big part of that theme…and mining…Colorado’s old west has a huge amount of mining history and I basically live in the middle of this amazing history that was lived by real, everyday people.
Let’s talk about my hats, cause I’ve got several, and not everyone knows about them all.
I wear the hat of: A Judy Niemeyer Certified Instruction in-training. This has been an on-going endeavor and truly what has inspired me to sit down and begin my blog in a serious manner. I’m enjoying this aspect of growing my social media presence very much as I also begin to fulfill a dream that I’ve had for more than 45 years.
I wear the hat of: A quilting instructor. This goes hand in hand with the previous hat. But I enjoy teaching at many, many different levels. I studied to be a music teacher and much to my parents’ chagrin, did not quite finish. But! My love of teaching has stayed with me through home-schooling our children; teaching 4-H students about quilting; holding an adult quilting class for 3+ years which met once a week; and now I’m teaching Quiltworx patterns as I work towards my certification. It’s also a long standing and well established hat on my head.
I wear the hat of: A professional long arm quilter. A skill that I have been honing for the past 8 years and will continue to do.
I wear the hat of: Quilt restoration and repair professional. This is a skill that I’ve been growing since I was a little girl and owe a debt of gratitude to my great-grandmother who first introduce me to needle and thread. It was a crochet hook and yarn, but from there I progressed over the last 50+ years to the skills I have today. I spoke at length with another restoration professional several years back about how to find a way to gain some sort of certification for this skill set, and she graciously giggled and said there is none. The best who do this have spent their lifetime acquiring their skills and there aren’t any programs to equal their knowledge. We’re all self-taught. Now that’s food for thought!
I wear the hat of: Director of the Great Escape Quilt Camp, which today looked like a big messy desk as I wrote letters, compared notes from my last off-site retreat, made lists and began to plan menus. This hat is relatively new…maybe 6-7 years old or so. But it is something I absolutely and completely love to do. You see…I firmly believe that everyone has several gifts—or skills—they are innately good at without a lot of effort. It’s something they just do naturally. And without trying to toot my own horn too loudly…I’m pretty good at organizing events and being the hostess with the most-ess. And when I combine quilting and teaching and hosting all under the same hat…or rather all on the same head…well, life just sings away and I’m a pretty happy camper.
Other hats that I wear are the hats of: Being a wife…Being a mother…Being a daughter and sister…Being a home-maker…Being a farmer’s wife….and the list continues on and on.
But suffice it to say, I like my hats. I’m going to keep wearing them. I think I’ve finally found the right combination and don’t really need to add too many more. There will be some that come naturally from others, but they’ll get here when the time is right.
Now…where was that Director’s hat again…. it’s here somewhere!
Or, you could say, it’s a matter of pressing, aka ironing. In today’s everyday world, ironing is a skill primarily reserved for shirts and wrinkled pants and what not. But in the quilting world, using an iron is a necessity for every project we undertake. And believe it or not…ironing and pressing are not the same sport. Hey…it’s liberal arm movements, repeated many times for each engagement. That could be a sport, right?? And those of us who can use both arms are considered ambidextrous too, right? It is in my book, so I’m going with that.
Anyway, considering the topic at hand, I was pressing the last thing to pass under my needle and I happened to take a closer look at my little side table that I use for that purpose. Well, that led to another thing and then another until the whole focus of my morning yesterday involved a task I didn’t expect to be doing. Come on along and I’ll show you what I was up to.
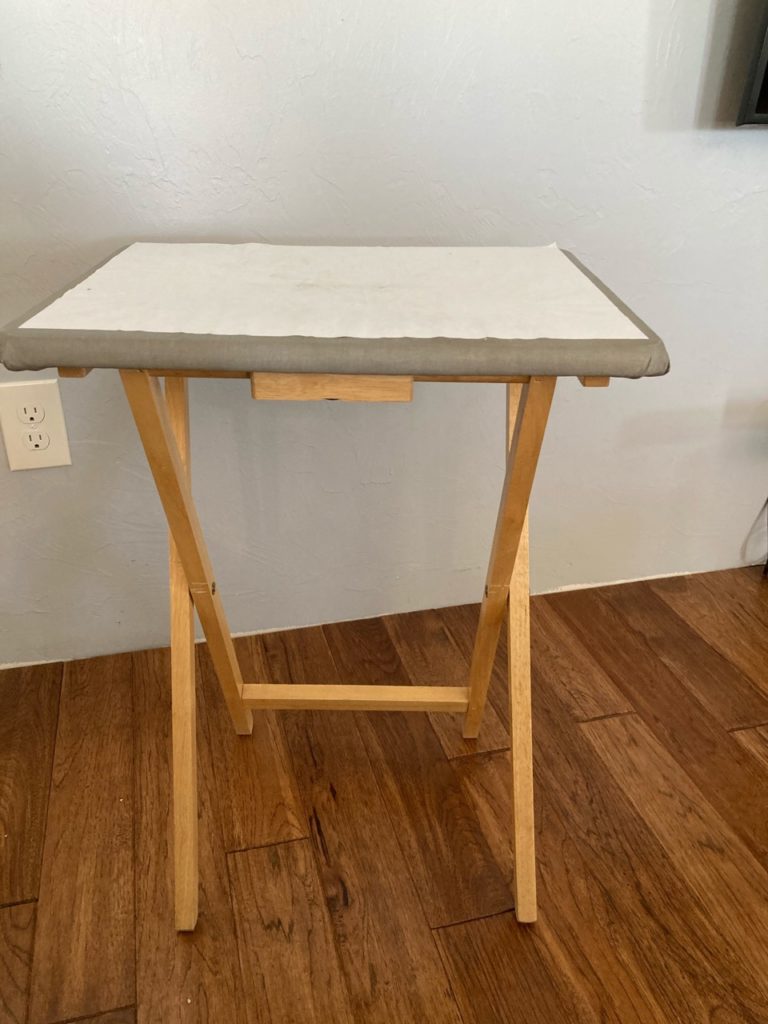
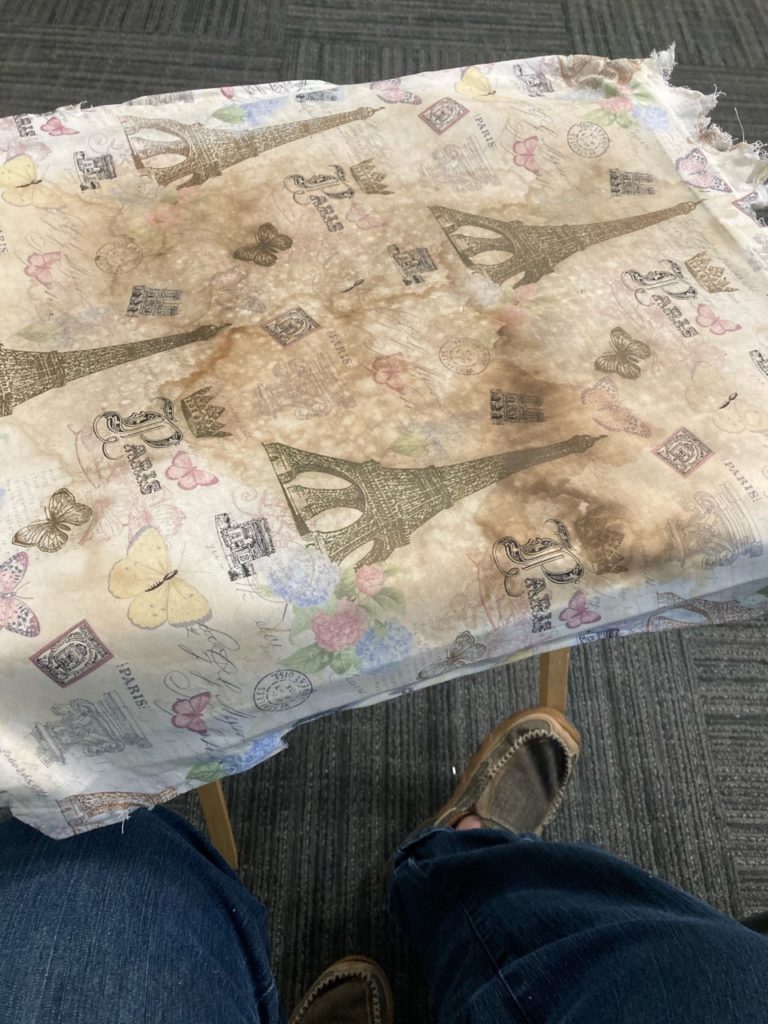
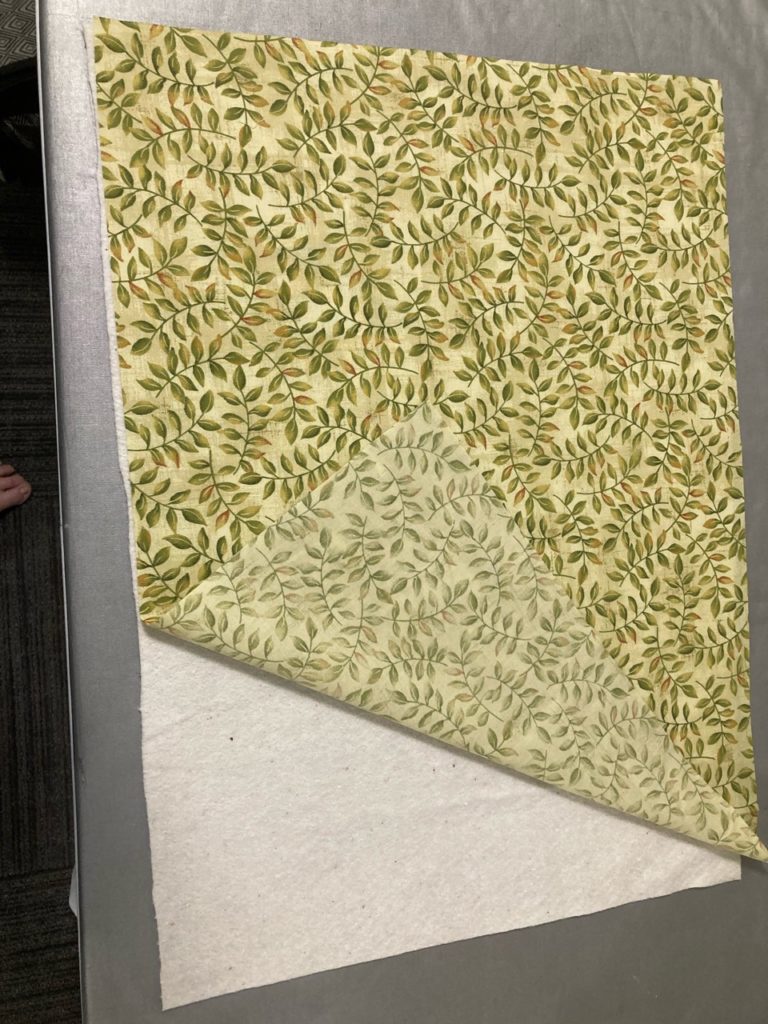
Here it is…just a modest little TV tray.
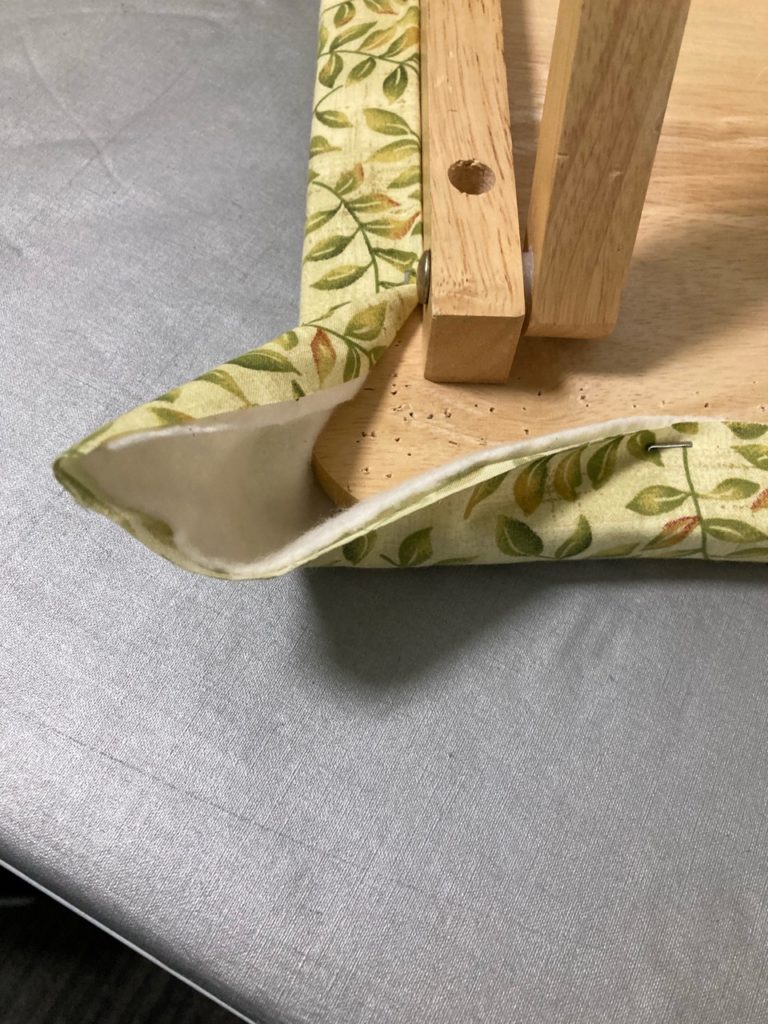
This is a wooden TV tray that I recovered several years back to serve as a little side table when I sew. Mostly for ironing, but it’s a perfect size and height for several tasks. It’s had a couple different layers of fabric over the course of time, but I decided to try some freezer paper on the top to see if it would help to preserve the fabric underneath a little longer before needing another layer.
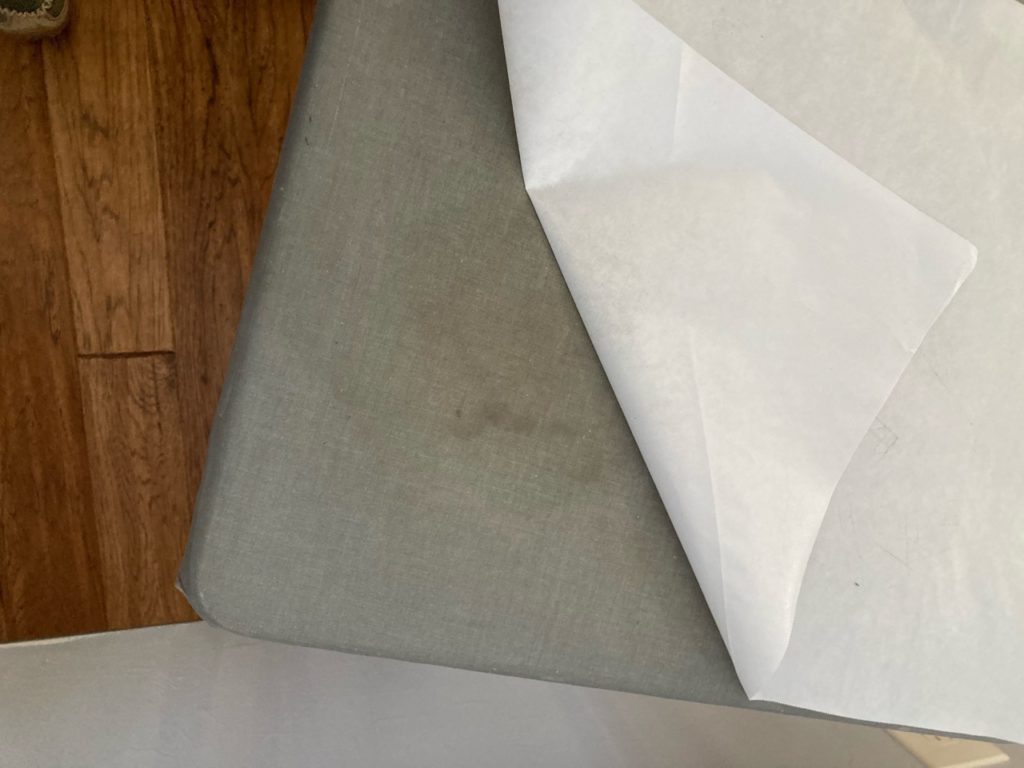
You can also see along the left side of the paper, the discolored fabric underneath.
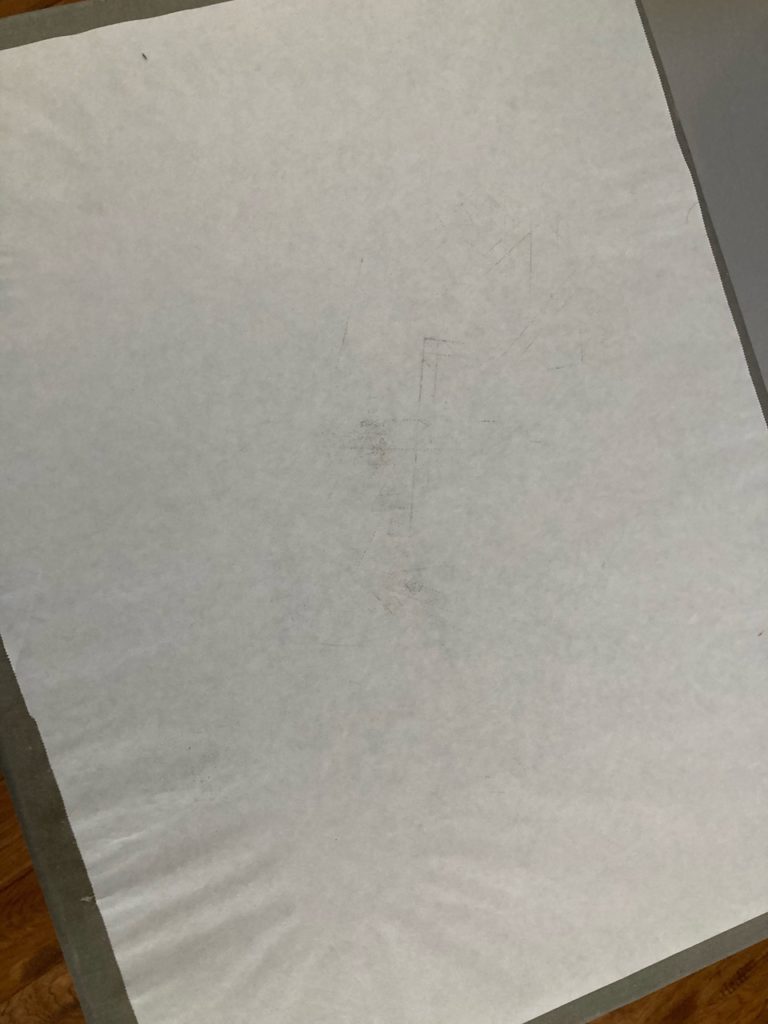
You can see here the freezer paper is showing some marks on it. A bit of ink that transferred from a home printed piece of newsprint for paper piecing…a bit of scorch mark from high heat…a bit of paper shrinkage from being steamed during pressing.
Up came the paper to this point, but just one more pull on the paper revealed the degraded fabric underneath.
I decided it needed to be replaced, so out came the gigantic roll of freezer paper that only comes in one size and will last two lifetimes. I cut a piece to replace the old, and proceeded to remove the marred sheet from my little pressing table. Unfortunately, the paper also brought up a spot of the top layer of fabric. Hmmmm…time to investigate.
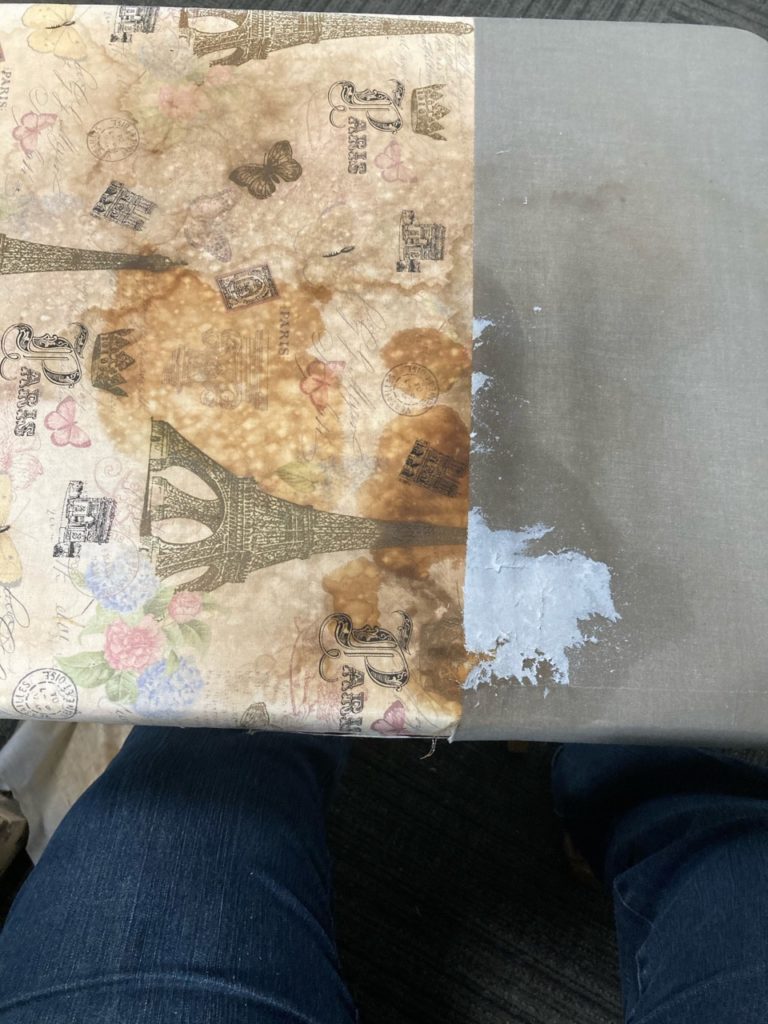
I found the top fabric had begun to basically rot. Rot?!?! Nah…..that couldn’t be…rot comes from moisture and other unsavory conditions. But it was damaged none the less, and had to come off. Then I saw the layer underneath. Yuk!!
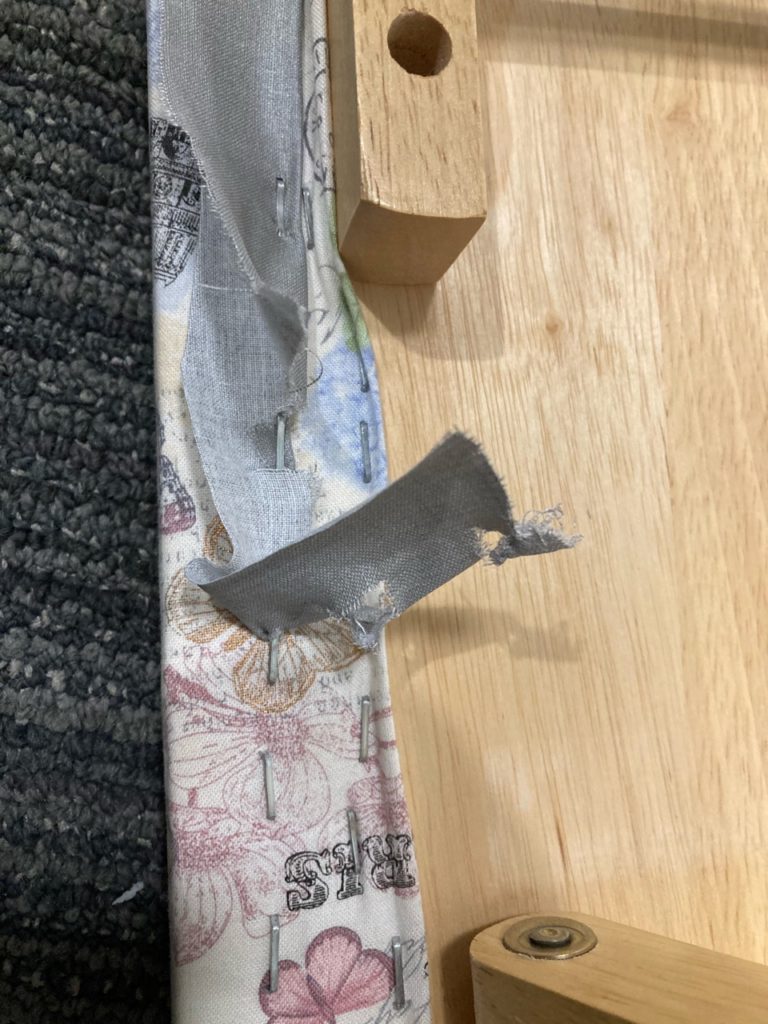
More tugging and pulling of the top fabric revealed the next layer down. Not very pretty at all. I really loved the initial layer of fabric. But it showed scorch very quickly, which led to the second layer…the practical silver ironing fabric came into service. What’s surprising is the ironing fabric is quite thin compared to regular cotton. But it outlasts regular cotton for heat reaction.
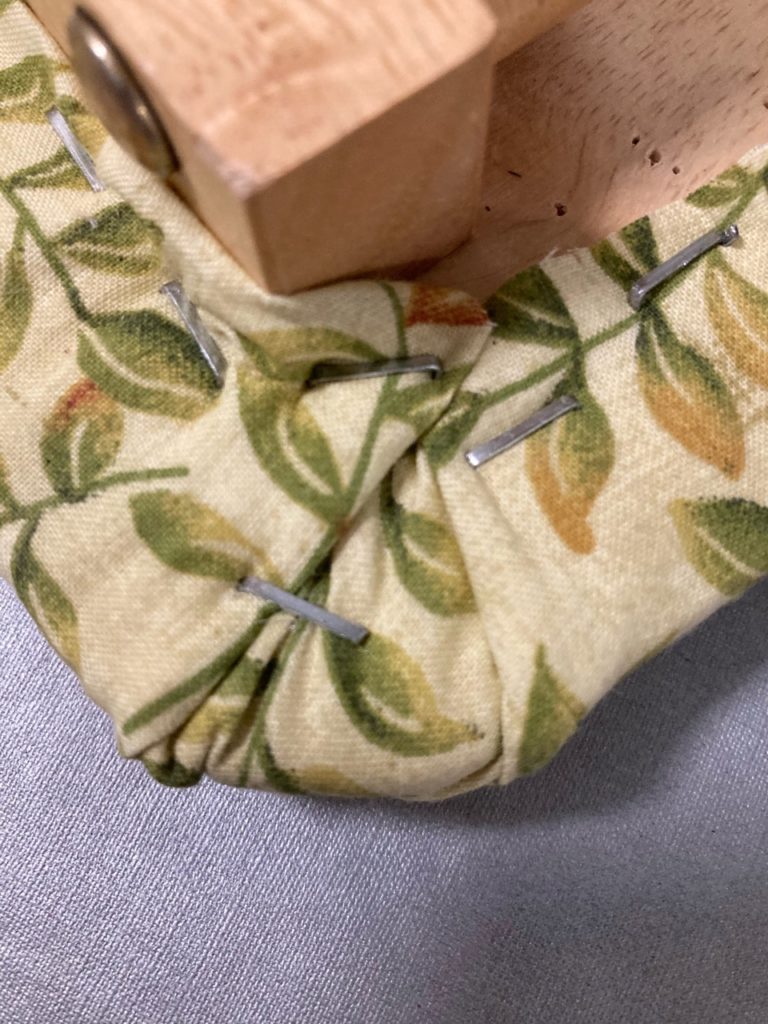
So, after some ripping and tugging and pulling on both layers with not much success, out came my tools and I began the process of stripping down the old and replacing it with the new.
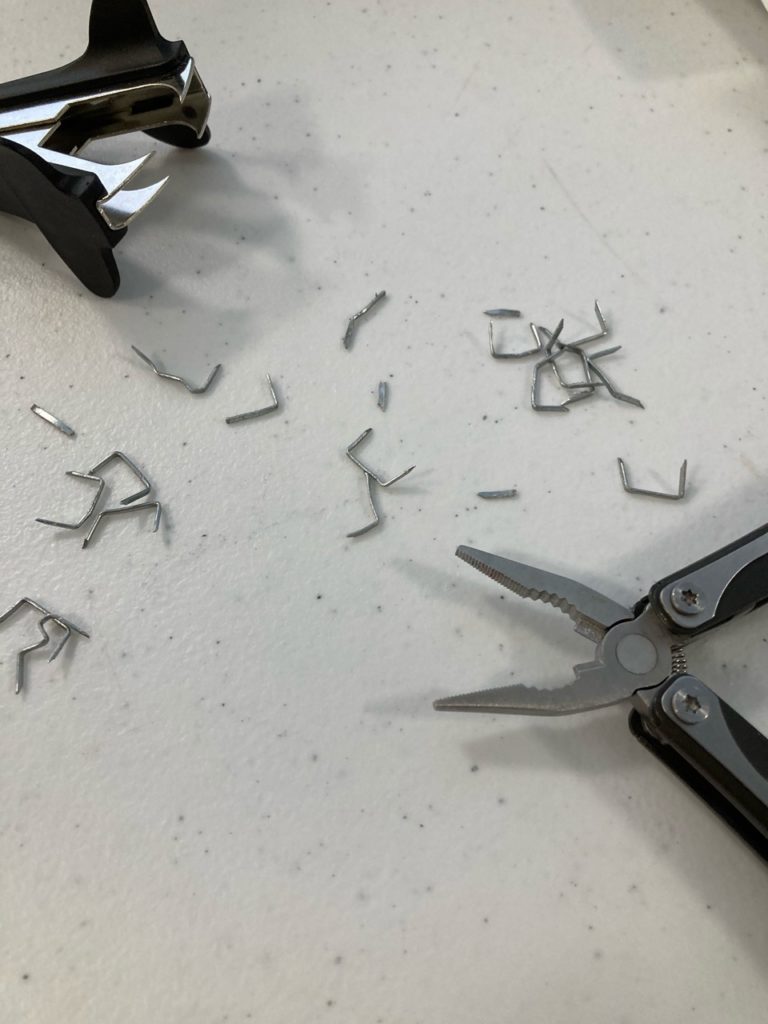
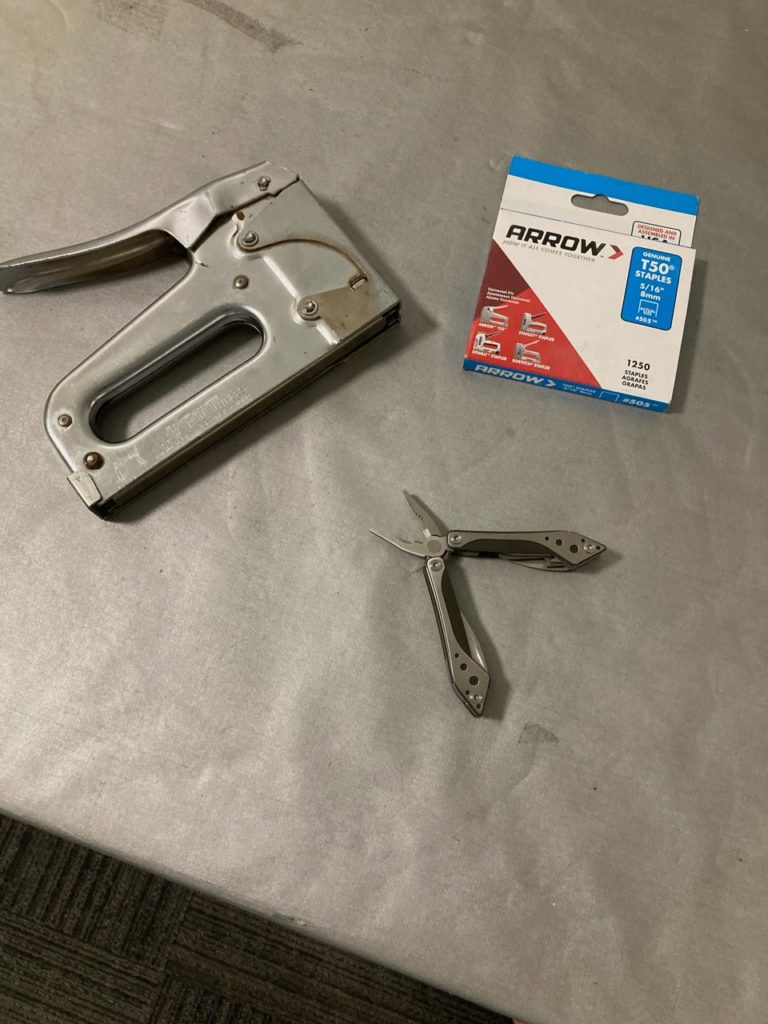
Brute force just didn’t work. I need some tools!Here are my basic tools for this step of the job. Nothing fancy. The staple puller helped in some places to get the staple separated from the fabric a bit. And my personal little Leatherman. Just the right size for my hands. No…I don’t need pink tools. But I do need them to fit comfortably in my hands. These two worked pretty hard for the morning.
The steps aren’t complicated, but they do take some effort.
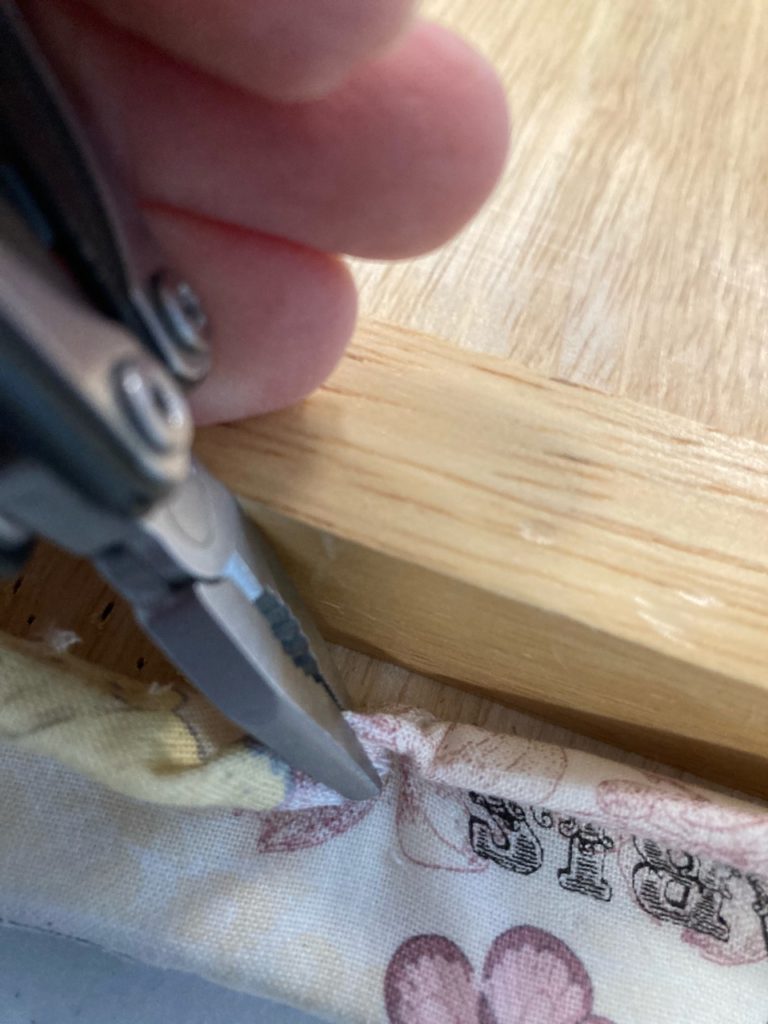
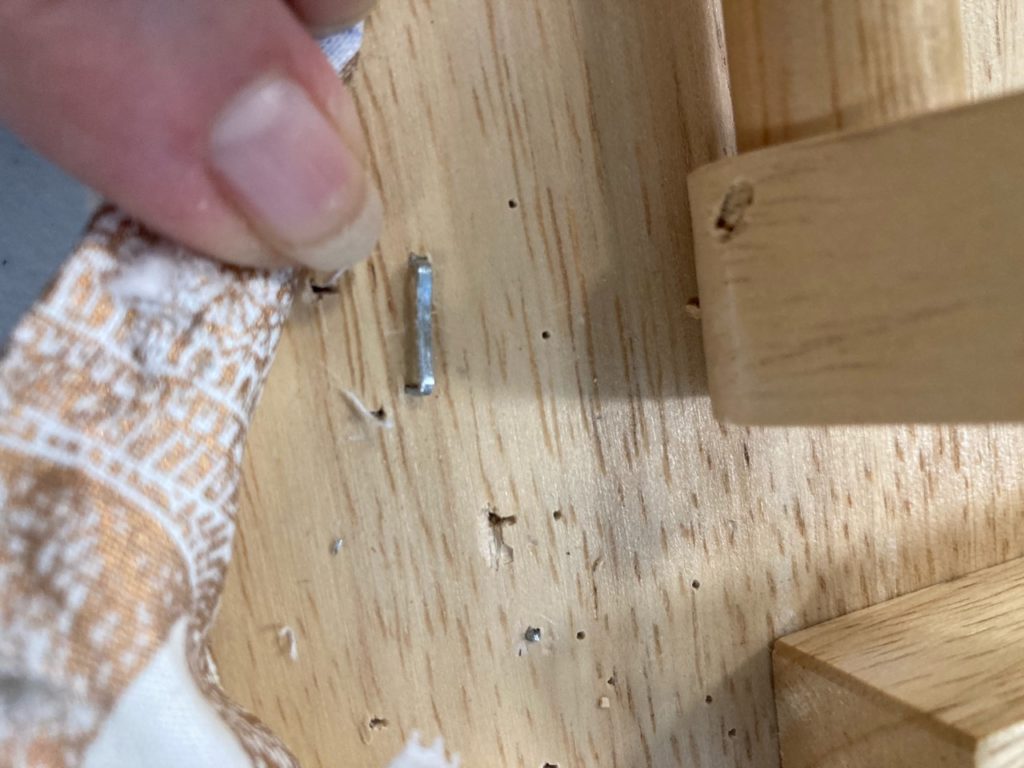
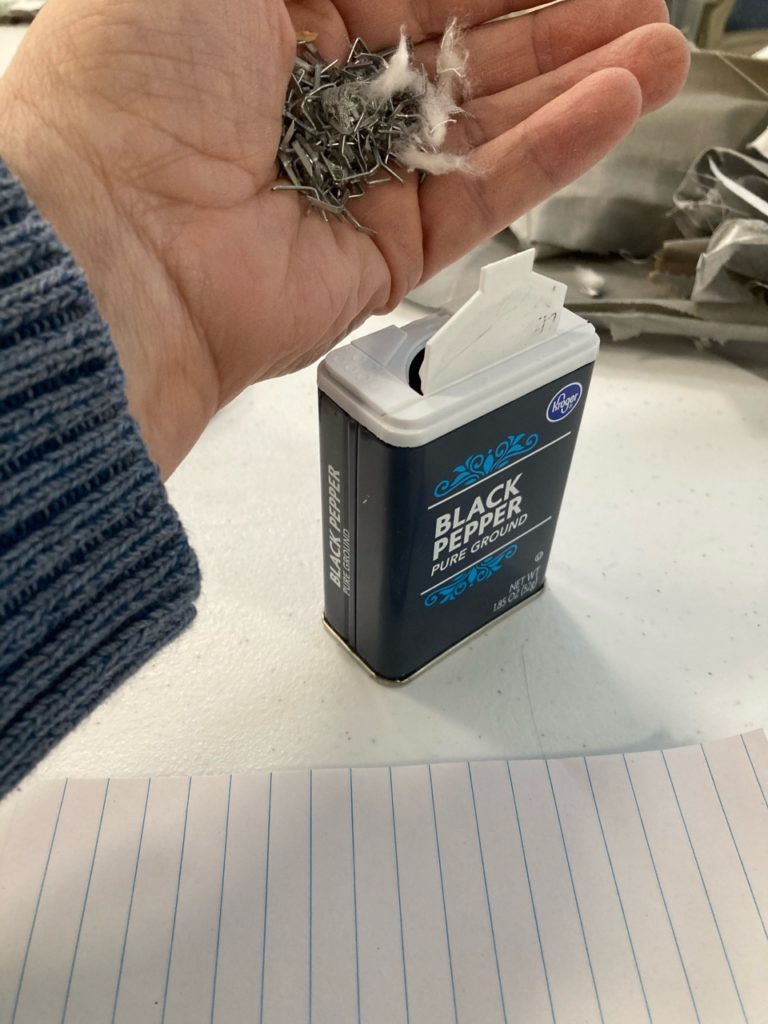
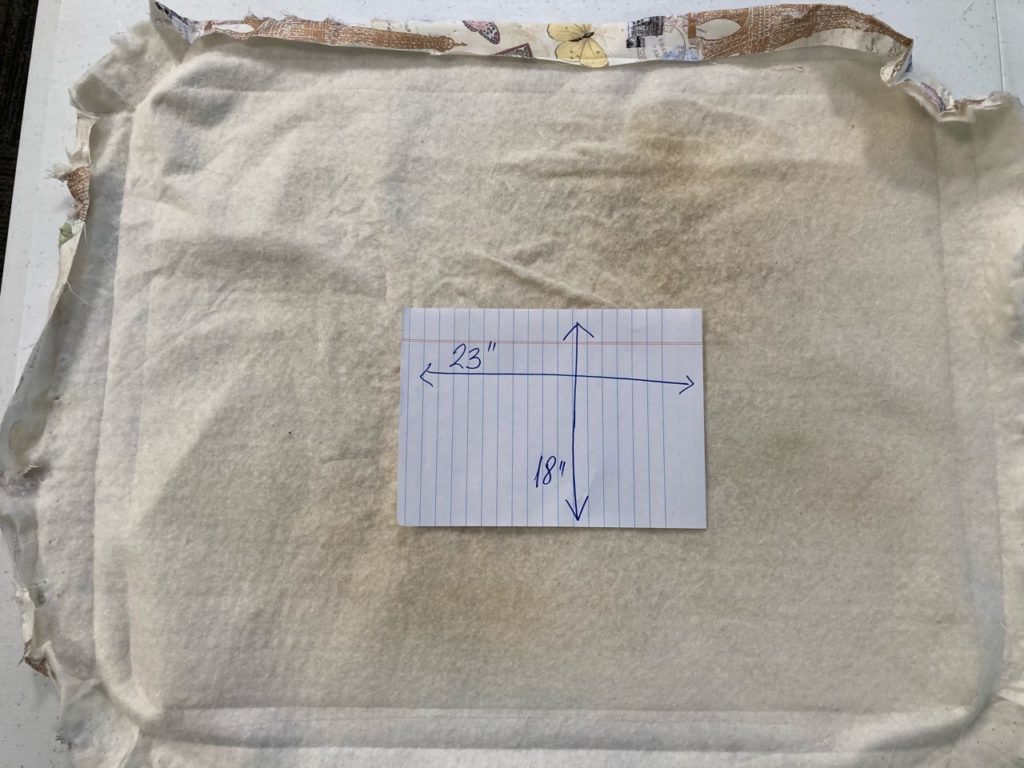
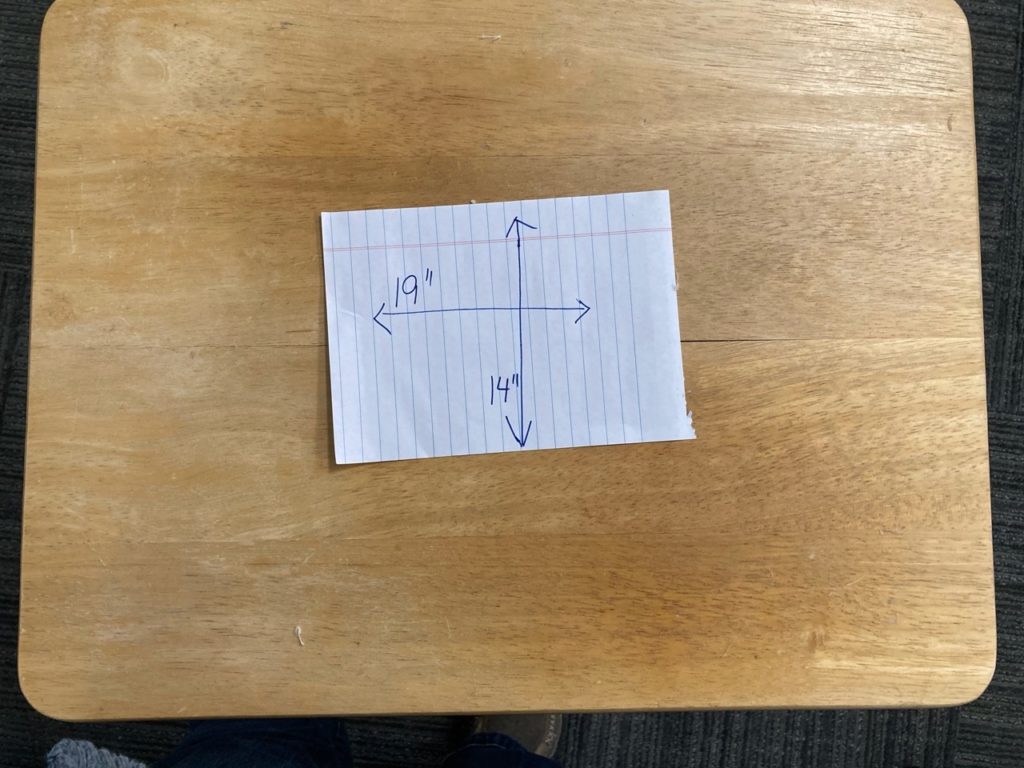
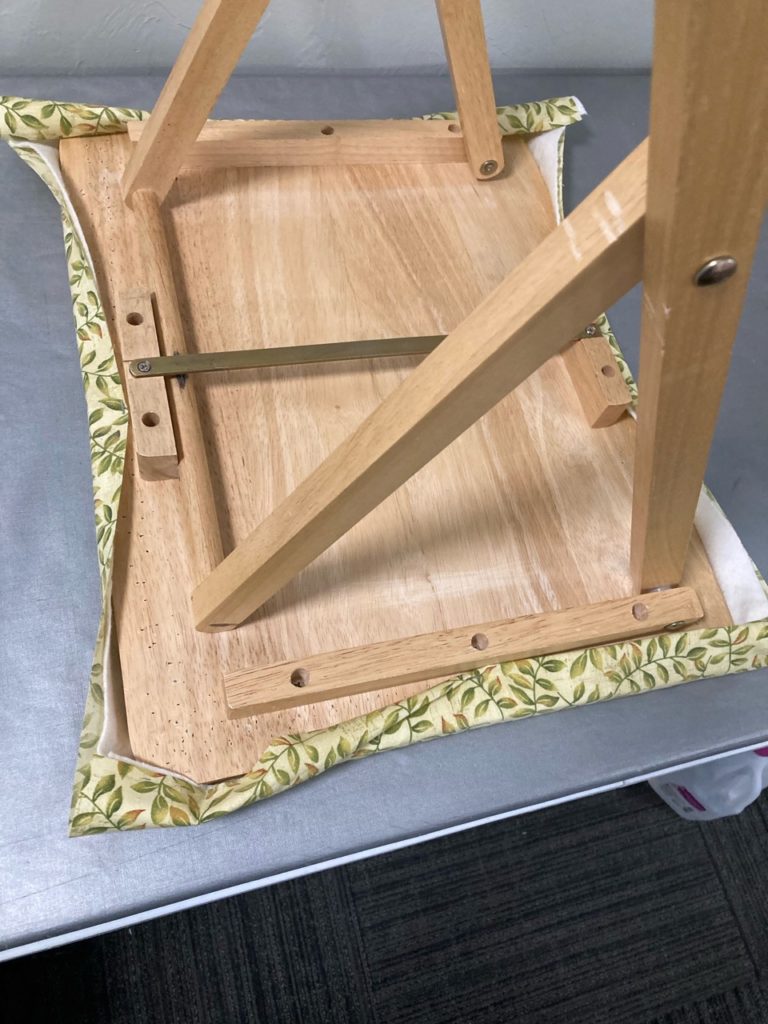
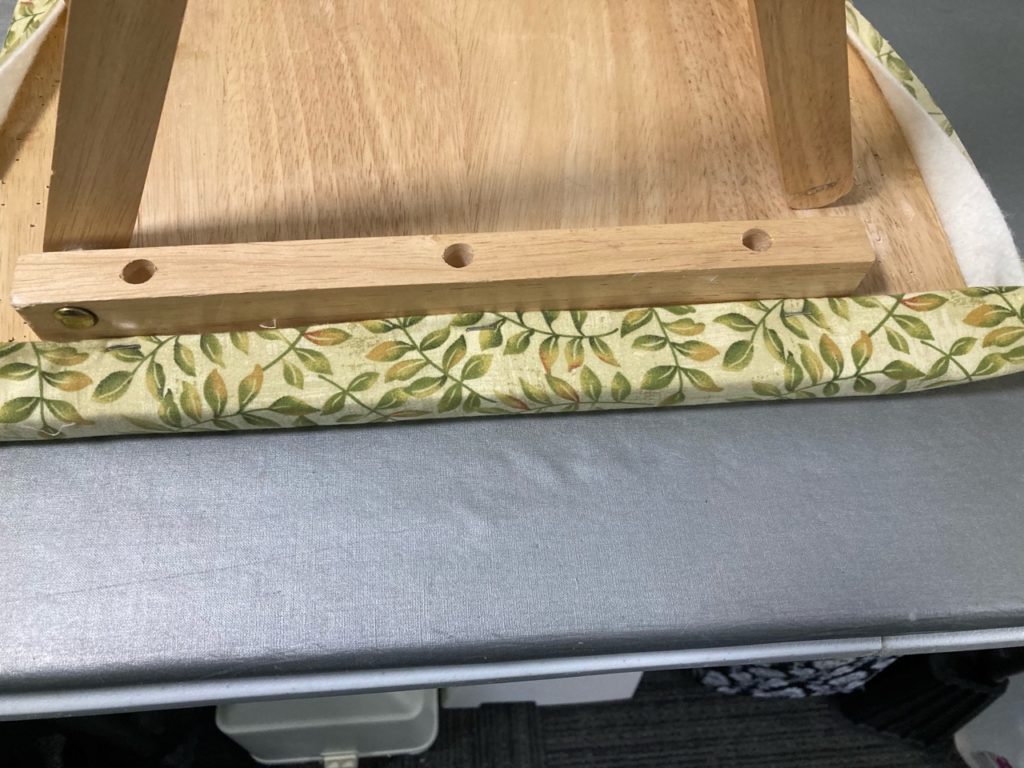
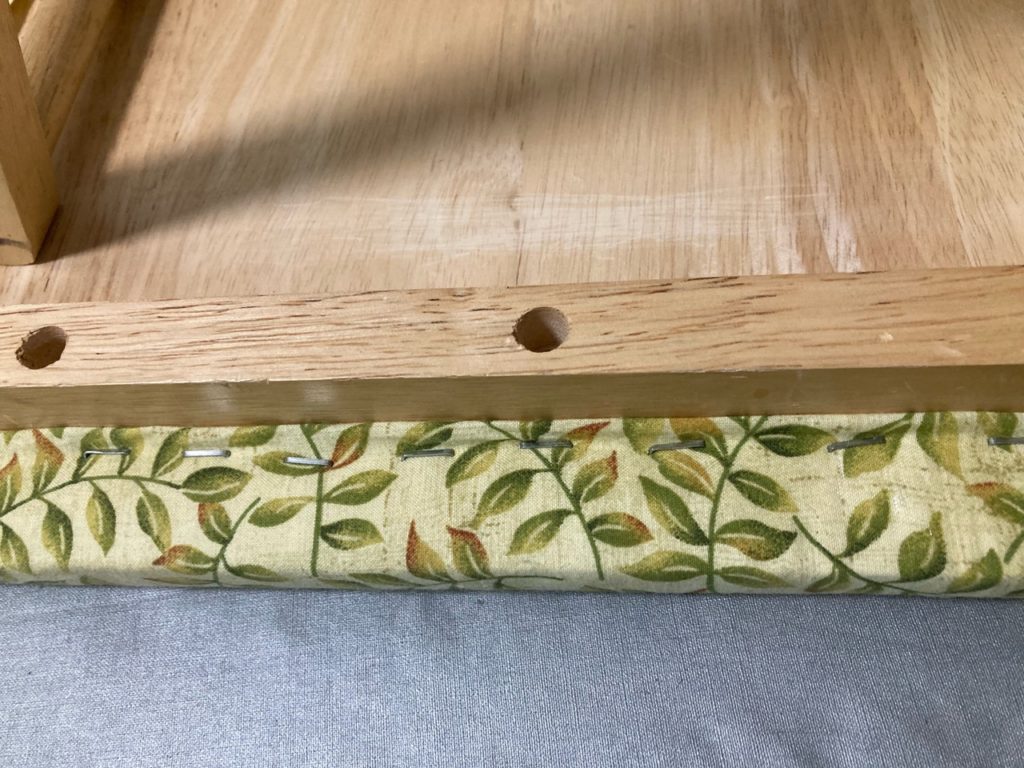
Sometimes, the staple pullers just couldn’t get close enough to the staple due to the frame of the table. So, I just grabbed the edge of the fabric and gave it a good pull. That loosened the staple nicely.Sometimes, the fabric just came right out and left the staple behind. These got a good tug. And sometimes they broke off. But I was able to grab hold to the broken portion and pull it out with the pliers from my Leatherman.You can see a broken piece here in one of the staple holes below and to the right of the staple I’m pointing to. It’s good to get these out too so there are no pointy surprises as you work.Off with the old! The rewards of my hard work. Trash bin for the fabric and into my little “sharps” container for the staples.Yep…it’s a recycled spice can. They don’t make official “Quilter’s Sharps Containers”. And if they did, it would probably cost much more than I’d pay. Just like baby furniture seems to be twice the price as regular because it has the word “baby” in it. So I’m frugal. Besides, every penny saved is a penny used to buy more fabric!But before this heap of ick went into the trash, I got the measurements for it’s replacement.And just to make sure I was doing it right, I measured the top of the table. Now I know the fabric to cover the table top and wrap around the edges needs to be about 4″ larger than the top surface.Here are the layers that will replace the old covering. A piece of 100% cotton batting and regular cotton, both cut to 23″ x 18″ .You’re going to need a staple gun like this for the next step. I’ve made sure to show the size staples used in this project too. Too long and the staples can poke out the top, and too short they won’t be able to hold the fabric very well. lol…ask me how I know. 😉Now comes the fun part. Turn the table over and center it on the fabric, making sure there is equal amount of material to pull over each edge. Start by placing one stable in the center of all four sides.Next, go around each side again and put a couple more staples in spaced equally. Make sure to gently pull on the fabric to make sure it is taut, but not distorting the other sides.Corners are next. Trim off excess fabric to keep from accumulating too much mass for the staples to pass through and get a good bite for holding in place. There’s no magic to the method of making a tidy corner. I just approach it like the wrapping of a present…it’s easy peasy.Here’s my first corner. It’s tidy enough and doesn’t need to be any better than this.. And just so you know…each corner is a bit different from the last. That’s ok with me. I just need it to be done well. Finished is better than perfect.When the corners are all done, then I go back and fill in staples all along the edge of the material. Again, making sure the fabric is taut and secure.
Ta-Da!! Here’s the finished ironing board. I’ll still be adding a sheet of freezer paper to protect the new surface. But for now, I’m enjoying the fruits of my labor.
Thanks for coming along on this mornings bunny trail!
I did a fair amount of that this weekend. You know, doing the busy work of a home…some laundry, some dishes, a bit of cooking and so on.
The laundry and dishes are the same for us all. And pretty much so is the cooking, but over the weekend I did some batch cooking so that I’d have a few things for later in the week. There was a huge stockpot of vegetable beef soup that bubbled away for an afternoon. And some Keto snacks for us to have on hand when the urge to nibble makes its appearance. A favorite for the man of the house is Key Lime Cheesecake Tarts, and for me it was Lemon Poppy Seed Scones. Other menu items were Keto Stroganoff, a Chicken Tortilla soup, and Baked Salmon with a Parmesan Basil Crust. Left overs and snacks to get the week started. Can’t get any better than that.
And a bit of this happened.
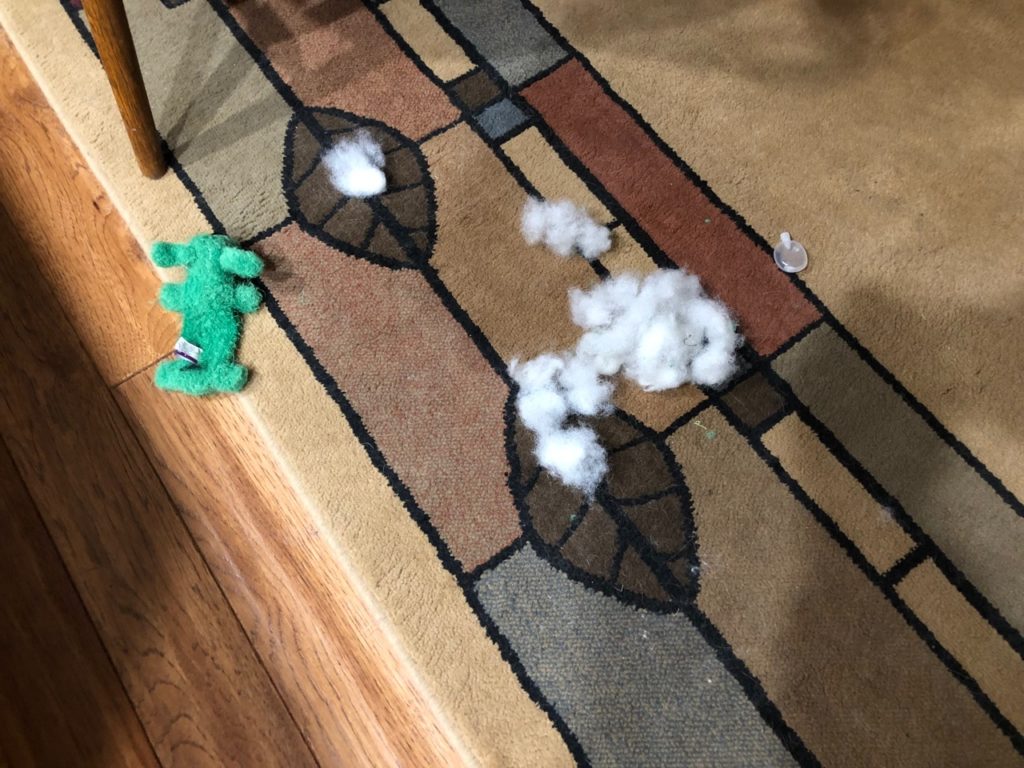
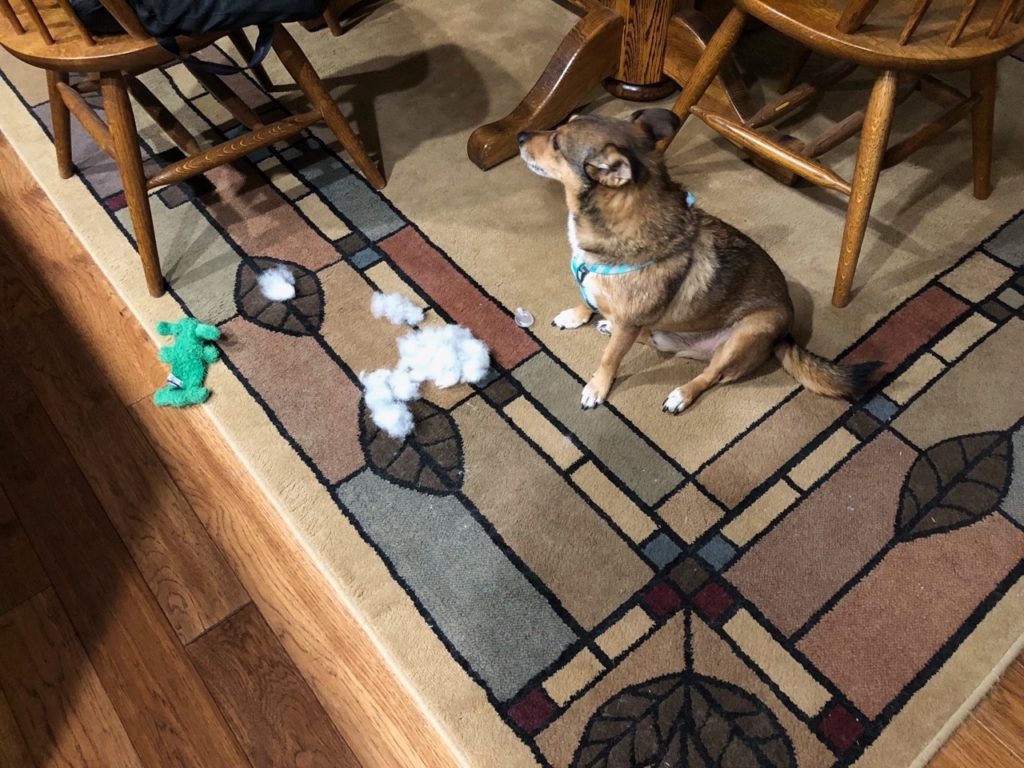
Buster got this little stuffie from one of my student this past week. I was really proud of him too, because this little green toy stayed stuffed for 3 whole days before losing its fluff. We retrieved the squeaker that’s laying towards the upper right of the picture. But once the fluff was out for all to see, the work was done.He wasn’t shy about owning up to it either. Now, our little green friend is re-stuffed and ready for the next time the oven goes on. Access to the fluff will be a bit easier, as the small hole won’t be sewn shut. A repeat de-stuffing hole is much easier on us both. Besides, I’d had to think that there would just be another hole and another until one day, poor green stuffie would look more like swiss cheese than an anxiety management tool.
You could call it murder on the dining room carpet, but we just call it a de-stuffing. And the culprit sat right there to be caught. Buster doesn’t like the oven, so whenever it gets turned on, he gets wound up and super nervous. We’ve found some “calming treats for dogs”, which only work so-so. But sometimes, the bugger gets a bit more anxious which ends up in a floppy toy on the floor. I just gathered up the stuffing and put it back for the next time he gets antsy.
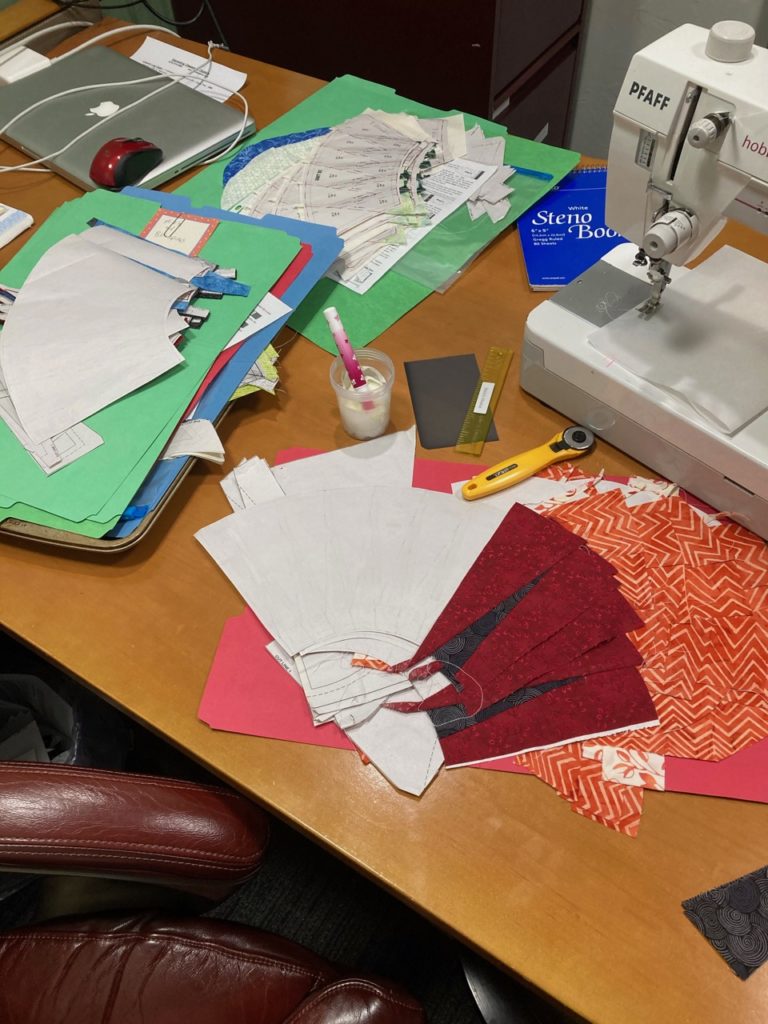
I did get some sewing time in. This is what my desk looks like when I’m working. Kinda messy…but it’s all part of the work I love.
Love working on all these different projects. It’s a restful place for my thoughts when it’s quiet. But for today, I had my TV on and was streaming the series “White Collar”. I use a Roku, and it works really well in my studio.
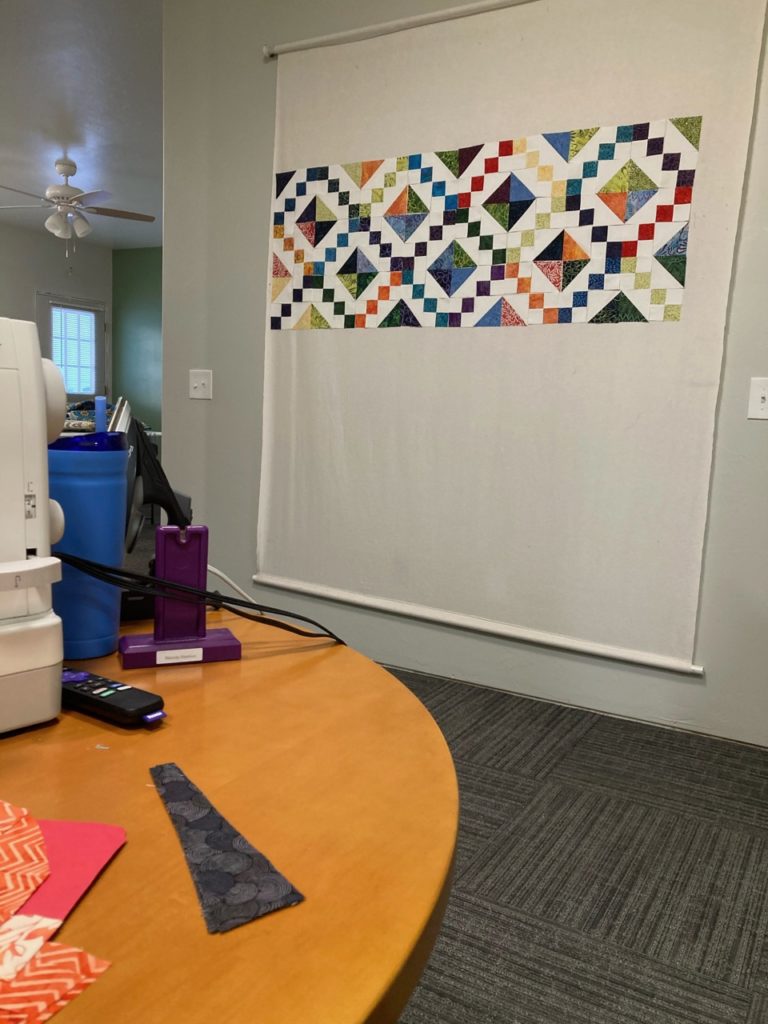
I also started laying out the blocks for this quilt. It’s another Moda Bakeshop like what I’ve written about before. This one uses a #5 Recipe card, and the quilt that I’m laying out is called “Ganache”. Only about half of it is on the design wall right now. I’ll lay the other half out tomorrow and then rearrange anything that might need it. This design actually has sashing between the blocks which I’ll add into the construction once I’ve decided on the final placement. It would just be too large for the design wall if I put them in now. But, the jury is still out…I might just go ahead and call this arrangement good and add extra borders to reach the size I want. I dunno…it’s a process.
This is a pretty cool little layout. Reminds me of a Jacobs Ladder, but also has some “X’s” and “O’s” movement to it. Got some pondering to do…
So, that’s pretty much the weekend for me. Kinda restful, kinda busy…..but mostly…. Just puttering. Feels good to go a little slow for a couple of days. Makes the merry-go-round of the regular week that much more fun.
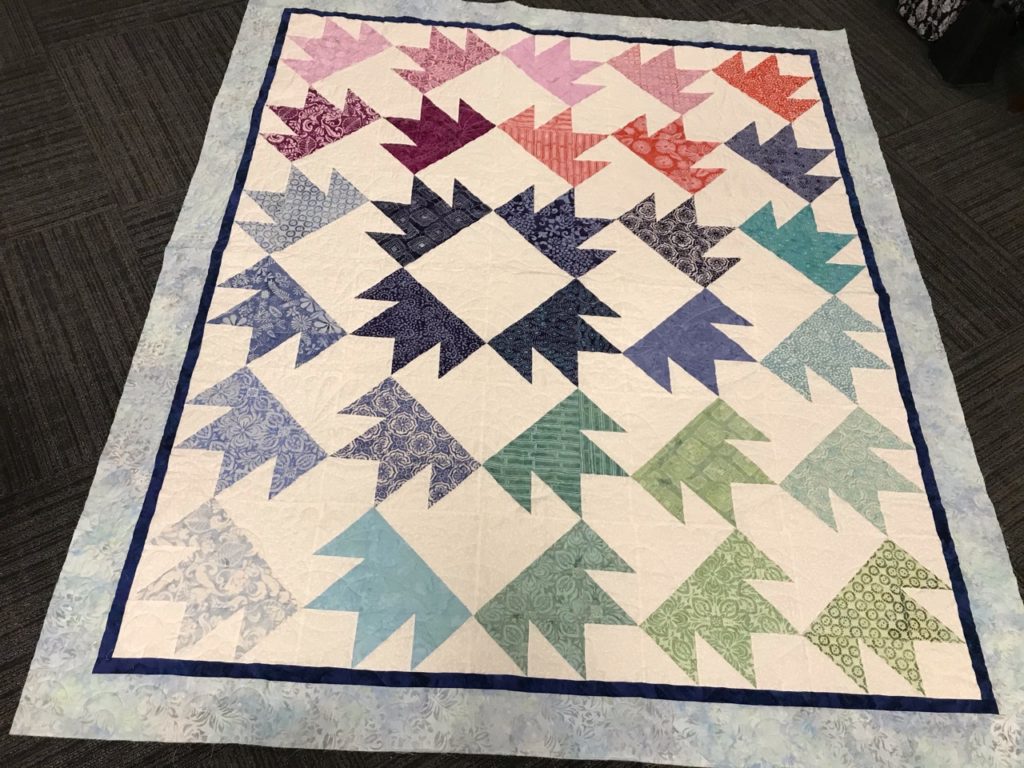
Are you in a bind? Well, I mean…are you binding? I am. Today I am putting on a binding to a sweet quilt that has been hanging as a store sample at Clubb’s Fabric Store in Delta. I retrieved it for a class and then brought it home to put a binding on it.
I simply love this quick and easy pattern. The batiks remind me of the beach, so I’ve named it my Beach Bear Gingerbread quilt. It’s the second time I’ve done this same pattern, and I have a 3rd set of blocks in this pattern made with rich mulberry and green batiks with cream background. Looking forward to seeing how that turns out too!.
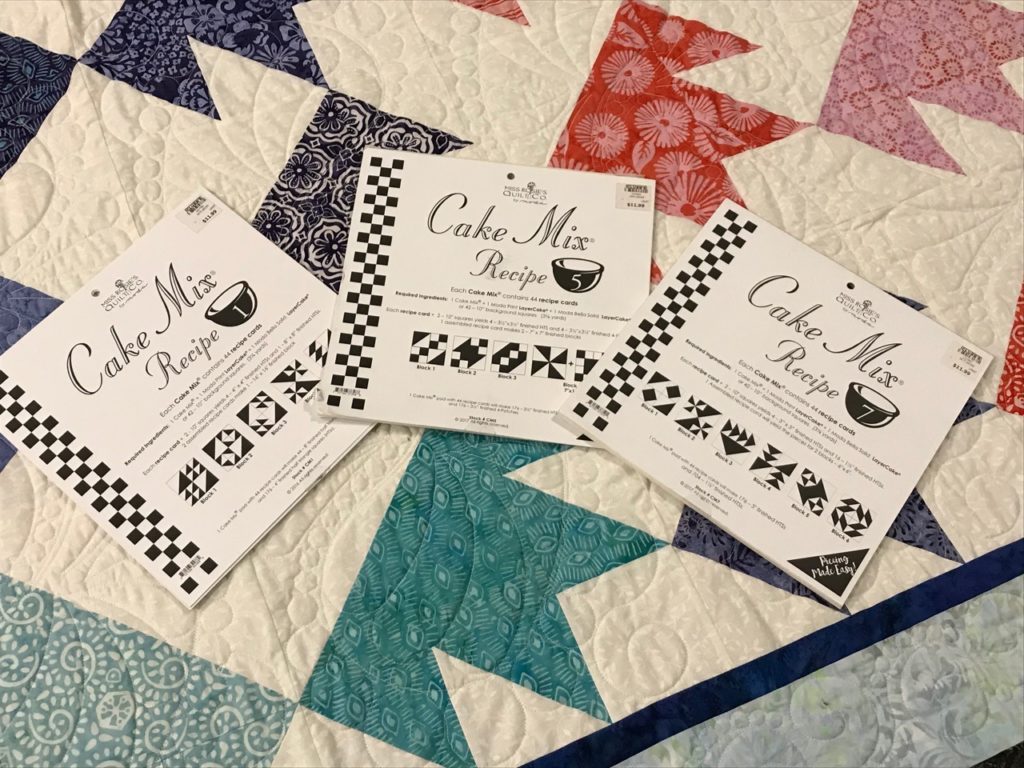
This is a Moda Bakeshop, by It’s Sew Emma Patterns. Bakeshop? Well, let me give you a quick run-down on this clever pattern set-up. The “Bakeshop” is built on layer cakes. You have an instruction book called “The Cake Mix Quilt Book, Volume One”, (the “cookbook”, aka the instruction book). All these patterns utilize “layer cake” fabric collections plus some amount of yardage for backgrounds, borders and binding. Genius!
This is such a great pattern book! The instructions are written with clear and concise directions, and has lots of graphics and pictures to help in construction of the project.
And you have “Cake Mix Recipe” cards like this.
This is so clever. The mixing bowl shows the number of the recipe card. And the black and white pictures on the covers show the variations of how to set the block that each of the recipe cards can make. You can make them all the same, or a combination of any shown.
These “recipe cards”, (printed like a tablet that you can tear off, one page at a time), are numbered 1 thru 8. In the “Cookbook” each recipe card has two different quilts from which to choose. For instance, the quilt I’m working on is from Recipe Card #1. I made this quilt, named the Gingerbread Quilt, but I could have chosen to set the same recipe card into a different quilt named the Sherbet Quilt. Totally cool!
I have used these Bakeshop patterns several times, and love them as a quick gift or easy “take-along” project where I know I’ll be talking a lot or have lots of interruptions. It’s a perfect retreat project. It’s also a terrific introduction to paper piecing. And it would be an excellent project for a younger aged 4-H youth project.
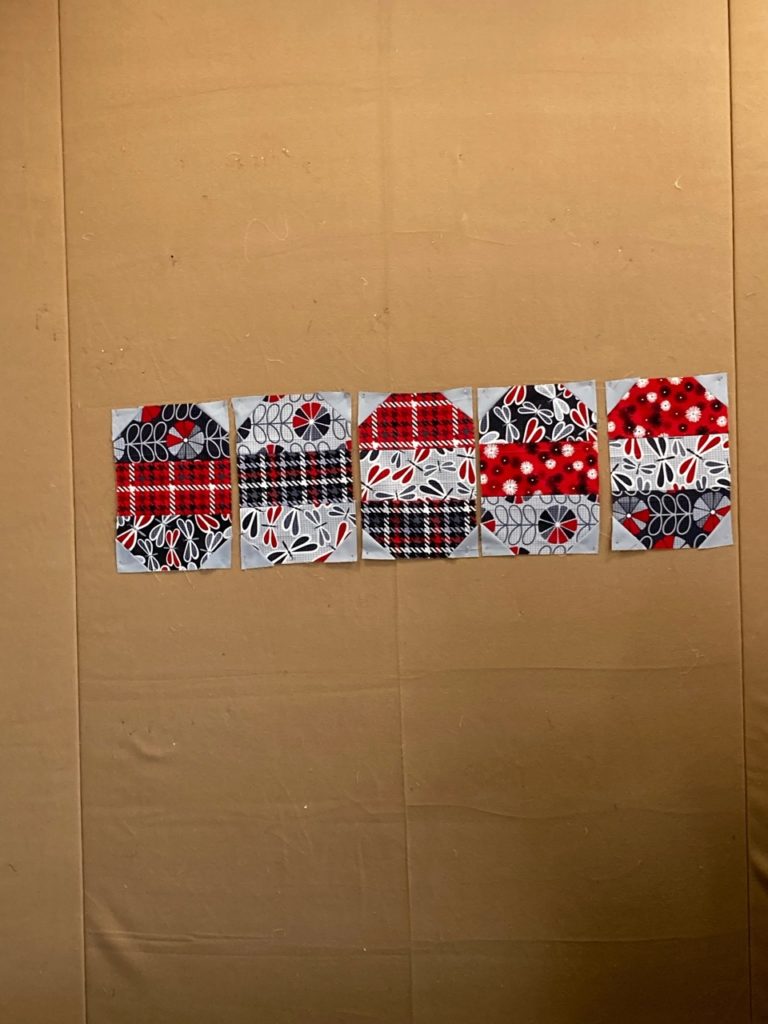
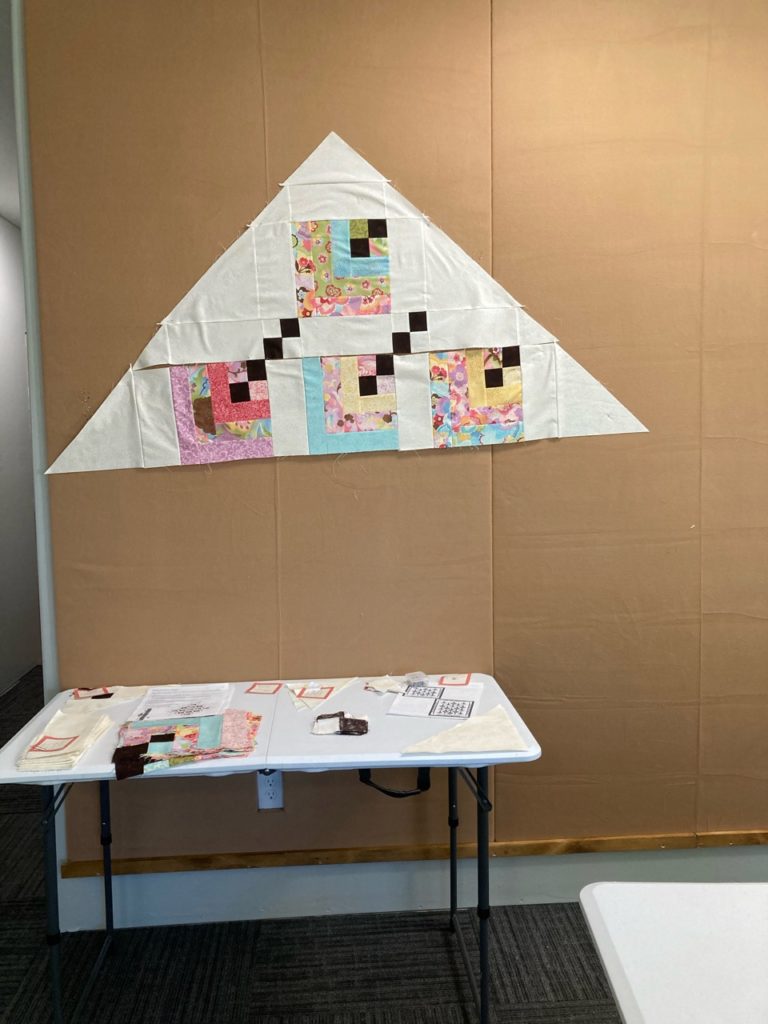
Then, because I had nothing else to do with my time, and because I can’t stand to throw away fabric that I think can be used for something else, I took my scraps from a couple different Bake Shop quilts and threw these blocks together. I know, just a tad OCD, but definitely cute. I’m sure that I’ll be doing something clever with them before too much longer….stay tuned.
These little gems were done in a weaving method…much like kids do with paper strips. I used fabric glue to keep things together, nothing is sewn yet. They vary slightly in size and the tapered ends still need to be trimmed, but I think there will be more coming. It won’t take many more to create something else to add to the “tops to be quilted” pile hanging out in the long arm pile.
But let me get back to the task at hand…binding.
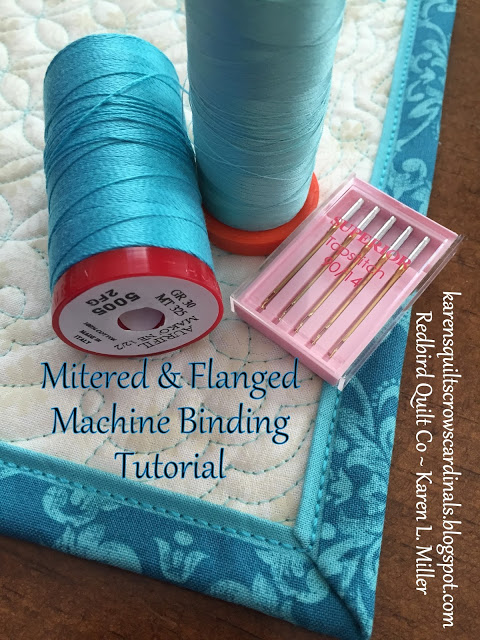
I don’t know about you, but binding can be a pickle. Some quilters love it, some don’t. Some even avoid it at all costs. But let me tell you about a method I found while I was surfing around Facebook one day. Or rather, it surfaced in my Facebook feed as a “suggested for you” type of item. Usually, I don’t follow those bunny trails, but for this one I did. And boy howdy am I glad I did.
This is the link to Karens Quilts, Crows and Cardinals of the Redbird Quilt Company. This has been my saving grace for peaceful bindings! (Pardon my pun). https://karensquiltscrowscardinals.blogspot.com
If you follow this link you will go to her home page. You’ll want to click on the “My Tutorials” tab and scroll down until you see this topic.
The flange binding that is in the title of the blogpost is what caught my eye. After reading her post, I saved it and was determined to give it a try. Fast forward a few months and bingo…I had a quilt I wanted to try it on. It turned out wonderfully well!! And I’d love to show it to you, but of course the quilt was gifted away with no pictures taken before it’s departure.
But even more than the flange binding, I want to tell you about her method for joining the beginning and ending of the binding. THIS is THE –best—method—ever! I kid you not! Before I read this blog, it would take me a huge…HUGE…amount of time to do this one step. Binding prep, attachment and finishing are all a breeze to me. But the sewing of these two ends always eluded me. I wrote myself directions, drew pictures, cussed, cried, and cringed…always wanting to master that elusive mitered seam ending. (Totally not cool when I can do sooo many other, and much more technical sewing tricks.) Then the stars aligned, the angels sang as the clouds opened to rays of sunshine and I followed a bunny trail to this beautiful blog about binding. (Yes, it’s a bit overly dramatic, but when the lightbulb finally goes on, it’s a glorious thing.)
Putting all silliness away, I want to share with you this method. It is most definitely not my idea. She gets all the credit and the kudos for putting together a fantastic tutorial. Throughout her blog tutorial there are lots, I mean LOTS, of pictures of every step as well as excellent instructions showing you exactly how to make a flange binding AND how to join the two end together.
I can’t tell you how many hours I’ve saved using this tutorials’ instructions. And with all the projects that I have ready to bind, and those waiting for the long arm, I’ll be using this binding method even more. If you follow no other links that I share in my blog…go to this one and at take a look. I’m telling’ ya…it’s so worth your time. And while you’re there, take a peek at the rest of her blog. Gobs of interesting things are waiting there as bountiful treasures!!
So, without further ado, I’m off to finish up this binding. Hope you enjoy the tutes!
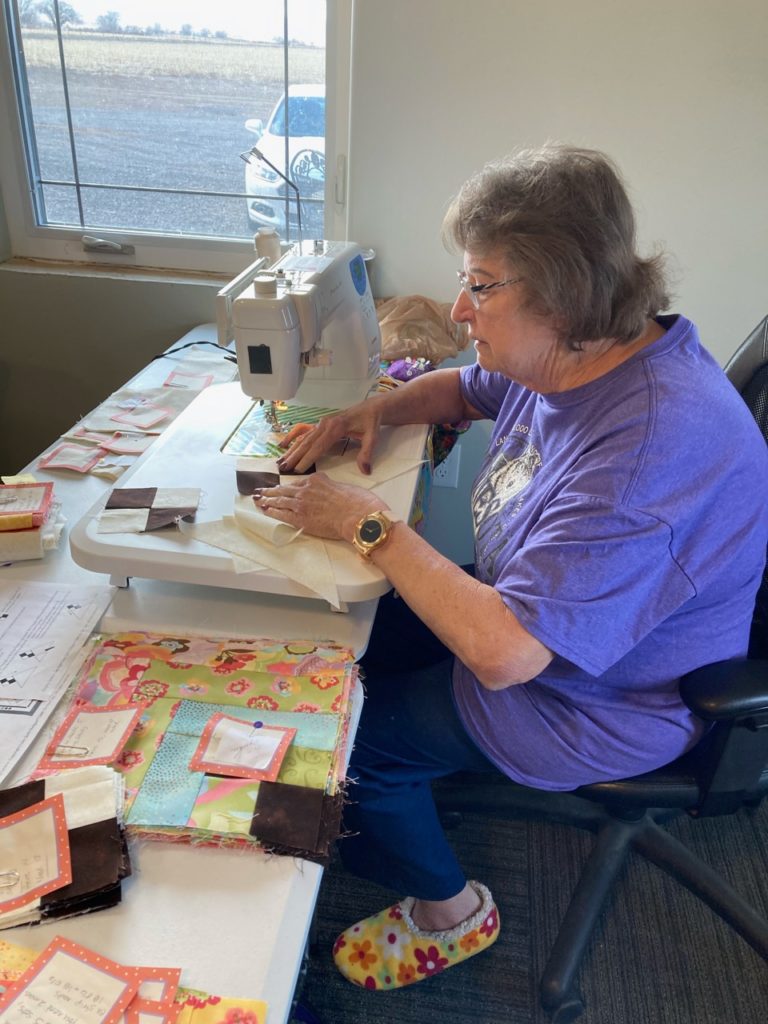
It’s been busy at my home studio/classroom. This week I started Operation UFO at my home studio/classroom on Tuesdays and Thursdays. It’s an open sew type gathering where quilters come for a day of sewing and bring their UFO’s (un-finished objects) of any type and have access to a teacher (that would be me); for as little or as much help as they need to get themselves going again on projects put aside for an indeterminate amount of time. There is a nominal fee, but I’ve been told it’s more than worth the cost. It hasn’t taken long for word to get out and interest to begin to grow. So, if you are local to me, send me a private message and I’ll be more than happy to send you more information. I’m thinking this will become a sought-after activity before too much longer. Yay!
Here is Cindy, working away and totally comfy. She even brought her sewing slippers! I love it!!Cindy is working on Hanging Gardens by Georgette Dell’Orco. It’s a great little pattern, being made with a sweet line of fabrics. We both wish we knew the name of the collection, but it IS a UFO. But we’re enjoying it all the same.Jean is working on another quarter of her Prairie Star by Judy Niemeyer. She’s got a few stitches to release before moving on to the next step.Here’s the first quarter of her Prairie Star all sewn together after the Judy Clubb on Sunday. She’s about to lay out two more quarters, using this as her guide for placement.
They were lovely days with lots of progress made along with lots of stories and visiting.
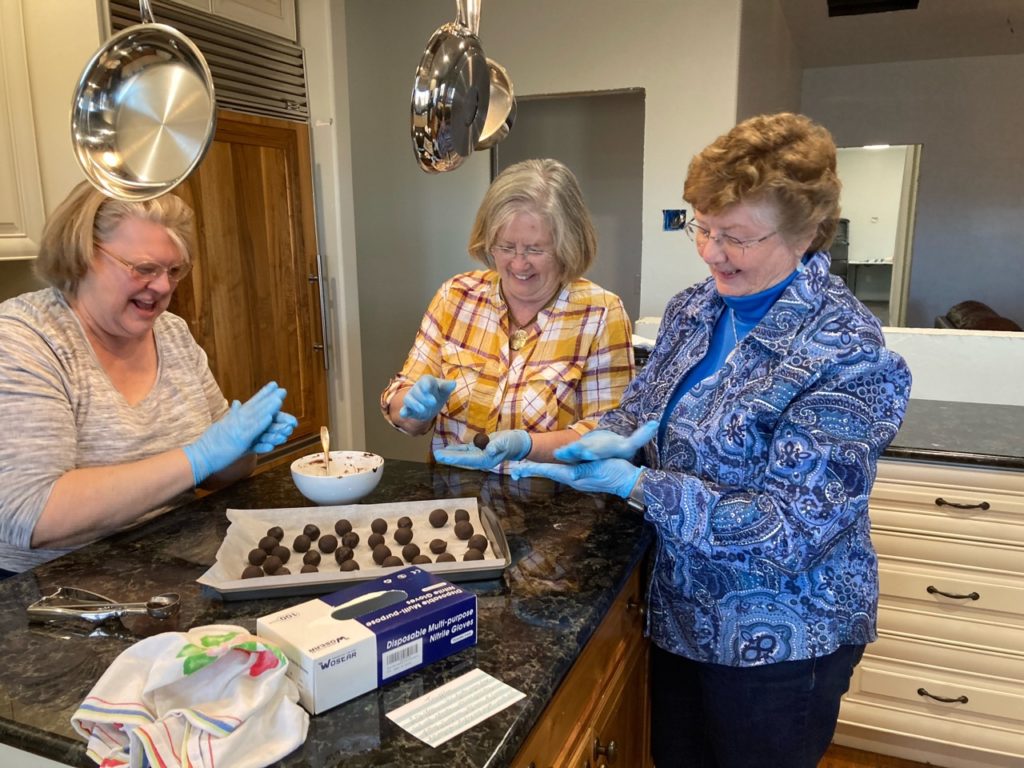
Another terrific day brought another small group of dear ladies, and I became the student! Of course, quilting was a topic that threaded its way though most every bit of conversation, along with copious amounts of laughter. But the main topic of the day was……how to make truffles. Yes! Those decadent, mouthwatering, melt in your mouth, wonderfully chocolatey wonders that only the best candy shops offer. I can only say to those reading this blog…future retreats I hold might just be the time that I pull out the stops and introduce these amazing treasures to attendees. Just sayin’…
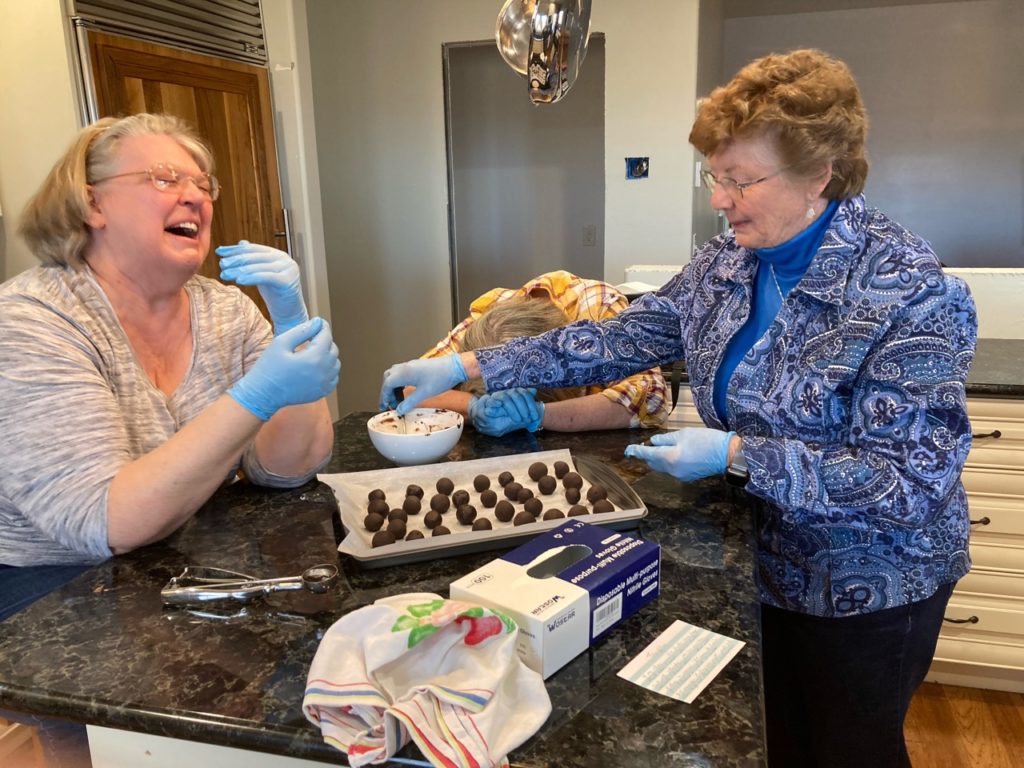
This is step two—rolling the flavored truffle center into balls which will need to chill for 24 hours before they can be dipped and decorated to complete step 3. I think the funniest of comments is about to be made….And here is the laughing, snorting and tears of too much fun! Oh my…we had such a good time. I love these ladies!!
These yummies are made with dark chocolate and flavored with caramel. But I have it on good authority they can be flavored with jams and liqueurs of choice. The combinations are endless…dark chocolate, milk chocolate, white chocolate— raspberry, boysenberry, orange, strawberry jams—coconut, rum, bourbon, crème de menthe and other spirits—oh…just imagine the possibilities!
No…I’m not a lush. LOL!! But these ARE the perfect size for flavoring truffles. Oh! And who doesn’t love these??? I personally know each of these are wonderful….mmmmmm my mouth is already watering.
So, while I’ve not been as active on the blog as I’d like, it’s been an action-packed week with lots of content that I’m eager to share with you.
Such wonderful things happened this weekend! I’m so pleased with the progress of my students over the past two days.
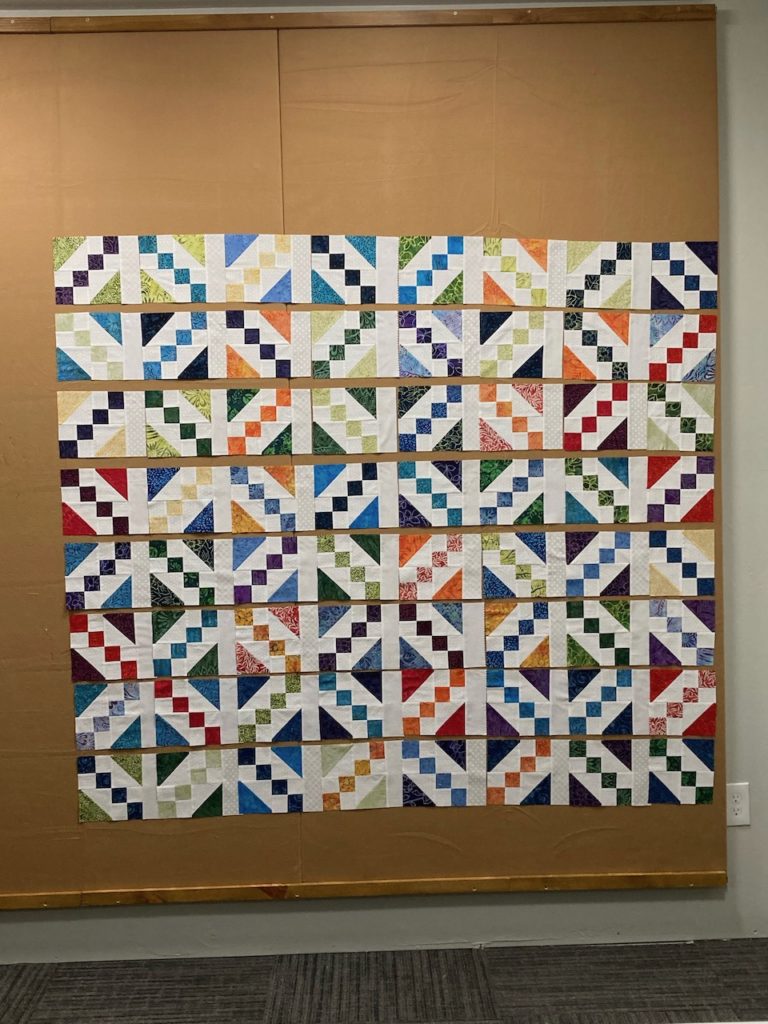
Saturday our Wedding Ring Class met with the goal of laying out their finished piecing and seeing for the first time what their quilts will look like. We had such a great time! Over the course of the last 6 months we’ve been meeting, using the Quiltworx Wedding Ring pattern and its variations as a Block of the Month. There have only been a couple months we weren’t able to meet, but that happens even without a pandemic going on. They’ve all made wonderful progress and each step of the way there were oooh’s and aaaah’s as we shared our progress each time we met.
And we all learned something…including me! Some things I learned because I was asked a question I didn’t know the answer to, and others because I needed a creative solution to help them obtain a goal or to make it easier to continue their work.
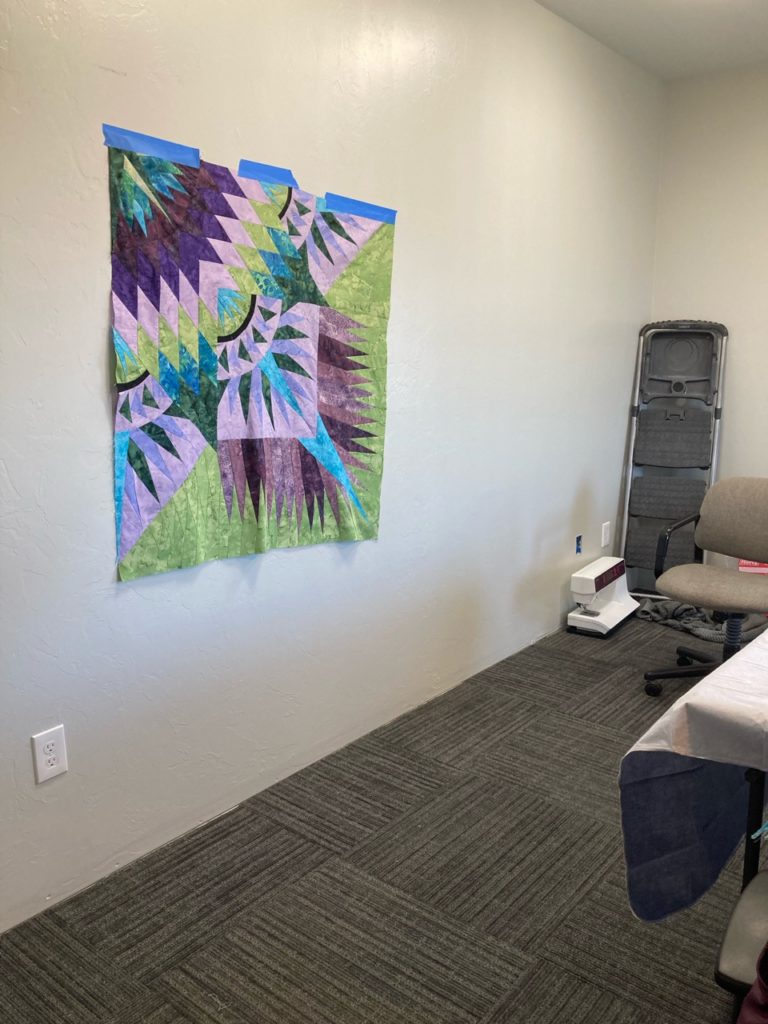
The latest solution was what to do about a design wall! In the pictures, you’ll notice their units (or block pieces) are being laid out on sheets. It’s a curiosity, but a solution that I suggested and they agreed to with enthusiasm. Neither of these lovely ladies have design walls at home. My goal was to find a way for them to layout their units without: 1) having to take copious pictures with their phones; 2) disassemble what they laid out; 3) transport everything back home; 4) reassemble it all and lay it out only in small portions either because of space or foot traffic concerns, and then hope they were getting everything together correctly They jumped at the idea! So, after handing them each a flat sheet, we got busy.
Here is Shirley laying out her units. After each row across there was a happy dance of excitement and a “Boom-chicka-boom-boom” coming from her as she saw things coming togetherAnd here is Jean working on a table doing the same thing. From her came “mmmm-mmmm-mm-mm-mm”. For Jean, we worked out a number chart for her to follow as she laid out her units. It worked like a charm!! Another teaching aide that will go into my files for the next time I teach this class.
As they laid the units out, each one was pinned to the sheet. And at the end of class, each sheet was gently rolled up and carried to the car with the confident knowledge that each time they went to work on their project they could just go right to work without the time spent on trying to find their place in the process.
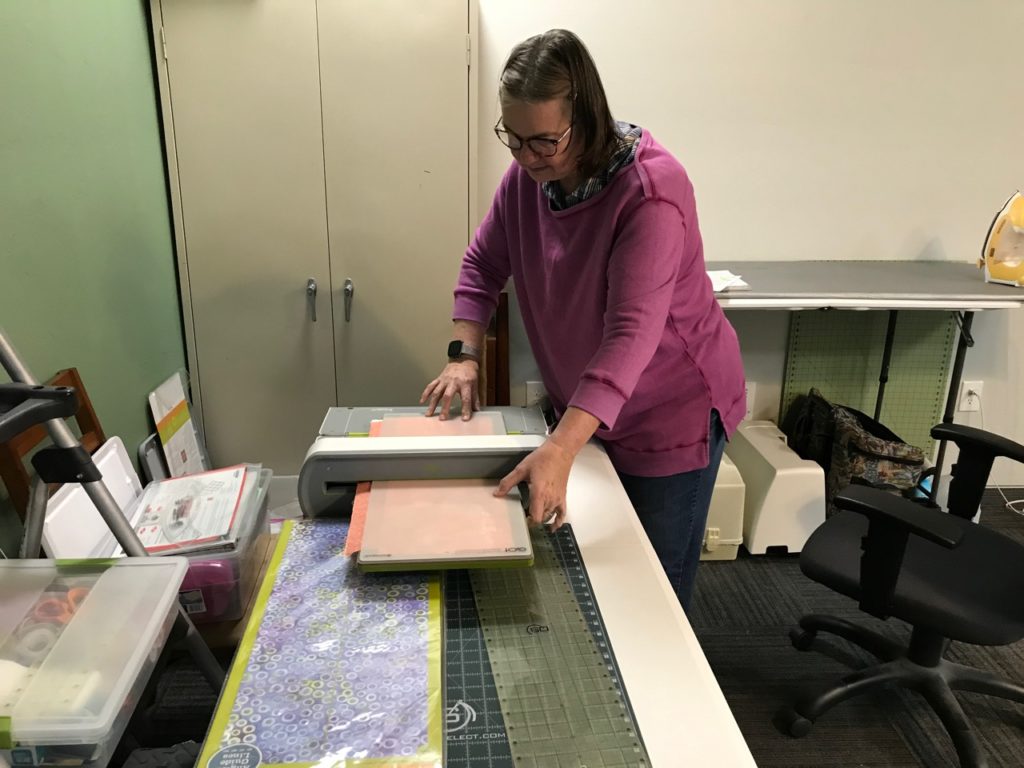
Dottie was also with us and she brought her AccuQuilt Cutter to make quick time of cutting the 2 ½” strips for her project. I’ve never seen one of these in action, and I must say, it was so cool to see how they work.
I’m thinking this may need to be an investment for some time in the future. They sure are slick little machines that make quick work on lots of repetitive cutting
It was an awesome day full of great friends, fun and lauging, and tremendous progress!
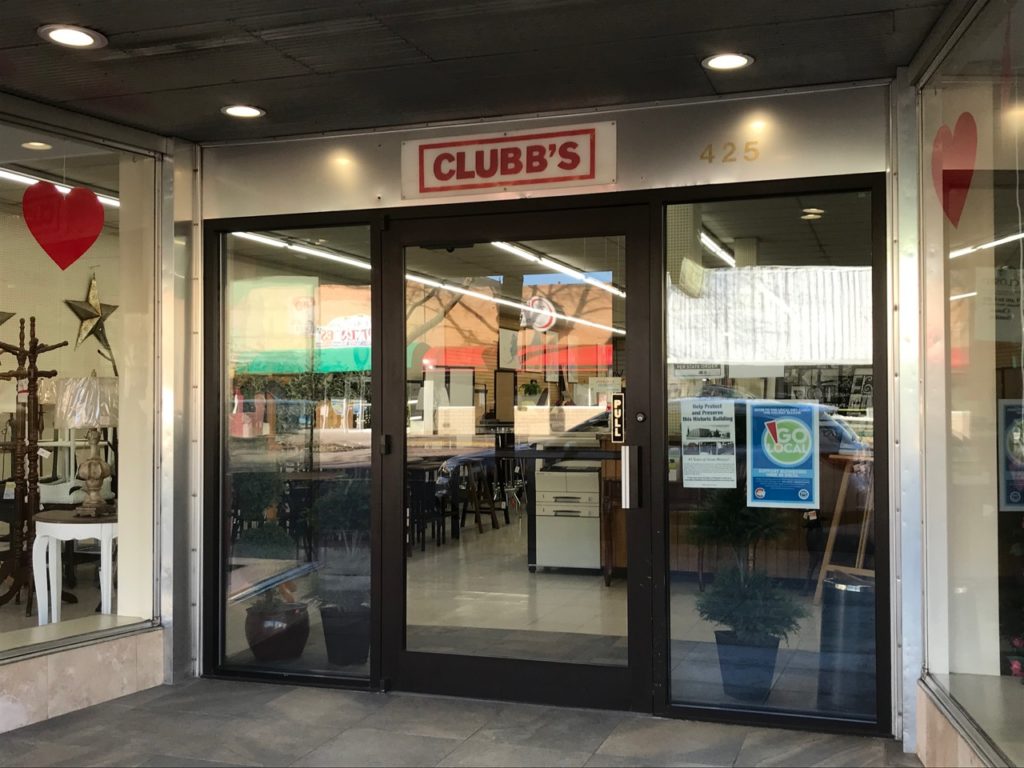
Sunday was much the same for the ladies that joined me at Clubb’s in Delta for our Judy Clubb. The Judy Clubb is an open sew kind of class where anyone working on a Judy Niemeyer pattern is welcome to come and sew for the day, and I’m available for as much or as little help as is needed
The entrance to our classroom. Our class area is the furniture store. And the fabric store is right next door, always open for us during class and ready for anything we need. It’s a terrific arrangement!
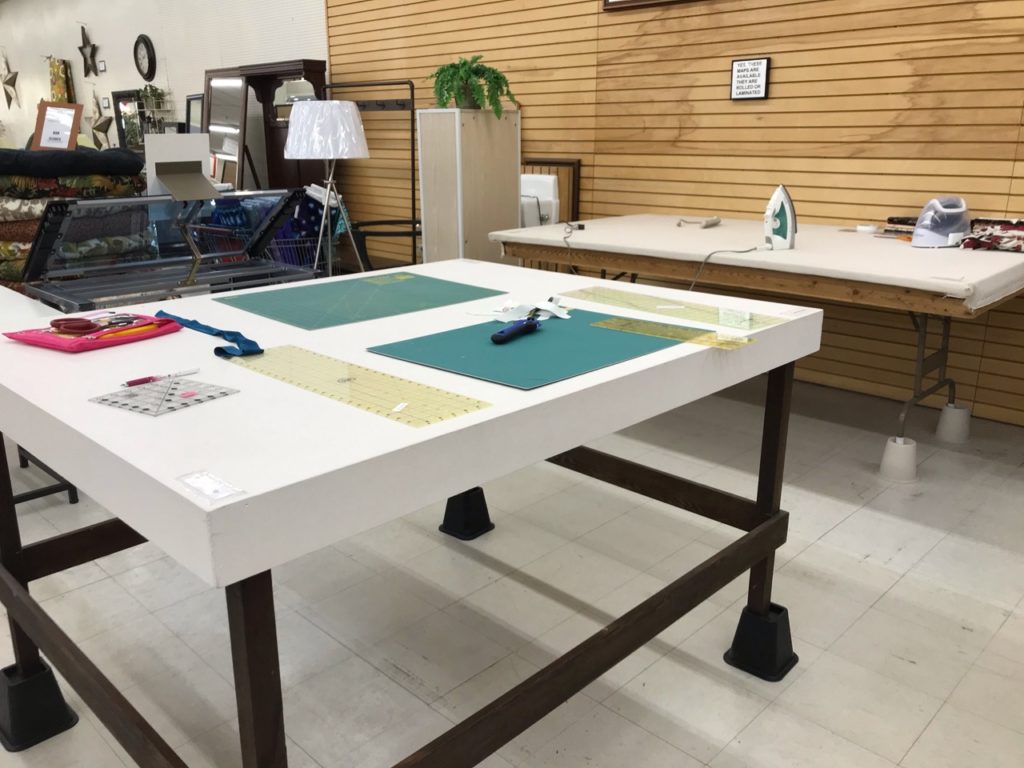
We have a wonderful work area at Clubb’s where a terrific cutting table and ironing area are provided. Lots of beautiful lighting and abundant room is provided for us to work our magic.
These stations are sooo nice! Plenty of room for multiple people to work at the same time.
Take a look at what was worked on!
Cheryl is working on putting the binding on her Impatiens placemats. Her color choices are simply beautiful! And one of the best helps I could give her was to show her the UTube videos by Judy Niemeyer on that very subject. It’s amazing that we have the ability to carry an iPad, secure an internet connection and tune into a free, on-line video and then help the student to utilize the same resource at home. When Cheryl had a question, we worked through it together finding a few additional helps for her to use at home. She’s doing a marvelous job!
I love Cheryl’s color choice on this project and she is so precise in her stitching. What a lovely project she will have when all finished.
And here is Jean, using a sheet as her backdrop on the design wall to pin her Prairie Star to. Her goal for the day was to get one quarter of the quilt on the wall and assembled and marked with notes on how to complete assembly for the rest of her quilt when she’s back home.
The quarter section of Jean’s quilt is nearly put together. She’s added some little yellow notes for her to follow when she gets home so she can get this project all finished up. How exciting!Jeans pulling a few more papers off the back of a unit before assembling the next section. Making great headway.
All in all, it was a very productive, and rewarding weekend. I think one of the things I truly love about this work that I do and the quilters that start out as students and then become friends, is that I get to help them reach their goals.
People, non-quilting people, frequently remark to me about how this is nice and all that, but what’s so special about a quilt…. it’s just a blanket after all. And my knee-jerk reaction is that they just don’t get it. And they don’t. But what I say to them is that quilting is a tool. It’s a tool, or a means to reach a huge plethora of outcomes. Quilting is a creative outlet, which is a crucial aspect of our mental and emotional health. Quilting is a skill-building tool that enhances our cognitive and deductive reasoning utilizing color theory, math, planning and organizational skills to just start the list. And one of the very most important things quilting does is to both create and revive memories for those making the quilts as well as those receiving the quilts. Quilting as an art and a skillset is something that has a huge ripple effect on all those around us quilters. And no…these are not just blankets. They are works of love.
And I….me…I get to help these lovely people create and fulfill their goals.