What’s Under Your Needle?

What’s under your needle today?  Are you piecing, or planning?  Laying out blocks to complete a top?  Are you quilting or binding?  I’m so curious as to what’s under your needle!

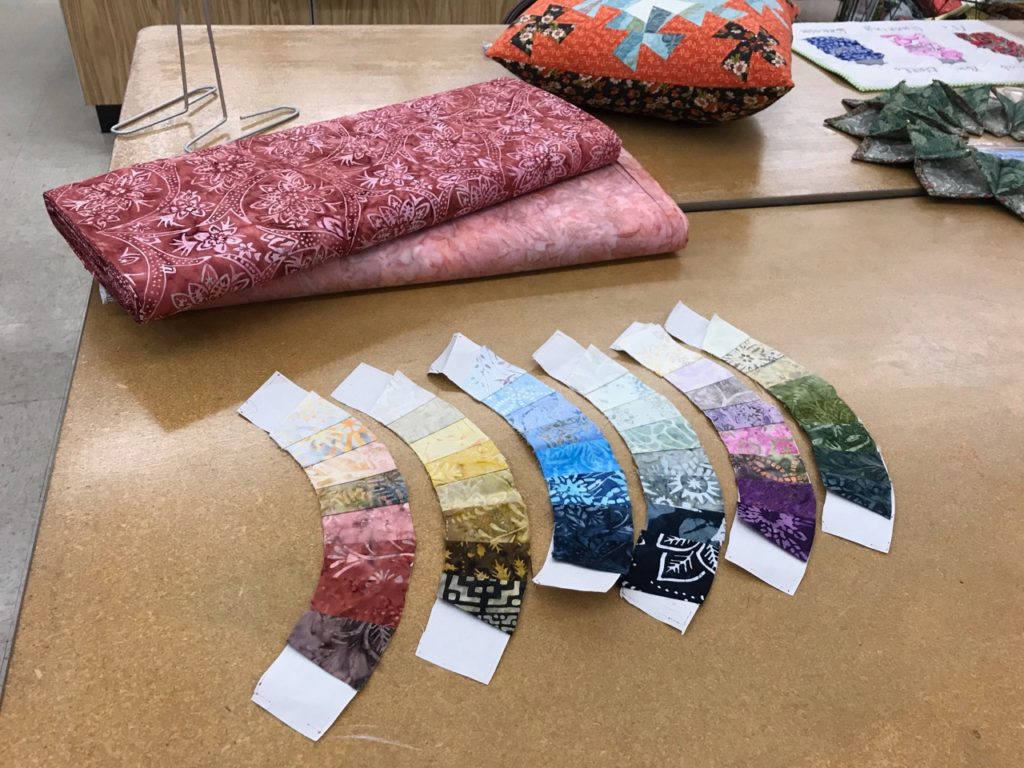
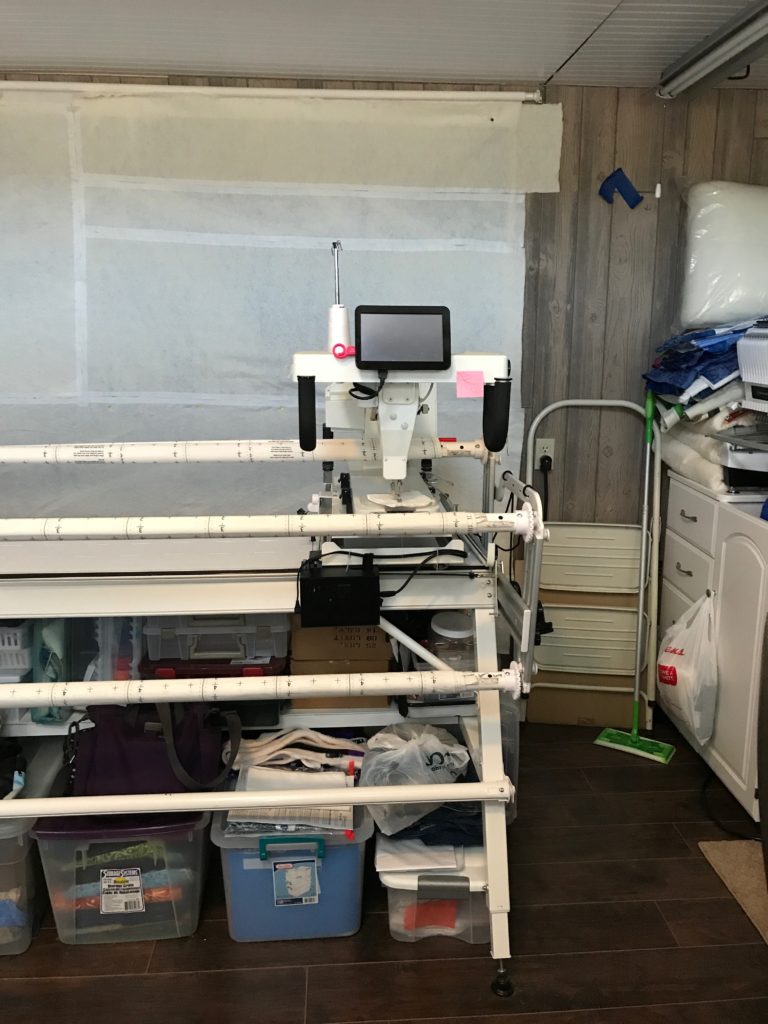
Today, after my morning chores, a few phone calls and emails and a couple hours of standing at my long arm, I’m piecing.  Paper piecing to be more exact.  It’s what I love to do…in fact I crave my time at the machine, working on several different patterns at a time.  

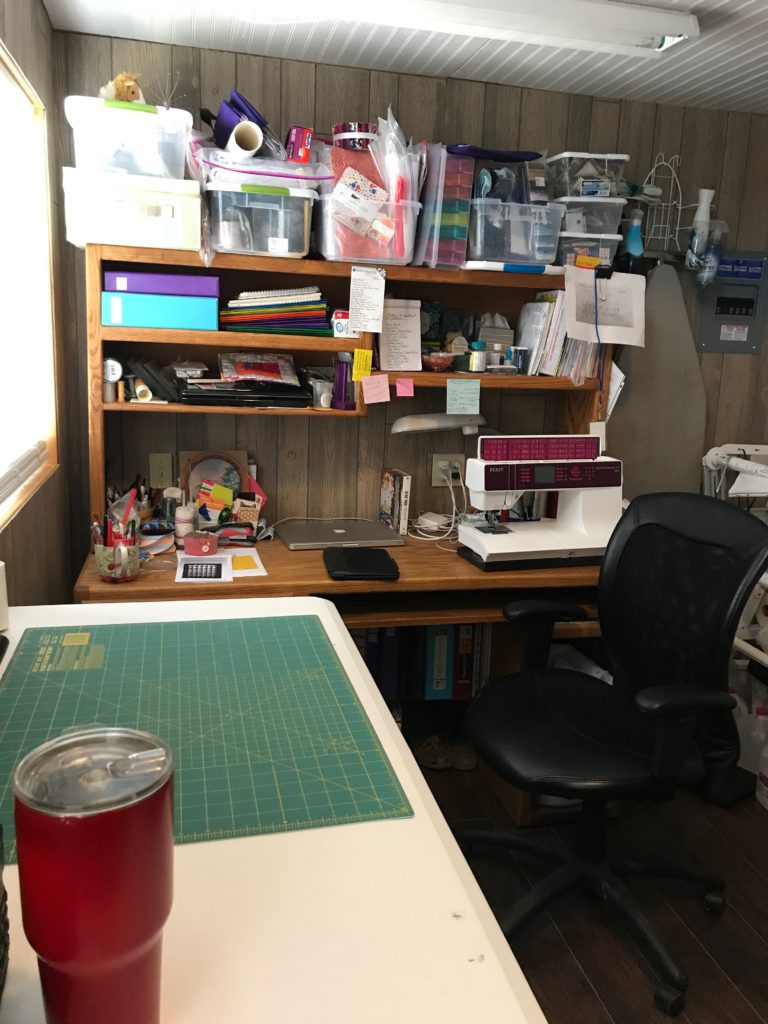
I’m sure there are many people who think I’ve got a screw loose, and they probably aren’t far from the truth.  But my passion for creating quilts is super focused on paper piecing.  And Quiltworx patterns by Judy Niemeyer are the highlight of my quilting world.  I find my mind and my heart breathe a sigh of contentment when I sit down at my sewing desk to work on the current projects.  It is definitely my happy place.

Becoming a Certified Instructor for Quiltworx is something I’ve been working towards since my first trip to Montana in April of 2018.  It’s January 2021, and I’ll be finishing up this adventure a year from now.  It’s a huge time commitment.  And in every way, in my humble opinion, equal to a Bachelor’s degree from a college.  Each of the patterns that I complete is easily equal to the cost of a college class and it’s required books.  Especially if I only buy the newest fabrics for each of my projects.  

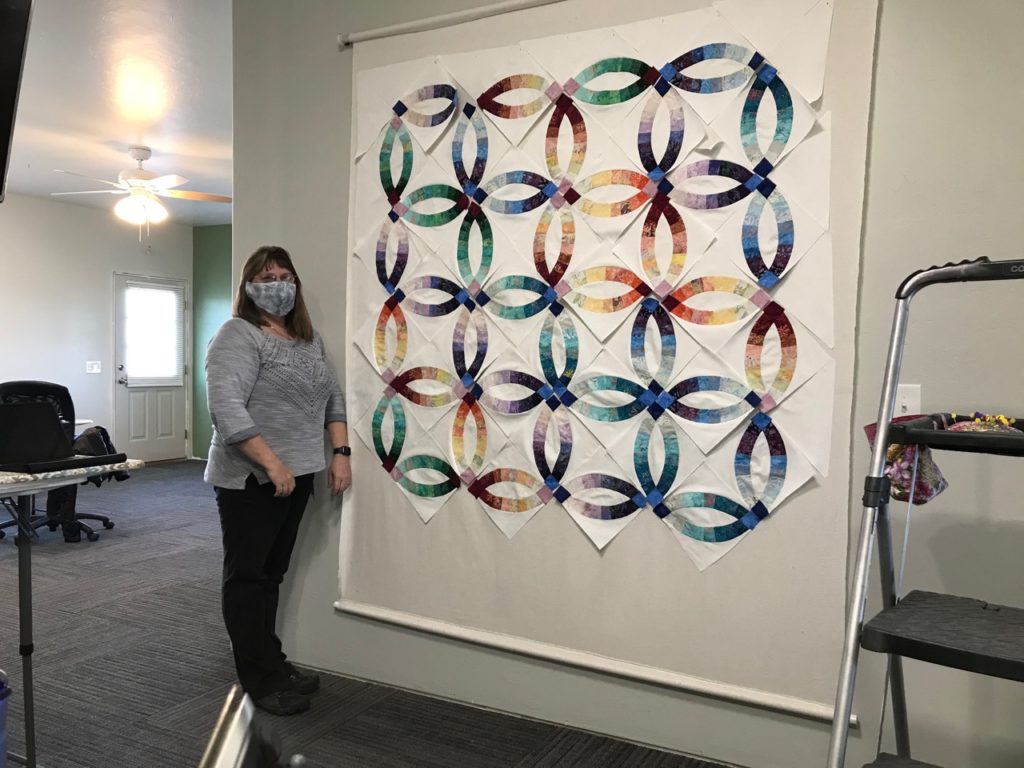
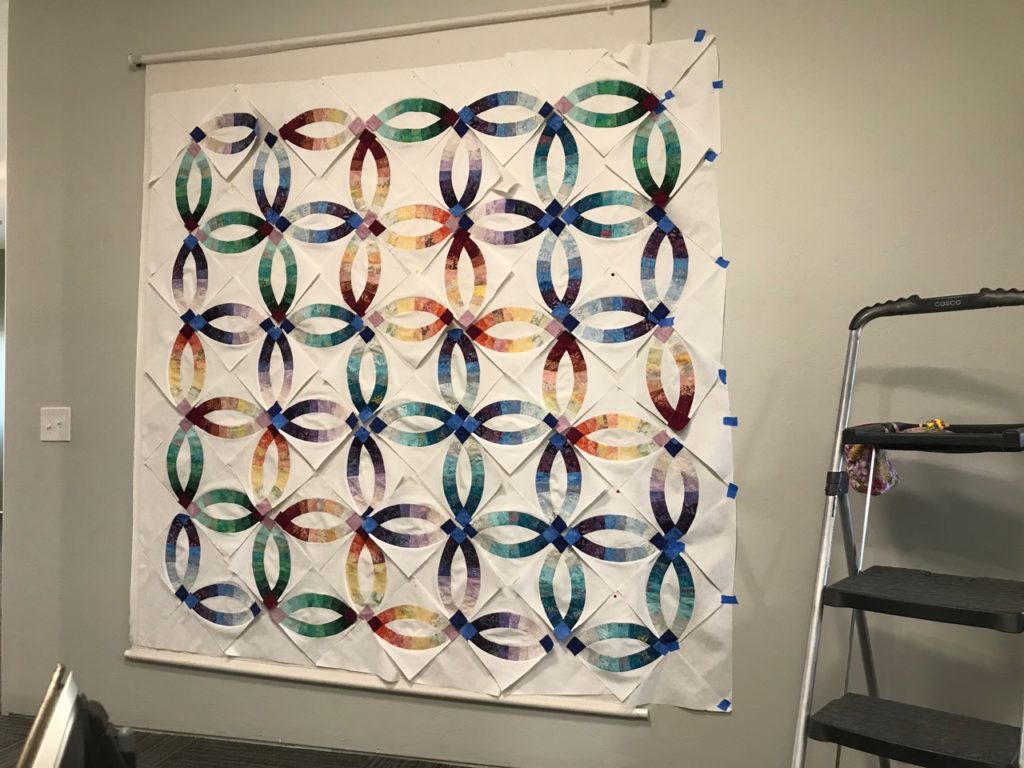
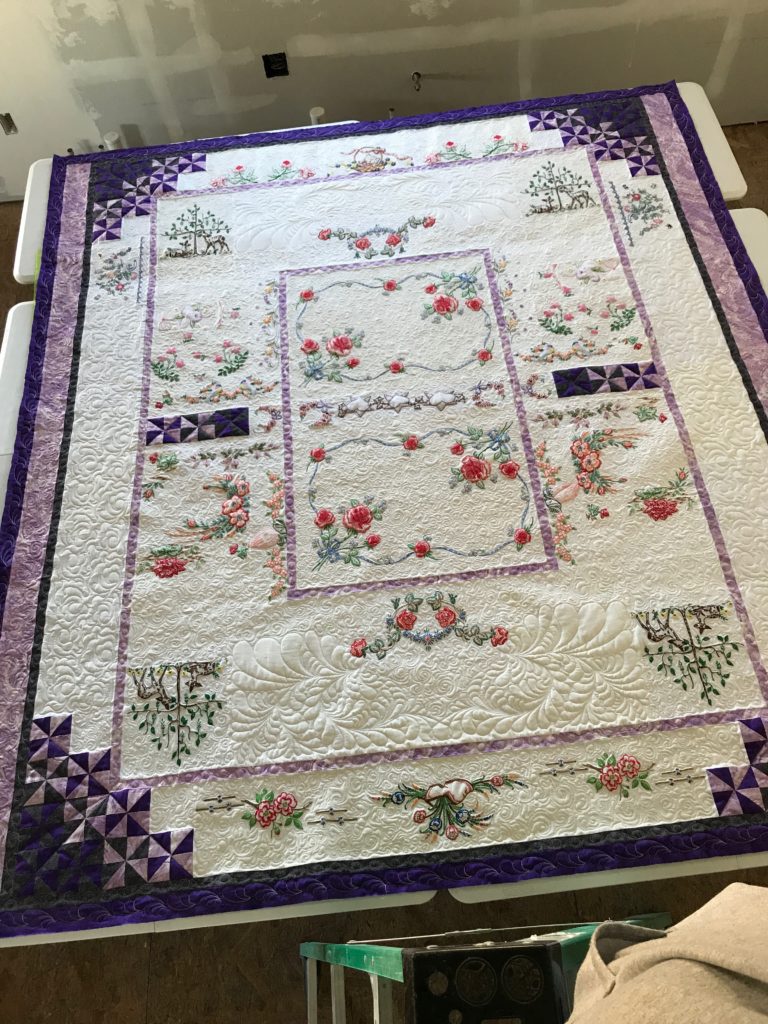
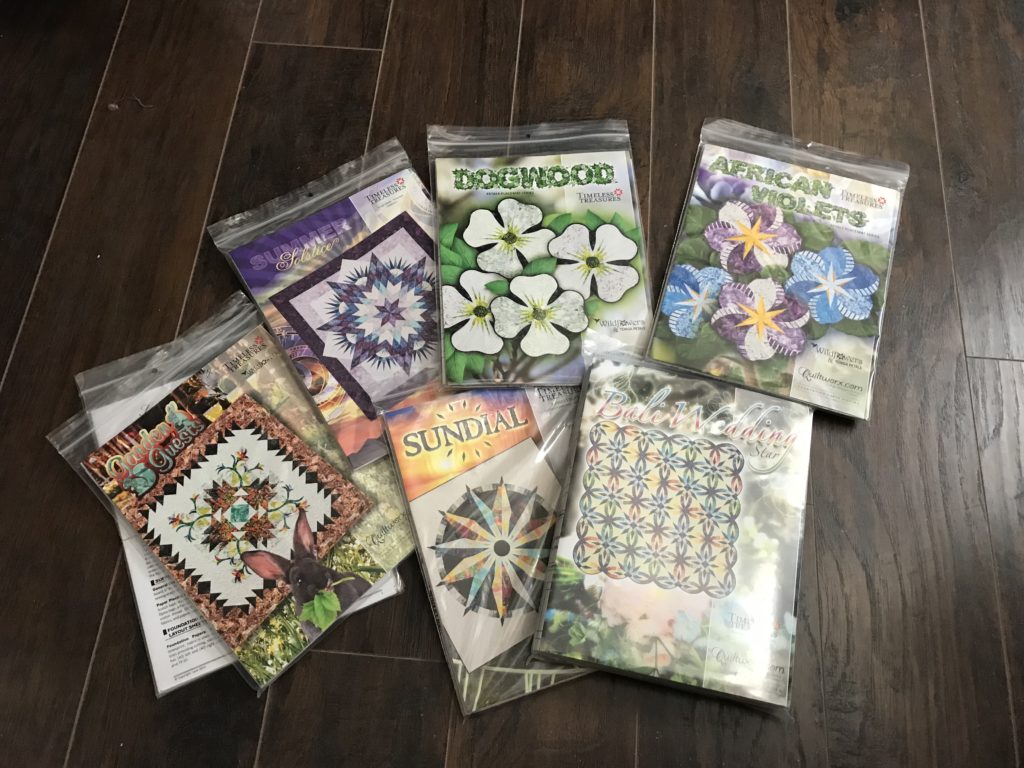
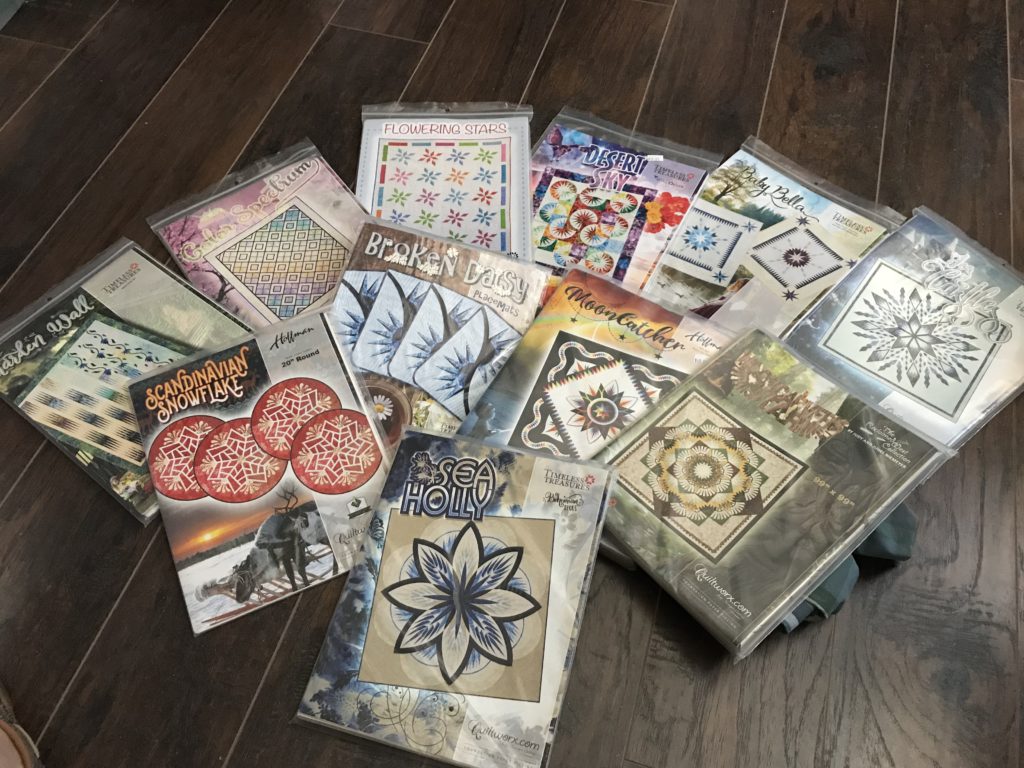
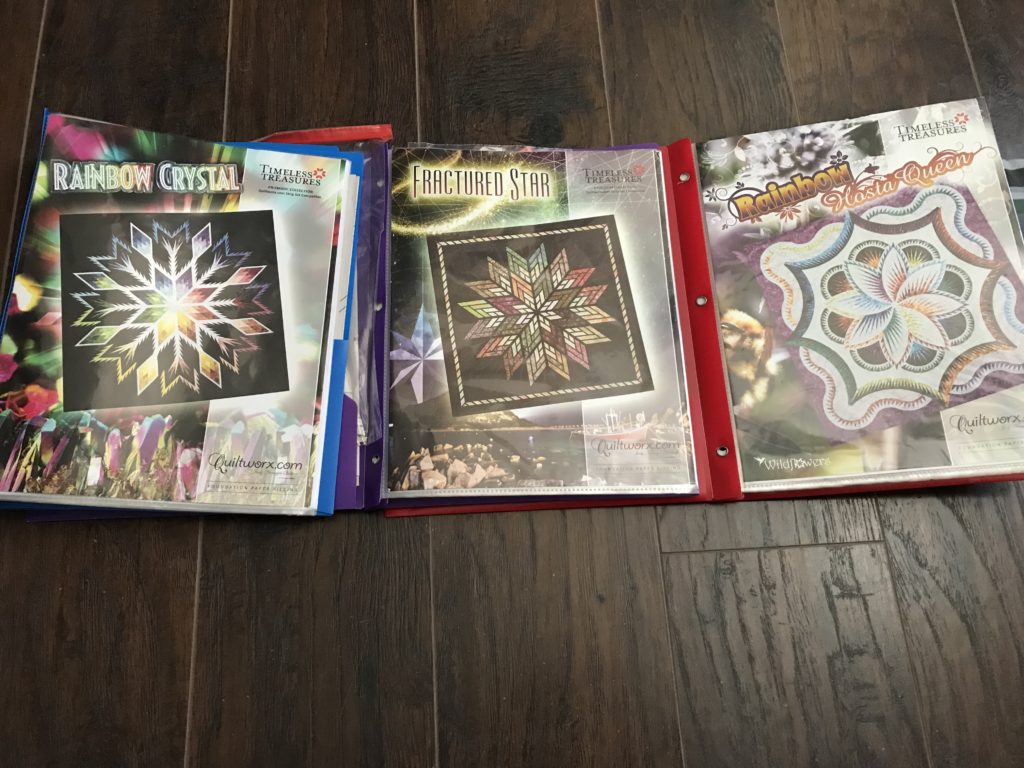
Don’t get me wrong…I love, LOVE all the gorgeous and newest fabrics, but I’m also quite budget conscience.  I’m especially proud of the fact that I have been able make several of my portfolio patterns directly out of my stash.  Out of my STASH!!!  I’m over the moon about that.  Here are a few that I’ve been able to do that with.

Here is my version of Lincoln Log Cabin. It’s 31″ square and a super fun and fast project to make.
I love my Twinkle Star! It was sooo much fun to make. And at only 38″ square, it’s a great size for gift giving too!

Next is a summer color way of My Two Baby Sisters placemat. Another quick project with endless color options.
This is Star Baby…waiting for her turn on the long arm. I LOVED putting this together! Another sweet little wall hanging.
And here are Tea Time Placemats, also waiting to be quilted. This pattern is awesome! And comes with enough papers to do a set of 4 for your table. Can’t wait to make some in autumn colors too!

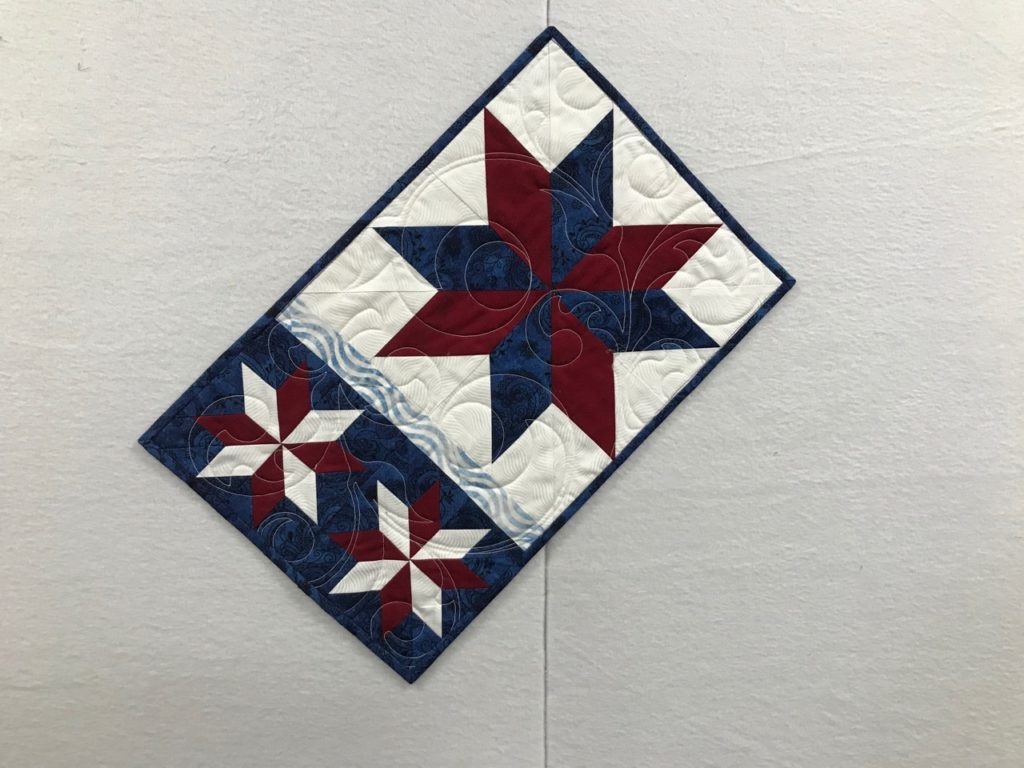
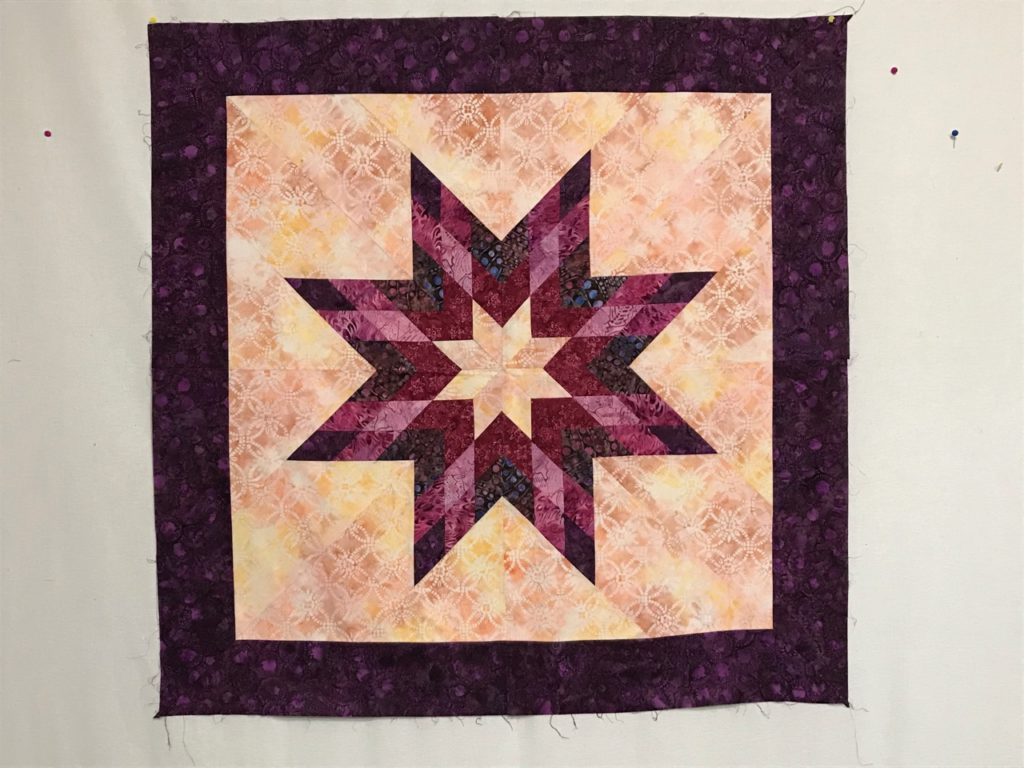
Golly! There are more than I thought that came from my stash.  Actually, there are even a few more, but I’ll save those for another time.  Using from my stash is something I’m pleased with .  And it’s also something I think will be a helpful to encourage my students to do.  Of course…when my students are shopping for fabric I’m only a phone call away to ask a question, if I’m not already there helping, guiding and suggesting options to add to their selection process.  Who doesn’t like to shop for fabric??

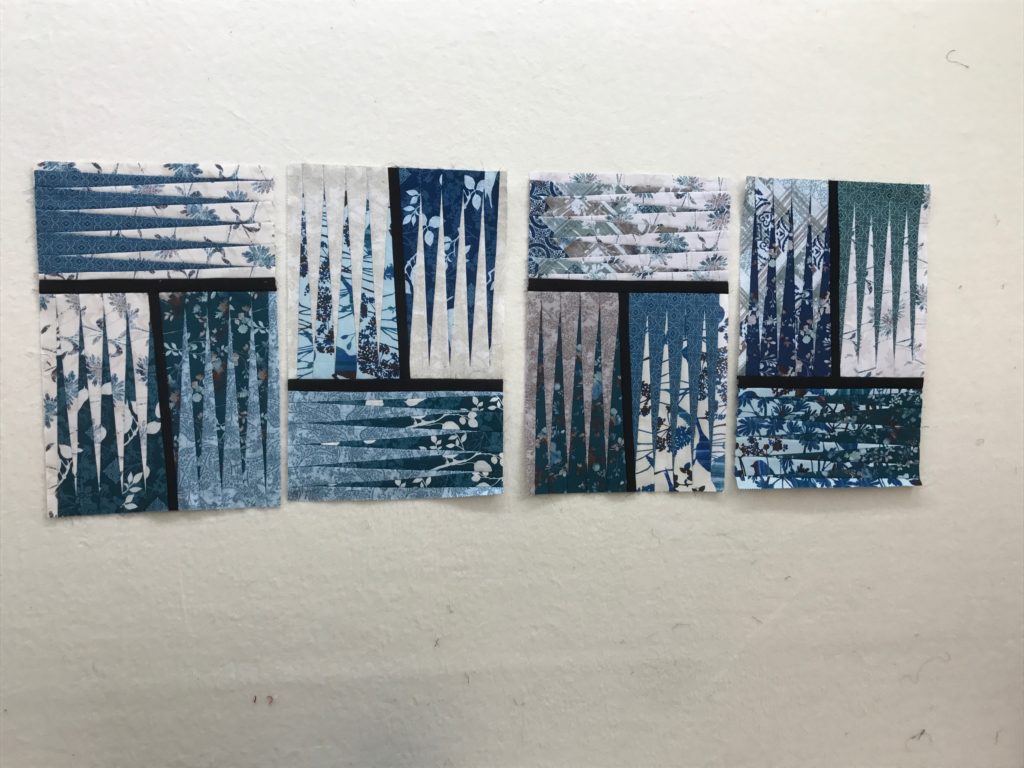
So, leaving the bunny trail that took me away from my original question…What’s under your needle?  This is what’s been under mine for the past several days.  I’m working on just a few patterns all at once.  It’s a skill set that I’m honing and finding it to be quite productive.  It can be a bit confusing at first, but it only takes a little while before it becomes second nature. I love working on my projects this way.  

I have two 4 foot tables that I use for my pattern staging. Here’s the first one. On the right is my version of Clockworks, which is a Quiltworx Cut Loose Press pattern. And on the left is Color Spectrum I have nearly all of these blocks completed…next will come setting the blocks to make the top.
Here is the second 4 foot table. I’m working on my Dinner Plate Dahlia here. Granny Sassy Designs put this kit together for me, and she does an AMAZING job! I’ve loved this color way since the first time I saw it. I’m over the moon about this beauty!!
This is how I stack my projects as I work on them. Each time I go through the stack I do the same step to everything regardless of the project. For example, each layer will get ironed all the way through the stack, then on to trimming and placing the next piece, then sewing them together, repeat.
Here is what the stack looks like exploded out layer by layer. I know what each of these belongs to, and where they are in the process by just looking at the top layer. Oh! And there’s an Impatiens placemat in there too. That’s 5 patterns across these 8 layers. Not everyone wants to work in this way, and that’s the beauty of it all…we all get to enjoy our own process with no judgements.

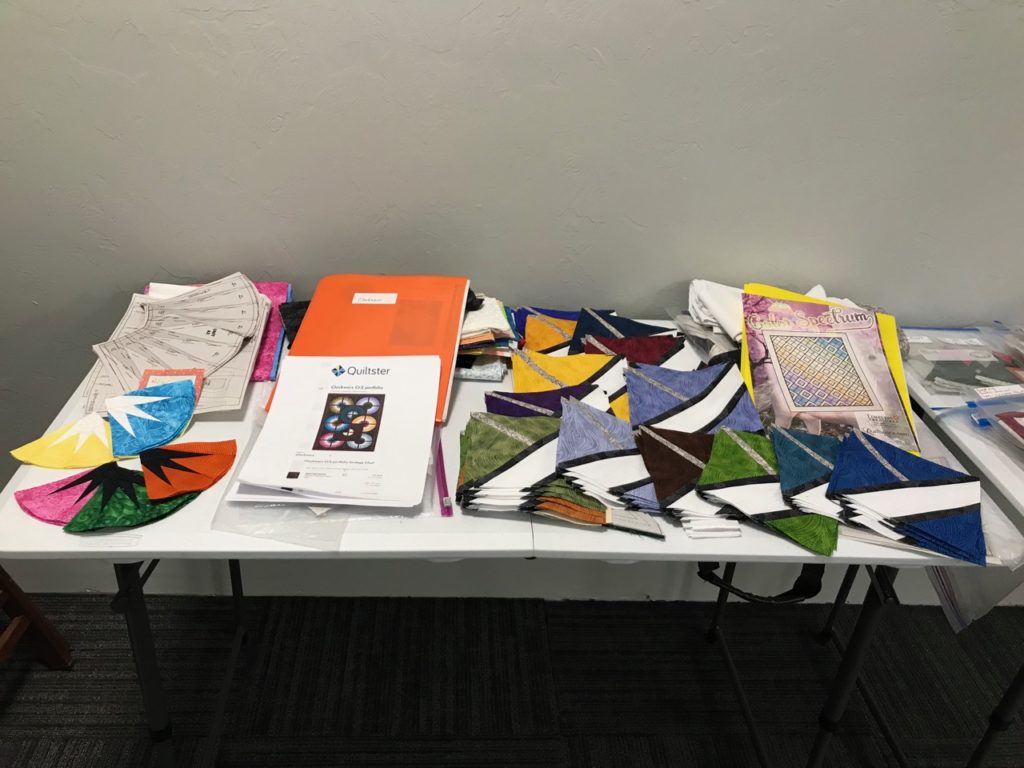
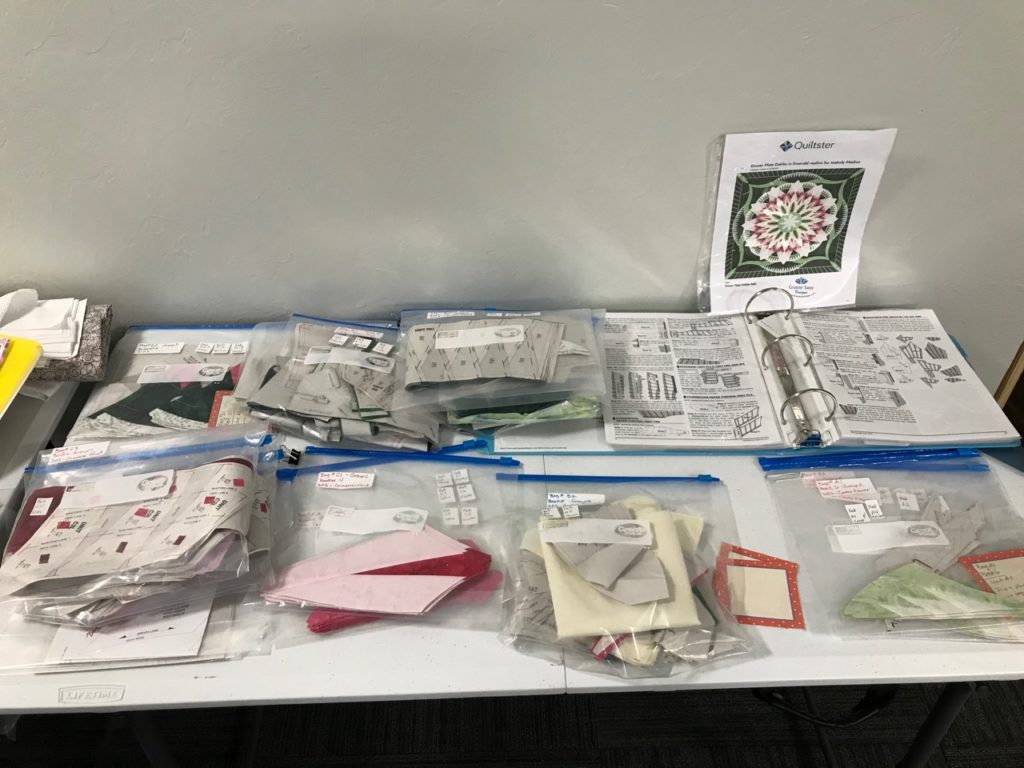
For me, it breaks things up enough to keep me from being bored if there is a lot of repetition (as in a large quantity of the same thing).  It also lets me make significant progress on a project if I employ the same method on a single pattern.  Yep…there must be a screw loose in there somewhere. But boy to I have a good time with it! Yippeee!!

I hope you are having a stitch filled day with lots and lots of enjoyable moments and a sense of accomplishment in being able to put needle to fabric.

May your bobbin never be empty!

Another Fun Day at MY Office

What a fun day I had today. Just as much fun as I had yesterday. I love working with my students to help them create the living version of what they envision in their minds eye.

Today I helped another student layout her blocks for the quilt she’s making as a gift. Kenda is also working on a wedding ring pattern by Quiltworx, titled “Flowers for My Wedding Ring”. She selected the “Taffy” strip set byTimeless Treasures to create her arcs, and this is how they turned out.

Here is Kenda with the first rendition for setting her arcs. It’s looking really good so far!

There are several things to consider when setting the arcs for this pattern. Things like color placement and sequence across the quilt, corner stone placement for where the arcs connect to the next block…not to mention number of completed circles that go across and then down the piece to complete the layout of the body of the quilt.

Here’s the finished version of how Kenda set her blocks. She decided to add another column in order to have 5 circles, or rings across and 5 down. Now to sew them all together.

Once all this is sewn together, it will create the center of the quilt. After this comes a “Flying Geese” border, followed by a large outer border where she will place appliqué flowers. Every step of the way, her work becomes more and more of what she envisions of the end product.

We also spent a little time working on the turned edge method of appliqué that she will use for the flowers, leaves and stems needed to finish this beauty. I couldn’t be more proud of her progress!

Like everything in our lives these past several months, it’s been a struggle to find a way to continue moving forward. I’m so pleased that between us, Kenda and I have found a way to stay connected and continue making progress on her project. It’s been a struggle at times, but completely worth the effort. It’s definitely no small thing to be able to have a face to face class like we did today.

If you would have told me a year ago that some of the most important tools in my teaching arsenal would be my phone, iPad and laptop, I would have humored you and given a nonchalant nod. Now…they are vital tools.

Today, I use text messages and pictures to pinpoint a question area for a student. Phone calls and coaching happens several times through a project. And for those who either live too far away, or just plain feel more comfortable at home, services like Zoom and Google Meet have become necessary and common place to stay in touch and in front of each other. This is a skill set that I never expected to acquire. But in all honesty, it’s a good one to have and be comfortable with. I’m not really a “techie”, but Praise Be that I’m married to one who knows how to interpret my questions and help me fulfill the needs of both my students and myself. I’m grateful and appreciative these avenues are available for the everyday person to utilize in order to do the things we love.

Someone once said that if you do what you love, you will never work a day in your life.

I whole heartedly agree with this sentiment. And these past two days have been evidence of that…because I call this playtime…..at MY office!!

Until next time…may your bobbin never be empty!

Time to Buy Fabric!

I love, LOVE to buy fabric. It’s almost an art form in itself. And it’s even better when I get to help someone pick out fabric for their project.

Today, I got to help a dear friend shop for a couple pieces of fabric that she needed for her Quiltworx pattern, Grandma’s Wedding Ring. She is soooo excited about this project. And she is doing such a beautiful job on it too!

Here we are–Jean is on the left, I’m on the right. We dangled our masks from our ears for the pictures, because who can recognize anyone in a picture with them on! In the background you can see 3 of my samples for classes offered at Clubb’s! To the right of me is the Lincoln Log Cabin, and above us is the Twinkle Star and also Tea Time Placemats.

This is Jean’s 4th class with me, and every project she tackles is more beautiful than her last. Her color sense is spot on, and I’m so pleased to be a part of her paper piecing adventure. What I love about teaching is that it only takes a few minutes before my students become friends. We had the best time today, shopping for her “cornerstone” fabrics to go along with her arcs.

She is working with the Quiltworx Strip Set “Cobblestone” by Timeless Treasures, and I have to say, they are simply beautiful. The colors are rich and warm throughout the collection, just inviting you to look again and again at how well they play together. Jean has done such a lovely job of piecing and I couldn’t be more proud of her.

We met at Clubb’s Fabric Store on Main Street in Delta, CO to accomplish this mission. After visiting about ideas on how to find the perfect colors to coordinate with her project, we then headed over to the “batik wall”.

So drool-worthy! 7 sections long and 3 shelves high, Clubb’s has a wonderful batik section to play in. I simply love to shop here!

And as you can see, Clubb’s has a wonderful display of batiks to play with. It’s way better than a candy store in my humble opinion! Definitely a feast for the eye. If you ever get the chance to visit this little gem of a store on Colorado’s Western Slope, you’ll be transported back to the fabric store of old where they have everything under the sun relating to sewing and fabric and quilting.

And then the search began. I truly expected it to take an hour to find the perfect fabrics, but Jean was on a mission and she landed her selections in less than 5 minutes! I’ll tell ya, she is awesome at this. It was so much fun to watch her in action!

Here are the B arcs that she brought to use as color reference for finding the cornerstone fabrics. Her selections are the bolts lying above the arcs. She’s quite pleased, as am I.

Next task for the day was to enjoy a tasty lunch at a wonderful little mom & pop restaurant 3 doors down. It was so good! But then, it’s always easy to enjoy a meal when your companion is doing the happy seat dance on her side of the booth because she is so excited to get home and back to working on her project.

All in all it was a wonderful outing.

I’m so inspired….time for me to get my machine humming too!

Till next time…..may your bobbins never be empty!

Where is YOUR Happy Place?

This is it! Here she is.

Here is my happy place! It’s my temporary happy place. Many of you know that we are building…and living in a lovely 5th wheel on the property. It’s a long process and one that I cannot survive without my happy place. I have 16’x20′ of creative space, and I use every inch I can find to hold as much as it can to feed my creative juices.

Come inside! And enjoy the tour.

What greets me when I open my door.

Every time I enter, my design wall greets me with the current project. At the moment, I’ve got a pieced batting hiding what’s beneath it…something to be revealed at a later date.

Two of the three most important work areas! Quite tidy finally after the last whirlwind that landed in here.

Looking to the left after coming through the door is my cutting table and sewing area. The desk has a terrific keyboard area that slides out, which allows me to have my machine at the perfect level and great space behind it for all that passes under the needle.

The cutting table. Not a lot of space, but the table, and everything under it fits perfectly between the door and the window.

While standing in front of the third most important work area, I turn around and can reach the cutting table and the tools stored away inside that dark brown box. Thread and patterns and books and bolts. All within reach.

Here she is! My Pfelicty Pfaff long arm. The third work area.
And here’s more of her.

She covers a lot of floor space, but oh my do I ever use up every bit of storage I can beneath her. Yes, I name my machines. Pfelicity Pfaff has big shoes to pfill, and she hums away quite nicely.

These pictures were taken several days ago, and my cute happy place looks much different as I work. I am in truth what is know as a “messy”, not a “tidy”. I believe creative people truly are “messies”. It’s what allows our brains to search outside the box, so to speak. I need that freedom to make a mess in order to find the groove, to reach beyond what might be hidden away and discover or uncover the next thing that will inspire me. It’s like opening a present or reaching to the bottom of a drawer or box to find the perfect “next” facet of my idea. Sometimes I feel quite like Mary Poppins and her carpet bag…reaching all the way in with my fanny up in the air grabbing for the potted plant in order to see that perfect shade of green and the perfect curve of the leaf in order to bring that into the top I am creating or the quilt I am long arming. (Isn’t the minds eye a marvelous thing to explore!) And then…before I know it…the project is finished and it’s time for the next one.

Every time I start a project, regardless of whom it is for, I clean up and put things away from the previous project. I have to. I don’t currently have the space to simply let things lay and work around them. I wouldn’t be able to find anything! When everything is back in it’s place, the trash emptied and the floor swept, I can begin again. It’s what makes my brain happy. I know where everything is, and have just enough room to work. I need to begin with a peaceful and organized space. Then, as the whirling dervish that I am, my creative self takes over and my carpet bag moments begin again. A clean and tidy work area is like a new canvas to me. A place to bring out the fabrics and threads and patterns, put them up on my design wall and audition things, and a way to imagine how to bring things into being from an idea.

What is your happy place? What is important to you to have at your fingertips? Do you like certain sounds, or smells or colors to inspire you? Do you listen to music, or audio books, or television to keep you company or to have something in the background as your creative self plays in the foreground? Are you a tidy or a messy? What brings you joy??

For me—I use my laptop to connect me to Amazon Prime, or Netflix, or Britbox or Acorn TV. I use it to play DVD’s or audio books or music. And I use a wireless headset so I can hear both what is playing as well as my machines. Each machine has a specific sound that I’m in tune with, because when they aint happy, they let you know toot sweet! Right now, I’m working through all the seasons of JAG. But NCIS and Stargate and Downton Abbey and Poldark and all of the Star Trek TV spinoffs have been recently viewed. It’s an eclectic mix to be sure, but that’s me to a tee.

It’s important to know these things. I believe that once you find your happy place, regardless of its size, dimension or place, you find an inner peace that will radiate to others. Your happiness spills over to others, and they become inspired. It’s a gift we all can share. It makes me continually happy, and I find great satisfaction in living my life this way.

Thanks for stopping by and taking the tour! What is your happy place? I’d love to hear about it!

And as always…may your bobbins never be empty!

The Story Continues

Another look at the completed top.

Thanks for stopping in again to continue the story about the making of this remarkable quilt. Today, I’m going to share the second half of creating a quilt…the quilting. Now, for those who live outside the quilt world, you may not realize that there are two distinct types of work involved in creating a finished quilt. The first step is called “piecing” which is when multiple pieces of fabric are sewn together to create what is called a “quilt top” or “flimsy”. It is not yet an actual quilt. The second step is when a “top” is added to additional layers. These are the “batting” (middle), and the “backing” (what is seen as the reverse side of a quilt). These three layers are then sewn together. That process, where these layers are sewn together is called “quilting”. So we quilters are all piecers, lol, and then we are quilters—either we quilt it, or we quilt by check! But any way you slice it, we are quilters. Back to the story…..

This quilt has sections of computerized quilting, but the majority of the work is free motion. Those terms are fairly self explanatory in that with the computerized quilting, a computer program makes the machine quilt by itself, and free motion means that a person drives the movements of the machine head. What is not as well known is that these two skill sets are quite independent of each other. They both take a lot of practice and skill to learn, and neither is as easy as it sounds. The results of each can be quite remarkable in their own way, and are even more stunning when used in concert with each other. Let’s take a look as some of the highlights of this piece.

The beginning of the quilting process. The feathers are a digitized motif. As the quilting is laid down, you can begin to see shapes coming to life across the open areas.
The free motion fill that is outlining the embroidery motifs.
The texture of the surface is quite pronounced here. A blending of both computerized and free motion.
And finally, a view of the back of the quilt. You can see quite clearly how the quilting allows for shapes and motifs to be highlighted. It becomes a completely different creation when you look at the back.

The computerized quilting motif used for the feathers is a Quiltworx design that I already had in my digitized library and it just begged to be used here. If you are looking for some amazing and well made designs, particularly for anything made for a Judy Niemeyer pattern, visit their website and look through what they offer. They are well designed and stitch out with ease. https://store.quiltworx.com/SearchResults.asp?Cat=1841

I couldn’t have completed this quilt without the offerings of Angela Walters and her Free Motion Challenge. You can also follow this link to find out more about what she is doing to inspire multitudes of quilters on their journey to grow their skills. http://www.quiltingismytherapy.com/2018/02/07/free-motion-challenge-quilting-along/

My last bit of info to pass on to you all concerns the batting I used. If you look back at the pictures, you will see how the stitching that is laid down begins to bring more pronounced texture to the surface of the quilt. There are a lot of different ways to bring this about, but suffice it to say that the batting is the biggest helper to this and works in concert with the density of the stitching. One of the more popular methods to attain this look is to use a double batting. By that, I mean you literally use two battings to give the loft to the areas not as densely quilted. Typically an 80/20 poly/cotton blend for the bottom layer, and a thinner 100% cotton or even bamboo or other fiber content batting is laid over the first. I personally don’t like the double batt. My first experience in using this method was not as enjoyable as I’d hoped. Plus, I found the weight of the quilt to be significantly greater than I anticipated. Not to say at all that it shouldn’t be done! I’ve seen lots and lots of quilts made this way that turn out simply beautifully. I just didn’t enjoy the process very much.

Instead, I opted for this product.

This my fav! I love it. Hobbs hit a homer on this one. If you want to give it a try, ask your local quilt shop if they can get it for you. It’s worth the effort!

And I must tell you, I am sold! Any quilt that I want to give noticeable depth and texture to will have this as the batting. I love the feel of the batting, the drape of it and the way it stitches throughout the project. But even more importantly… the weight of it. It is lightweight, has just the right amount of loft….and it’s washable. Wool breathes and is appropriate in both warm and cool climates. Yep—it’s my favorite!

Thanks for coming along with me on this two-day installment post. It’s been fun for me to reminisce and share. I hope you’ll share your thoughts with me about this project.

If you would like to share your thoughts with me directly to this post, make sure you are on my blog site, rather than FB. If you followed the link from FB, just look to the upper right side of what you see and under the caption “Recent Posts” you’ll find the listing of my posts. Click on the one you want to read and follow through to the end of the post. At the bottom you will find comment boxes where you can share your thoughts. Either place you post your comments, I’ll see them, but one flows through FB and the other through my blog site. Please feel free to “Share” things you like through FB! It helps me reach more people every time you do. And thanks for bearing with me as I learn the ropes of blogging…and the proper “blogging etiquette” too.

As always…may your bobbins never be empty!

It’s Spellbinding

Every time I see this picture, I just want to spend hours looking at it.

My husband says this quilt looks like it came from a deck of Hoyle playing cards. You know, the ones with the beautiful designs on the back. I had no idea it would look like that when I designed this quilt. But let me tell you it’s story. It’s something I am quite proud of. I’m kinda tooting my own horn, but honestly…I still marvel at the fact that I made this amazing piece. Well, I made this version of it. Let’s get to the story…

I have a customer that has been sending her tops to me for quilting for about the last 4 years or so. Mostly, she does hand embroidery on baby quilt tops, and then has me add a border or two and then quilt them up for her. She does amazing work, and is lighting fast at it too. I think the world of her, so when she asked me if I would consider creating something for her daughter as a wedding present I was both honored and intrigued.

Her idea was to bring me a huge selection of hand embroidered items from 5 generations of women in her family…and also to include something from herself and her daughter. I was like a moth drawn to a flame. She talked to me about this venture a full year in advance of the wedding and that’s when I began the mental process of designing the top and also learning what I envisioned for the quilting. You see, I have primarily been a computerized long arm quilter, and I knew I wanted to do more free motion quilting on this particular piece.

Enter into my life, the Angela Walters Free Motion Challenge! If you haven’t heard of Angela Walters, look her up on uTube, or FaceBook or just Google her. She is an amazing quilter and has been making free challenges available to anyone who is interested in learning about her approach to free motion quilting. All of the free motion quilting in this piece was inspired by what I learned through her. I am continually impressed and amazed by what she does and how she encourages others to reach for their own personal vision. Follow this link to her challenge and see what it’s all about! You will be so glad that you did! http://www.quiltingismytherapy.com/2018/02/07/free-motion-challenge-quilting-along/

Several months before the wedding, I took possession of said bundle of heirloom pieces of embroidery. To the tune of at least 15 pounds of linens!! There were dresser scarves, pillow cases, head and arm chair protecters, and more and more sets of pillow cases. The first thing I did was to sort through the stack and separate the yellowed items from those that weren’t discolored. They had obviously come laundered and smelling quite fresh, but I use a product made specifically to take the yellowing out of vintage linens. Once the sorting was done, the yellowed ones took a dunk and rested for about 12 hours. Out they came and most looked just the same as those not dunked.

You can begin to see the yellow lifting out of the fibers. The water was clear to start and quite murky by the time the soak was done. This product is incredibly gentle while it does its work.
I LOVE this product! I use it every time I have anything vintage that needs brightening. Visit their website to find this and other products offered at www. retroclean.com Or, ask your local quilt shop if they can get it in for you.

Then, more sorting according to motif content, and groupings of pairs or single items. From there, I began to arrange complete linens (uncut) on my design wall to begin the process for creating. Auditioning groupings, shapes meshing with other shapes. When I began to see a form taking shape…out came my rotary cutter and a set of templates that I use for lots of purposes. The templates are part of a system used to create T-Shirt quilts and originate from the “Too Cool T-Shirt Quilt” book by Andrea T. Funk.

This author has developed a template system that I use for multiple purposes. T-shirt quilts and the quilt featured in this post are just a sampling of their possibilities. The tags at the top of the book show my favorite pages. Her system for creating a T-shirt quilt is the only one I use.

My dad made my set of templates according to the diagram/instructions in the book and I have to say, they are genius. There is absolutely no math involved in puzzling a project together when using these templates. If you are at all interested in using something like this but want to know more about the templates, and/or the system, leave a comment below and I’ll do what I can to help you out.

I was nervous to begin cutting these pieces, but oh so pleased with how they were starting to come together.
The more I worked with these linens, the easier it was to draw them together to make things come to life.
As this piece grew, it began to have it’s own sense of self. I started to introduce new fabrics to the top as well. The brides colors were dark lavendar and charcoal grey. Her embroidered contribution to the project is the strip with the hearts and stars in the very middle of the center motif. The small flowered wreaths were two separate pieces… and the large pieces were a pair of pillow cases. I’ve not seen pillow cases with designs over the entire top, only along the outer edges. A definite “must have” for the centerpiece!
Nearly done!
At last!

Here is the completed top! It was such a long process, but I learned so much about putting a piece like this together. I learned about my own creativity and skill as well. I have finally arrived! I know that sounds funny…but I feel this project brought together my technical skills of construction and the vision I had for the final outcome in a way that I only hoped could happen. Years of experience AND the correct tools for the job plus vision, planning and taking the first step to begin the project all culminated in this outcome. I am pleased beyond measure with my work!

This project was completed in November of 2018. It’s been a while, percolating in the back of my mind about sharing it with all of you here. I’ve been wanting to write about it and use it to showcase my thought process for creating something new out of something old. It’s a good representation of how I see life in general as well as how I envision two people joining their lives together. The old joining with the new; the art and gift of loving hands making things to use everyday; the stitching together of generations (both literally and figuratively) to make a new whole. It’s a beautiful representation of what marriage and family are to me.

As my husband and I celebrate our 33rd wedding anniversary today, and we look to the future to celebrate our sons upcoming marriage, I thought it would be a perfect time to bring this beauty out for a viewing. I hope you’ve enjoyed this as much as I have. Tomorrow will bring more pictures about the quilting on this project.

Until then….may your bobbins never be empty!

What Inspires YOU today?

Here’s a teaser for you. Believe me when I say, the story is full of inspiration for creativity.

What inspires you today? What is it that spurs you into action? Is it a sunny day with a brilliant blue sky and puffy white clouds? Or the laugh of a child? Do you have deadlines looming for anything? Is it the colors of a blooming summer garden? Or, do you simply long for time to sit at your machine and feel the fabric shushing through your fingers as your machine hums along?

There are so many ways to find inspiration for a project, and I think that is remarkable and fascinating. For myself….it varies greatly from day to day. But today, my inspiration comes from deadlines. Followed very closely by the desire to tackle at least a dozen new patterns! Lol!!

As to my deadlines, I am currently working on the long arm for several customer items. I can’t share them with you just yet. But I will as soon as they are returned to their respective homes, and I’ve been given permission to post them.

Most of these items will be either in the Black Canyon Quilt Show (BCQS) that will be happening in Montrose, CO from July 12-14, or the shows boutique. You can find more information about the show at: http://www.blackcanyonquiltshow.com Just click on the link and it will take you to their website. Once there, you can see all the wonderful things available to the attendees, including stunning quilts entered in a wide variety of categories; amazing teachers and education options; fabulous vendors and the shows very special boutique which sells handmade items created and donated by the members of our three local guilds. Each year, the BCQS Board selects a local charity to be the recipient of the proceeds from the sale of these items. If you are close by, or even if you are not but would love a road trip, make a point to drop in and be amazed at the amount and variety of talent that resides in the Uncompaghre Valley. It will knock your socks off!

The next deadline is to finish working through the planning for my teaching schedule for the third quarter (Q3) of 2019. I’ve been teaching at Fabrics and More in Montrose, CO since October of 2018, and just earlier this month began talking with Clubb’s Fabrics in Delta, CO about teaching at their store as well. By the end of June, we should have some amazing classes lined up at both locations for Q3! Q4 information will follow as soon as I can get that arranged as well. As soon as that information is available, I will post a calendar for alI to see. I have to say, I am over the moon excited. Stay tuned!!

But what my fingers are the most itchy to do, is to start on these!

Here are some of the newest patterns that have joined my “library list” of must reads from Judy Niemeyer/Quiltworx .

Or, these!

Just a few of the others patiently waiting for my undivided attention.

I am so incredibly excited to start working on all of these patterns. From one day to the next, I can’t decide which to start first. I might use the “eenie meanie miney mo” method, or the “blind grab bag” method, or the “choose a number” method to assist me, but then again, I might just use them all and then still change my mind. Who knows! But to say the least, all of them inspire me and they will all be under my needle at some point.

And of course, there are always the projects that are waiting in the wings for me to get back to, like these beauties.

So, you see…it’s not so much about finding my inspiration, but rather, figuring out which one of my inspirations will be at the head of the line. Hmmm, yep, it’s like that for me. Deadlines first, and then the wrestling match begins for the next available opening.

I can remember as I was growing up, my mom would always say, “Work first, play next.” And I would grumble, just as my kids did when I said the same thing. Now, I’m telling myself that as well. But to be honest, when the work is done first it makes the play time so much better! So, with that said….I’m off to work…”Hi Ho – Hi Ho – It’s off to work I go…(whistling sounds abound!)

I love my job…I truly do!

Until then—may your bobbins never be empty. (Or mine either! Wheeee!!!)

Happy Juneteenth!

My husband and I took a drive on Father’s Day to see some of the beauty that surrounds us every day. Looking up the canyon wall at the base of the Gunnison River where it flows out of the Morrow Point Dam.

I don’t know where 2019 has flown away to, but we are in the middle of the year and I don’t think we are going to slow down one bit. With that as the beginning of this post, I can only say, Yipeee! Hang On Vera!!! We’re going for a ride…. And that’s just what we did last Sunday. We had hopes of seeing the open spillways on the dam, which has only happened a very few times over recent history, but alas, we had missed it. We still had a lovely adventure and saw some new things we hadn’t seen before.

Yep…those spillway doors are closed, but you can still see the dampness on the dam wall as well as the path we were on from the water that was released. The water is clear enough as you look down that you can see the rocks below the surface for several feet.
Turning directly around from where the last picture was taken, you can see where the muddy Cimarron River, boiling along from snow run-off empties into the Gunnison. It’s amazing what the forces of nature can show you if you make the time to watch.

While I know this isn’t about quilting, it’s just a sample of what my days have included over the past month.

This happened too!

This is our son, proposing to his girlfriend over Memorial Day Weekend. He brought her home and took her to the Black Canyon of the Gunnison to make a beautiful backdrop for this wonderful moment. My husband and I are so blessed to have her joining our family.
I think this says it all! lol!

Along with a few birthdays, and a soon to celebrate anniversary, some of this was happening too!

Three of my five students for the day. They are working on their versions of Prismatic Star (Quiltworx). We covered an amazing amount of information, learned some great techniques and tips along the way, and enriched some new friendships.

These three smiling faces belong to some amazing ladies! One of them is a quilter, and has never tackled piecing a top…of any kind…ever. Another has made several Judy patterns, and the other is beginning her second Judy pattern. We had a terrific time together.

Look at that smile!!

My fourth student for the day, here is another happy quilter working on her Prismatic Star. It continues to amaze me how striking the individual color choices are and how each one brings so much life to these patterns.

Her color choices are a perfect match to the decorations of the home where this little beauty will go to live.

And here is the fifth student in the class, working on her Rustic Mountain Snowflake (Quiltworx). It was an incredibly busy day for us. Everyone did a fantastic job of tackling their objectives. We parted ways at the end of the day, with each student having a plan for their homework to complete before the next class day.

And these arrived too!
And this cute little cake, from my sweetest friend!

Yes…wonderful presents arrived at the classroom too. It was my birthday, and I had an absolute blast spending my day doing what I love, and enjoying these ladies as we worked together to bring something they envisioned to life. I am blessed beyond measure to be able to call something I love “my job”.

I read somewhere that if you make your living doing what you love, you will never work a day in your life. And for me….it is the truth. Blessing upon blessing!

Have a fabulous day! And may your bobbin never be empty!!

The Quilt Zone!

Welcome to my blog! Through these pages I’m excited to share with you my wonderful adventure of being a quilt-a-holic.  I confess…I love quilts.  I love everything about quilts!  And most of all, I love teaching and sharing what I know with any who may ask.

Quilting is a huge part of my life, and I wear many hats within the field of quilting.  I do repair and restoration; I am a long-arm quilter; I hold quilting retreats know as quilt camps; and the very best of my adventures includes my journey to become a Certified Instructor for Judy Niemeyer/Quiltworx patterns.  

Let me tell you about a wonderful experience I had last week!

On Thursday, I had my very first trunk show!  I did the program for my guild (Friendship Quilters of Western Colorado).  I was as nervous as could be.  Now, I have no problem getting up in front of people and speaking about any number of things, but generally not about myself.  This was different, and in a very good way.  Our attendance is usually around 45-50, but on last Thursday, we were over the 60 mark.  Yikes!  But it was all good.  We all laughed, and we cried a tear or two, but mostly we laughed and had a terrific time.

After that, and on into Friday, I taught a class to 21 ladies!!  It was a full house, and a wonderful success.  Oh my, was it a blast.  Most of the ladies were new to Judy patterns, and by the end of the second day, they were well on their way to mastering the Quiltworx pattern Cappuccino. I couldn’t be more pleased.

Let me show you some of the highlights of those two days.

Here is my Vintage Compass, (Quiltworx), made with Asian fabrics. It was only my second Judy pattern. Lots of good lessons learned on this quilt. I especially like how the quilting turned out using the Quiltworx digitized patterns for this quilt.
The back of this quilt is just as striking as the front. Changing thread colors may be a bit of a chore, but it certainly has a dramatic effect on the over all presentation. I love this quilt!
And here is the very first quilt I ever made!! It is an Eleanor Burns Quilt in A Day Log Cabin. After 20+ years, it is still just a top (held sideways) with no borders. I enjoyed making this piece, but once I got this far—I never looked back! Needless to say, this needs to make the migration from my UFO pile and into the completed pile, ready for the next trunk show.
This was the very first quilt I showed. It is from my great-grandmother, circa WWI. A “Red Cross Quilt”. I am so very proud to have this beautiful heirloom to cherish.
And here is an amazing quilt from my father-in-law. Beautiful hand quilting and pristine condition! An absolute treasure.
Prismatic Star (Quiltworx pattern). I chose to make this from a kit and it’s a very striking color way for this quilt. These are not my first choice of colors, but I felt the best way to acquaint myself with these type of colors was to utilize a well designed kit. It proved an excellent learning opportunity, as I’m much more comfortable in working with colors such as these. Really enjoyed making this quilt…much more than I anticipated.
A Fractured Paint Box (Quiltworx) made with a Chambray jelly roll. Fast — fun — and easy!
Prairie Star (Quiltworx). A terrific pattern that I am now teaching at Fabrics and More as a “Block of the Month”. Our class is small, but the ladies are so enthusiastic about their work. Learning, and teaching, this quilt is turning out to be a very rewarding experience.

There were about 20-25 more quilts in the trunk show, but I’ll save those for another day.

The project for the class following my trunk show was a set of placemats made from the pattern Cappuccino (Quiltworx).
Look at those smiling faces! These ladies have some beautiful beginnings to their projects.

It was certainly an exciting and fulfilling event. I feel so honored and pleased to have shared my first trunk show with my guild sisters.

Until next time—may your bobbin never be empty!

Introduction

Welcome to “The Quilting Zone”, together we will journey far and wide to explore my own personal journey as a quilting enthusiast. Sit back, grab your favorite snacks or beverage (or both) and come along for the ride.