
Thanks for stopping in again to continue the story about the making of this remarkable quilt. Today, I’m going to share the second half of creating a quilt…the quilting. Now, for those who live outside the quilt world, you may not realize that there are two distinct types of work involved in creating a finished quilt. The first step is called “piecing” which is when multiple pieces of fabric are sewn together to create what is called a “quilt top” or “flimsy”. It is not yet an actual quilt. The second step is when a “top” is added to additional layers. These are the “batting” (middle), and the “backing” (what is seen as the reverse side of a quilt). These three layers are then sewn together. That process, where these layers are sewn together is called “quilting”. So we quilters are all piecers, lol, and then we are quilters—either we quilt it, or we quilt by check! But any way you slice it, we are quilters. Back to the story…..
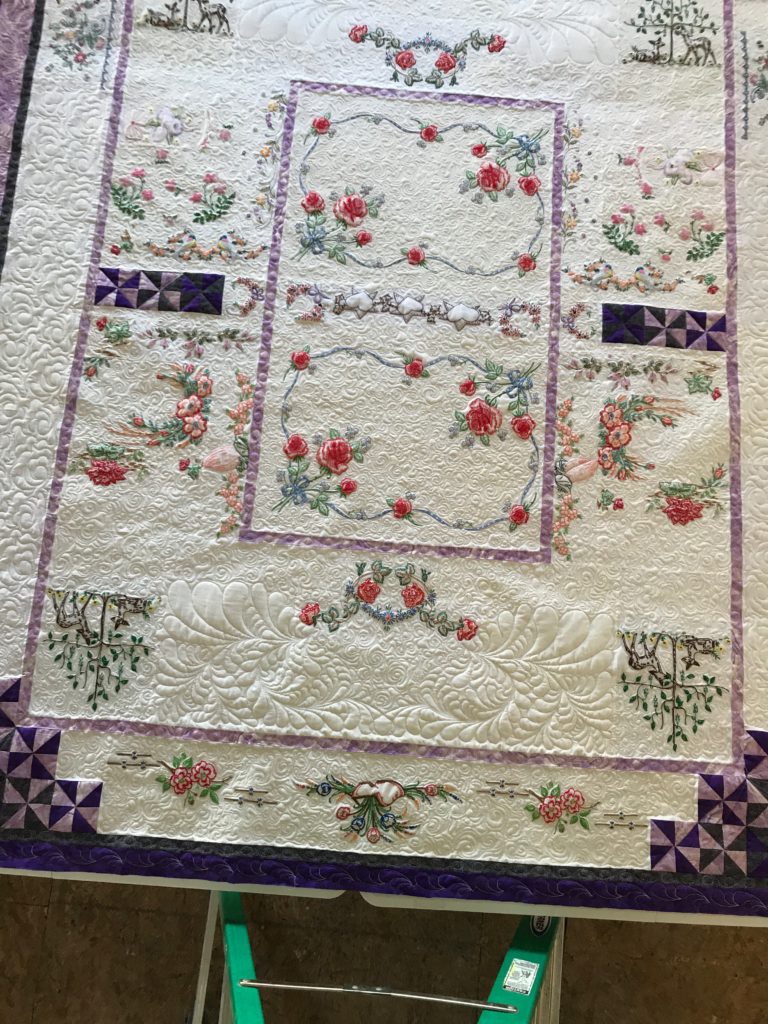
This quilt has sections of computerized quilting, but the majority of the work is free motion. Those terms are fairly self explanatory in that with the computerized quilting, a computer program makes the machine quilt by itself, and free motion means that a person drives the movements of the machine head. What is not as well known is that these two skill sets are quite independent of each other. They both take a lot of practice and skill to learn, and neither is as easy as it sounds. The results of each can be quite remarkable in their own way, and are even more stunning when used in concert with each other. Let’s take a look as some of the highlights of this piece.

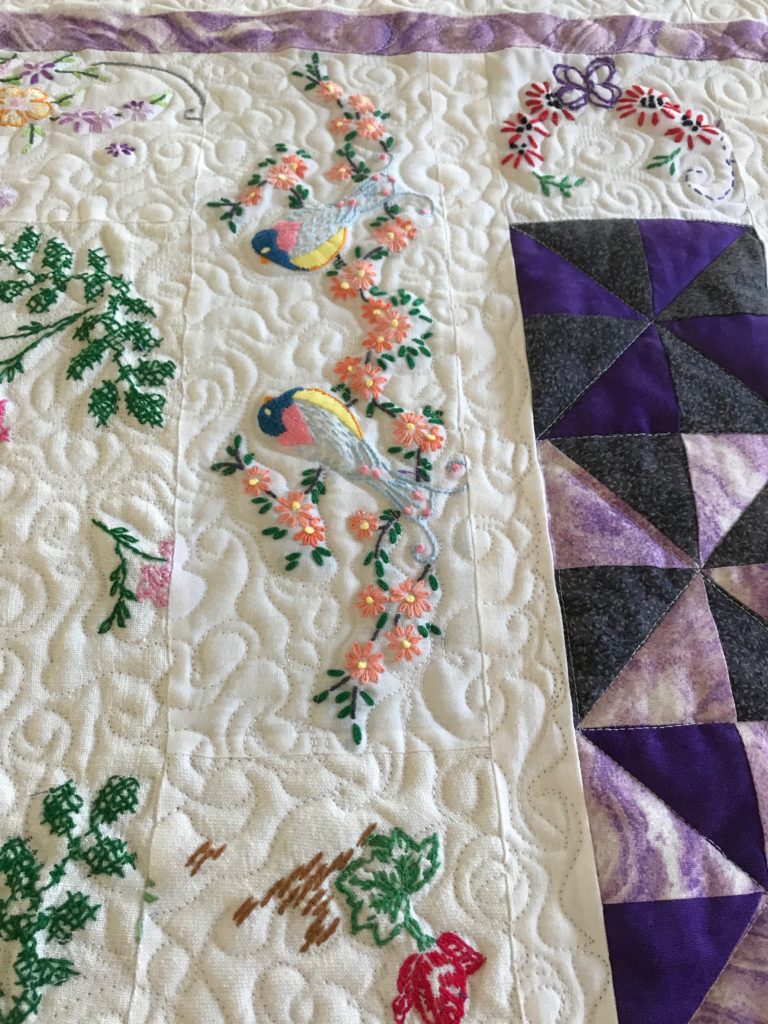
The computerized quilting motif used for the feathers is a Quiltworx design that I already had in my digitized library and it just begged to be used here. If you are looking for some amazing and well made designs, particularly for anything made for a Judy Niemeyer pattern, visit their website and look through what they offer. They are well designed and stitch out with ease. https://store.quiltworx.com/SearchResults.asp?Cat=1841
I couldn’t have completed this quilt without the offerings of Angela Walters and her Free Motion Challenge. You can also follow this link to find out more about what she is doing to inspire multitudes of quilters on their journey to grow their skills. http://www.quiltingismytherapy.com/2018/02/07/free-motion-challenge-quilting-along/
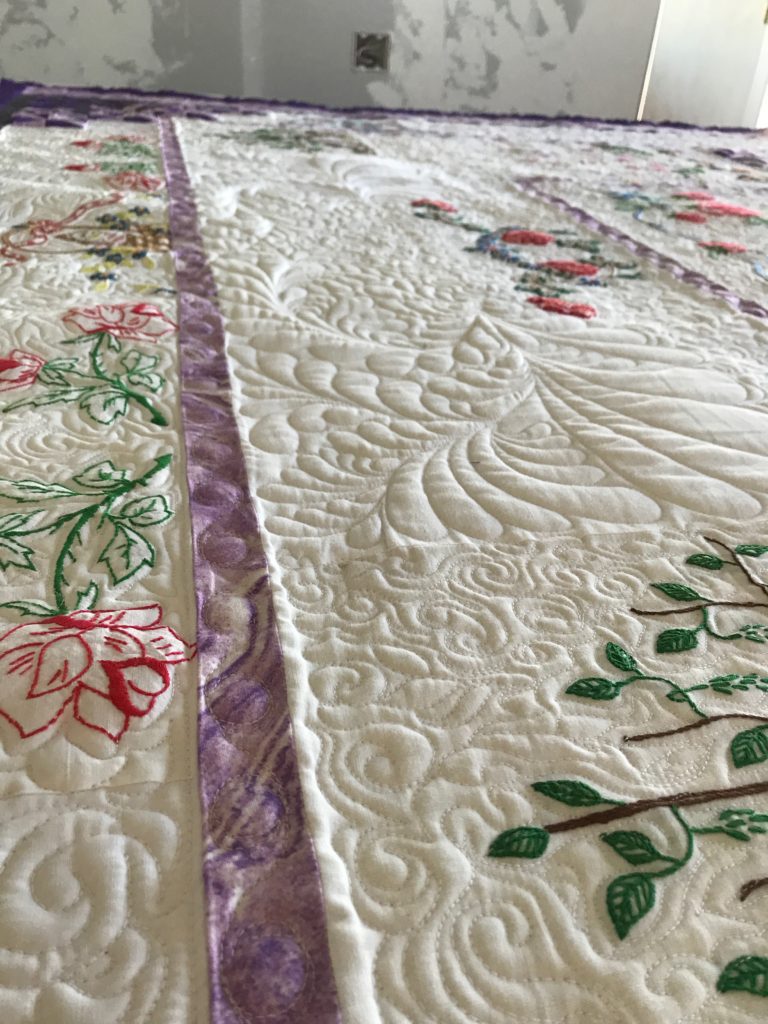
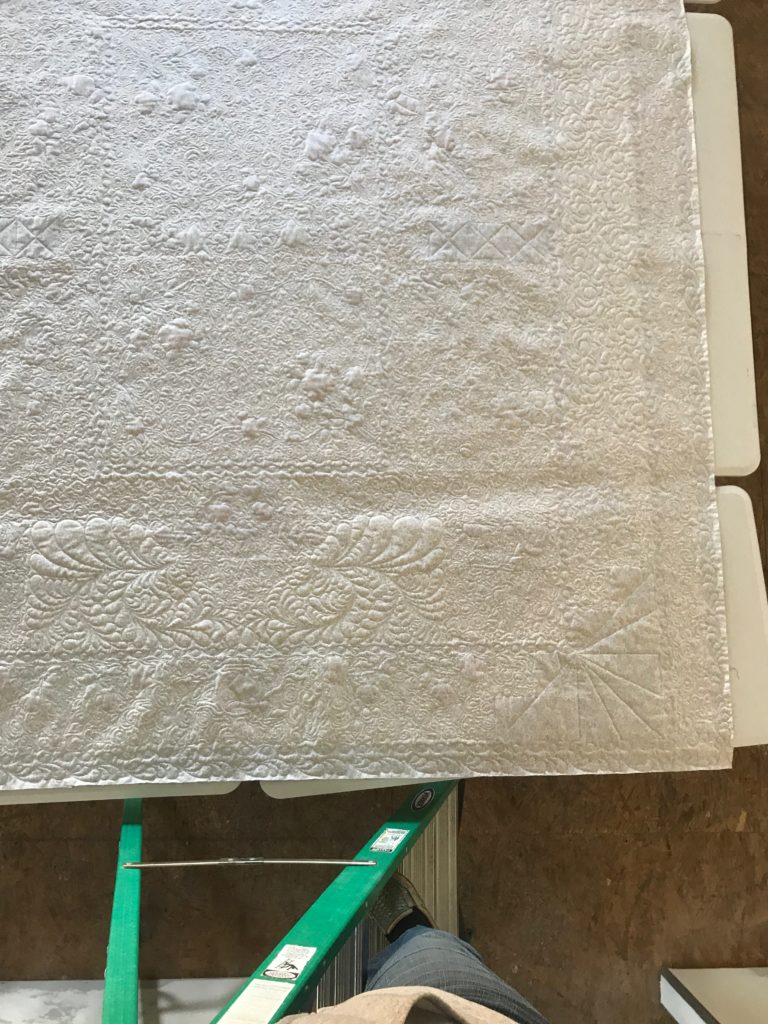
My last bit of info to pass on to you all concerns the batting I used. If you look back at the pictures, you will see how the stitching that is laid down begins to bring more pronounced texture to the surface of the quilt. There are a lot of different ways to bring this about, but suffice it to say that the batting is the biggest helper to this and works in concert with the density of the stitching. One of the more popular methods to attain this look is to use a double batting. By that, I mean you literally use two battings to give the loft to the areas not as densely quilted. Typically an 80/20 poly/cotton blend for the bottom layer, and a thinner 100% cotton or even bamboo or other fiber content batting is laid over the first. I personally don’t like the double batt. My first experience in using this method was not as enjoyable as I’d hoped. Plus, I found the weight of the quilt to be significantly greater than I anticipated. Not to say at all that it shouldn’t be done! I’ve seen lots and lots of quilts made this way that turn out simply beautifully. I just didn’t enjoy the process very much.
Instead, I opted for this product.
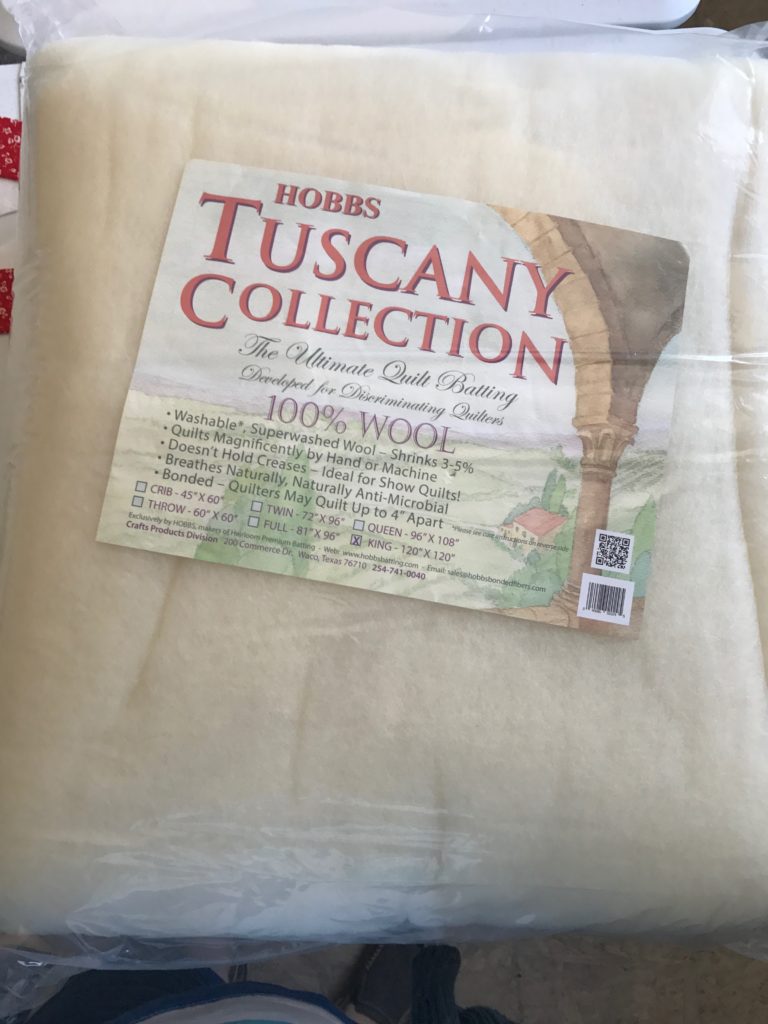
And I must tell you, I am sold! Any quilt that I want to give noticeable depth and texture to will have this as the batting. I love the feel of the batting, the drape of it and the way it stitches throughout the project. But even more importantly… the weight of it. It is lightweight, has just the right amount of loft….and it’s washable. Wool breathes and is appropriate in both warm and cool climates. Yep—it’s my favorite!
Thanks for coming along with me on this two-day installment post. It’s been fun for me to reminisce and share. I hope you’ll share your thoughts with me about this project.
If you would like to share your thoughts with me directly to this post, make sure you are on my blog site, rather than FB. If you followed the link from FB, just look to the upper right side of what you see and under the caption “Recent Posts” you’ll find the listing of my posts. Click on the one you want to read and follow through to the end of the post. At the bottom you will find comment boxes where you can share your thoughts. Either place you post your comments, I’ll see them, but one flows through FB and the other through my blog site. Please feel free to “Share” things you like through FB! It helps me reach more people every time you do. And thanks for bearing with me as I learn the ropes of blogging…and the proper “blogging etiquette” too.
As always…may your bobbins never be empty!