Becoming a Quiltworx Certified Instructor

Sitting at my desk this morning, I pondered what to blog about today…and it struck me the while I’ve been showing pictures about my work, and that of my students, I’ve not expanded much upon how I came to this adventure and the tasks this journey requires. Making samples of patterns for my portfolio is just the tip of the iceberg. A beautiful one to be sure, but there is so much more to the whole endeavor. Come along with me while I share a bit more of the journey.

Let me start by telling you how I came to love the patterns that Judy Niemeyer designs. The first time I ever saw a Judy pattern was in 2005. I was at The Great American Quilt Factory (which is sadly no longer open) just poking around and checking out the store. They had a red version of this on display and no joke, I stood there staring at it for 15 minutes! I was spell bound. And I HAD to have the pattern. I bought it with the thought that s-o-m-e-d-a-y I would be good enough to make this. I had never seen anything like it, and I knew nothing about Judy’s method of paper piecing. I had taught paper piecing before, but nothing to this degree. I went home and dreamt of this pattern many times for a number of years.
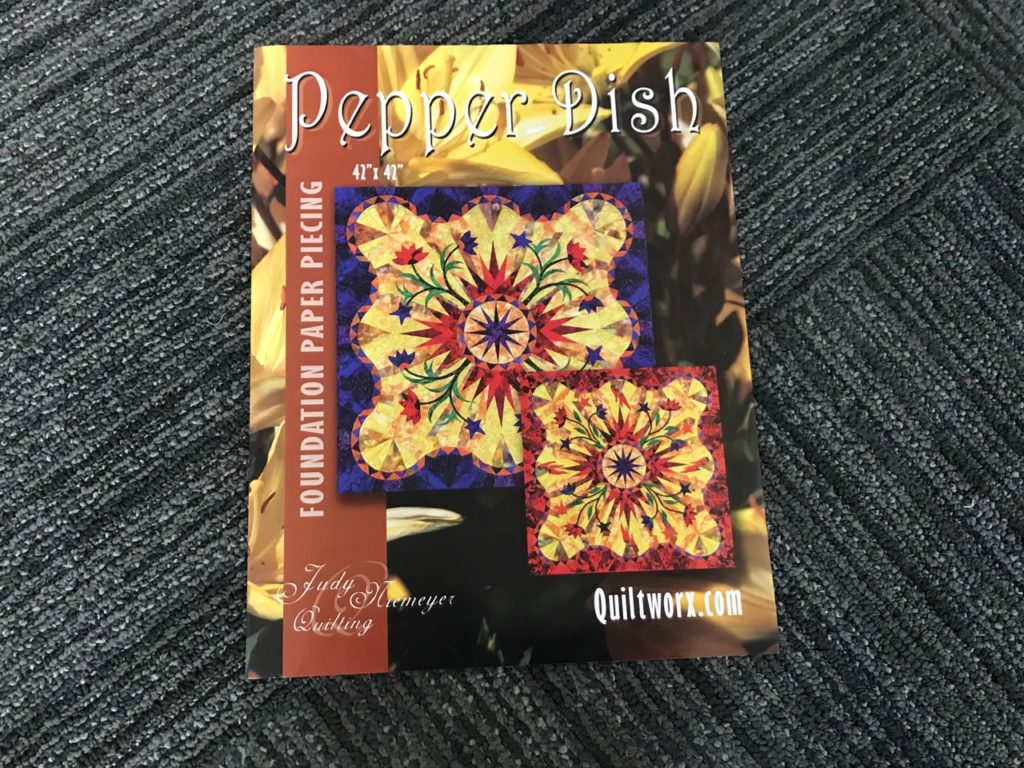
Here it is…the one that started it all. The store sample was of the red color way. Red just happens to be my favorite color, so of course it caught my eye. It was a love at first sight that still captures my heart. 2021 will be the year that I bring it to life. A 16 year love affair is long enough to wait.

Fast forward to 2015 when I was perusing the pages of the April edition of American Patchwork & Quilting and lo and behold…there was the Paddle Wheel. Another Judy pattern! I said to myself, “If it’s in the magazine, it must surely be easy enough for anyone to make! I’m going to give it a try.” I did, and following all the directions, and the pictures (which are always worth a thousand words), I gave it a go. And I was hooked.
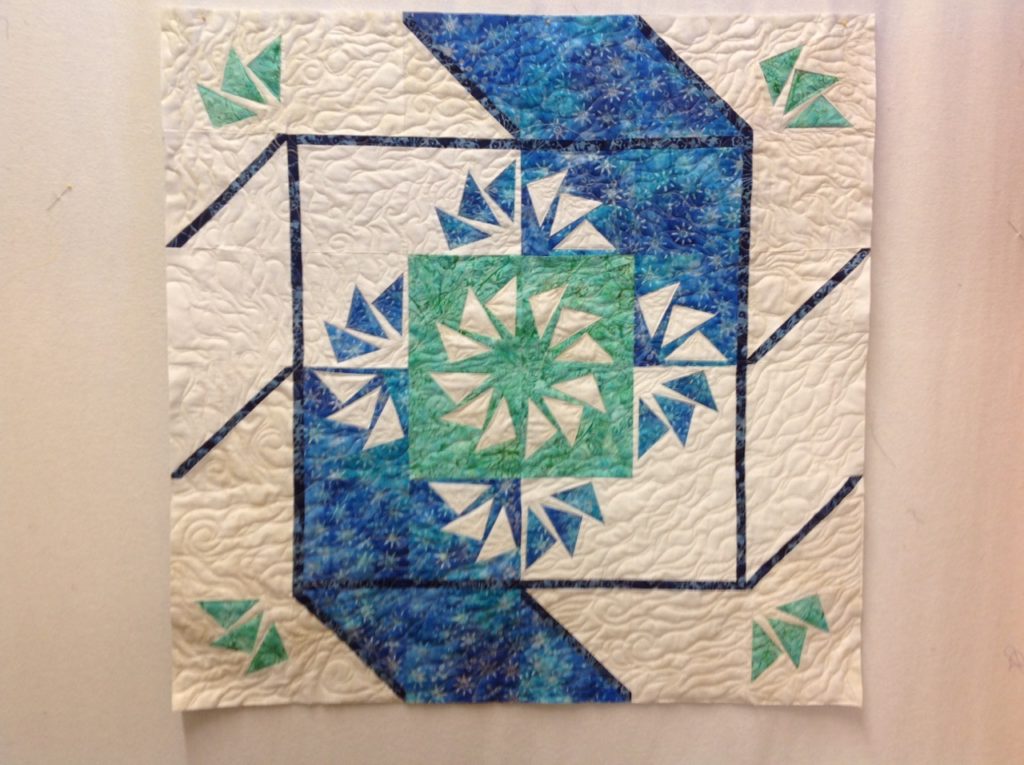
Here is my Paddlewheel, fresh off the long arm from a few years back. Isn’t it silly that I’ve still not taken a picture of the finished one with the binding on it?? I used colors that reminded me of the ocean along the Australian west coast when my husband and I vacationed there for our 25th wedding anniversary. Both my paper piecing and my long arm quilting have improved greatly since then.

I decided to check out their website Quiltworx where I learned about Certified Instructors and retreats in Montana with Judy Niemeyer herself. I was intrigued by what I was reading and the idea began to percolate on my back burners. Over the next few years I made a number of different patterns and really found my groove. I finally found what I wanted to be when I grew up! (You can click on the underlined word and the link will take you to their website.)

In 2018 I bit the bullet and decided to attend my first retreat in Montana to venture into the world of becoming a Certified Instructor. It’s challenging to be sure, and it should be. To date, at my last count I’ve complete about 25 different patterns with an undisclosed number currently still in progress, lol. (Not everyone needs to know the extent of my fetish, heh heh heh.) There are some that I’m very happy with, and some that make my buttons pop. Here are a couple pictures of one of those.
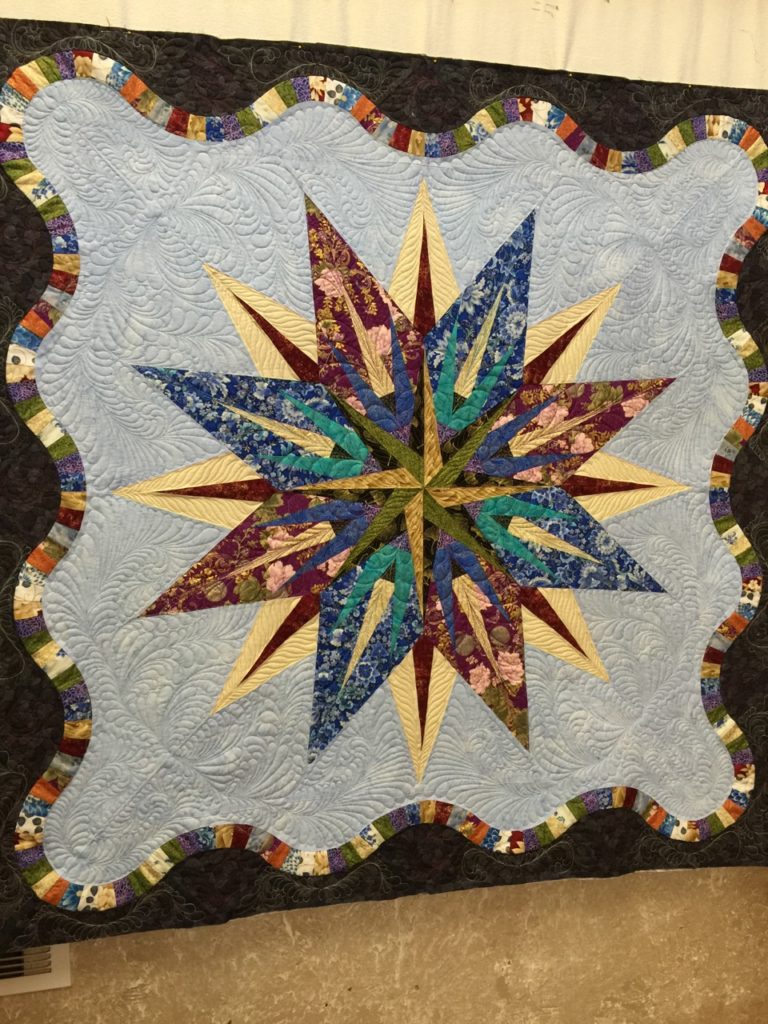
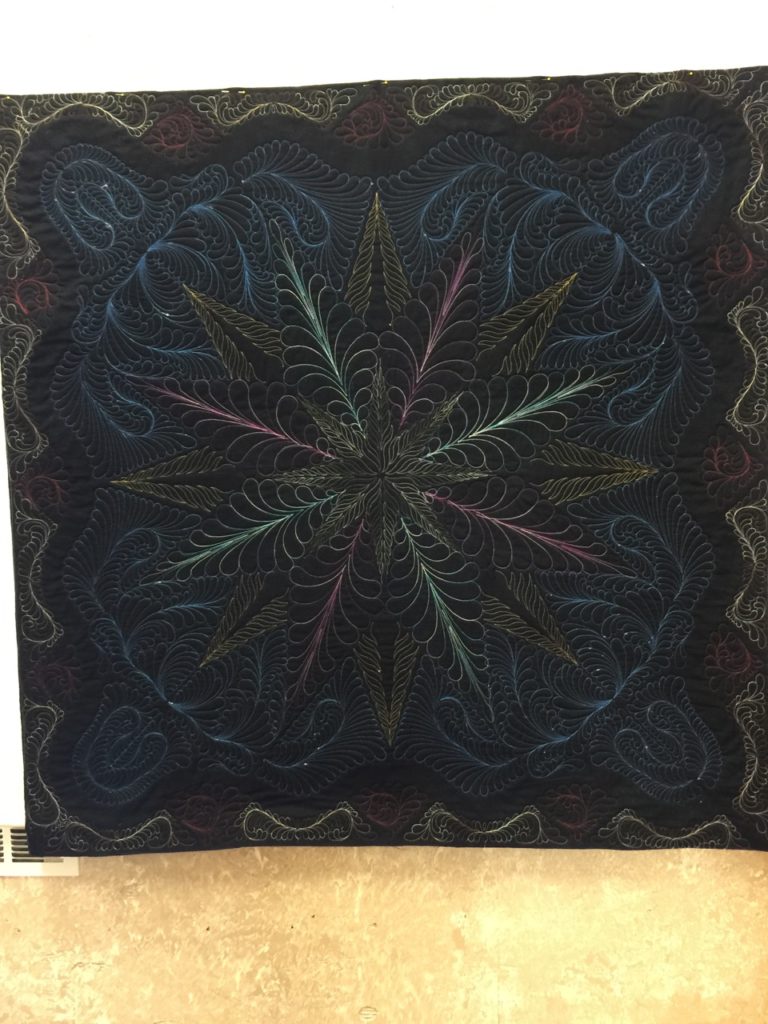
This is my Vintage Compass, made from my stash of Asian fabrics. It’s the second pattern I attempted and attended a class with a certified instructor. My goal was simply to learn the techniques of the pattern. I had low expectations of how it would turn out due to the fabrics as I’d never seen an example made with non-batik fabrics. Imagine my amazement when I saw the finished product.
And here is the back. Don’t mind the wonkiness of the picture…IT is straight, quilt hanger (me) had a wonky time of it. This is also my long arm work using Quiltworx digitized patterns. I’m super proud of this one. I won my first ribbon at a quilt show with this one. Red is a good color, (it IS my favorite after all). Hoping for a blue and maybe even a purple some day.

So along with making quilts and learning patterns, there are a number of things that a CI-in training must do to reach certification. Things like teaching and getting in front of groups for trunk shows and demonstrations; learning about and introducing others to Quiltster and it’s amazing capabilities to literally color a quilt to see what your ideas for color and placement actually look like BEFORE you buy one inch of fabric! It even gives you the yardage requirements for each color in the quilt, as well as how to sub-cut it for the proper size needed in each component where it’s used. I’m telling ya it is genius! Go check it out at Quiltster You’ll be so impressed! Here’s a few pics to show what you can do.
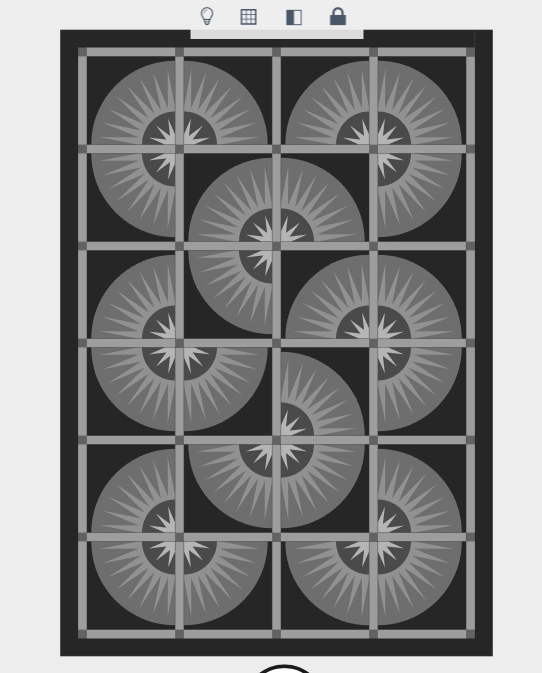
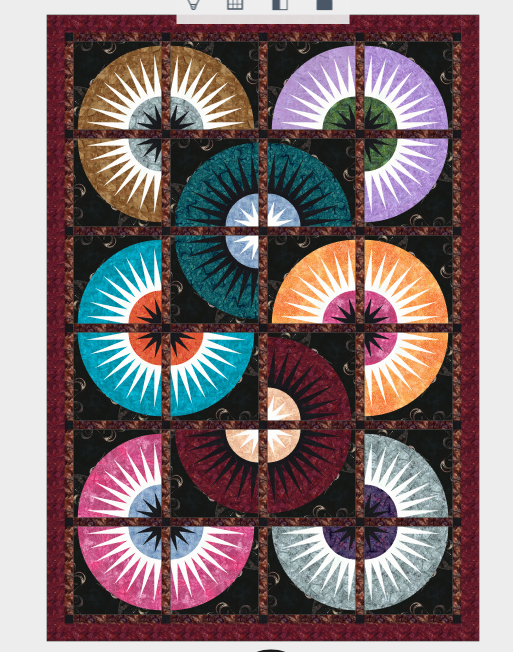
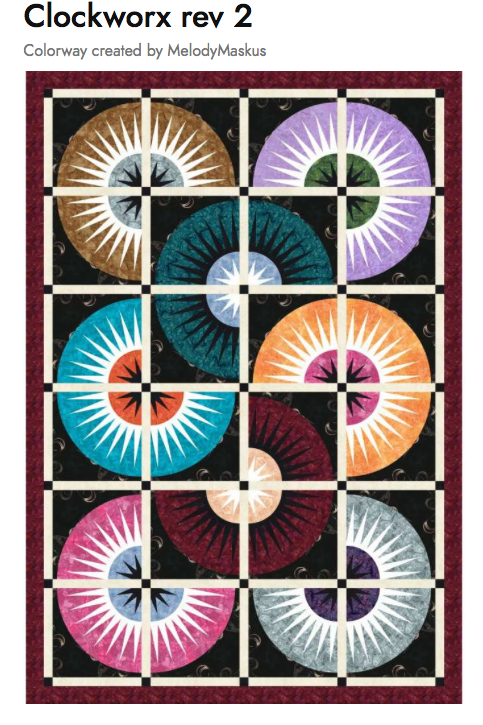
This pattern is Clockworks. You start out with a black and white version.
Next…you begin to color by selecting different fabrics.
Then, you can make slight changes, or big ones, to arrive at a version you like best. For this quilt I chose to make my first rendition. The white of the sashing in this version was just too much. I felt the darker sashing of the first attempt was more cohesive and allowed the colors of the New York Beauty circles to shine more. Would love to hear your thoughts on this!

Other things include developing an on-line presence. While there are many, many ways in which to do this, I’m starting with this blog. I’ve wanted to do this for a while, and have tried my hand at it a couple times, but never really got in a groove. They say to really do well and find inspiration you should write about what you know. And that’s how I got this little blog going again. 5 days in and I’m loving it. They say it takes 21 days to create a habit, but I think for this…it’s already stuck. I’m craving my blogging time.

There are more things on the “To-Do” list of the CI-in training, which I’m sure I’ll be sharing about as time goes on. But I wanted to touch on the highlights that are happening for me right now. Covid has thrown more than just a monkey wrench into the mix on trying to accomplish some of these things, so being creative about how to keep going forward is an important part of this whole adventure as well. I’ve always been a firm believer that it’s better (not easier, just better) to start with the hardest part of anything you want/need to do. After that, everything gets easier. But if the hardest part can whoop you, it’s worth finding that out sooner rather than later. This hard part–the Covid hard part–has jumped into the middle of my equation setting me to dig in and really work through it. IT will not be the deterrent it could have been if I were just beginning this journey.

It’s a big thing when you figure out what you’re meant to do in life. I’m not about to let a pandemic get in the way. Detours and alternate routes are definitely in order!

So hang on Vera! We’re gonna blast our way through this and get to the other side squealing and laughing the whole way through. Quilting really IS my life!

Until next time, may your bobbin never be empty!
What’s Under Your Needle?

What’s under your needle today?  Are you piecing, or planning?  Laying out blocks to complete a top?  Are you quilting or binding?  I’m so curious as to what’s under your needle!

Today, after my morning chores, a few phone calls and emails and a couple hours of standing at my long arm, I’m piecing.  Paper piecing to be more exact.  It’s what I love to do…in fact I crave my time at the machine, working on several different patterns at a time.  

I’m sure there are many people who think I’ve got a screw loose, and they probably aren’t far from the truth.  But my passion for creating quilts is super focused on paper piecing.  And Quiltworx patterns by Judy Niemeyer are the highlight of my quilting world.  I find my mind and my heart breathe a sigh of contentment when I sit down at my sewing desk to work on the current projects.  It is definitely my happy place.

Becoming a Certified Instructor for Quiltworx is something I’ve been working towards since my first trip to Montana in April of 2018.  It’s January 2021, and I’ll be finishing up this adventure a year from now.  It’s a huge time commitment.  And in every way, in my humble opinion, equal to a Bachelor’s degree from a college.  Each of the patterns that I complete is easily equal to the cost of a college class and it’s required books.  Especially if I only buy the newest fabrics for each of my projects.  

Don’t get me wrong…I love, LOVE all the gorgeous and newest fabrics, but I’m also quite budget conscience.  I’m especially proud of the fact that I have been able make several of my portfolio patterns directly out of my stash.  Out of my STASH!!!  I’m over the moon about that.  Here are a few that I’ve been able to do that with.

Here is my version of Lincoln Log Cabin. It’s 31″ square and a super fun and fast project to make.
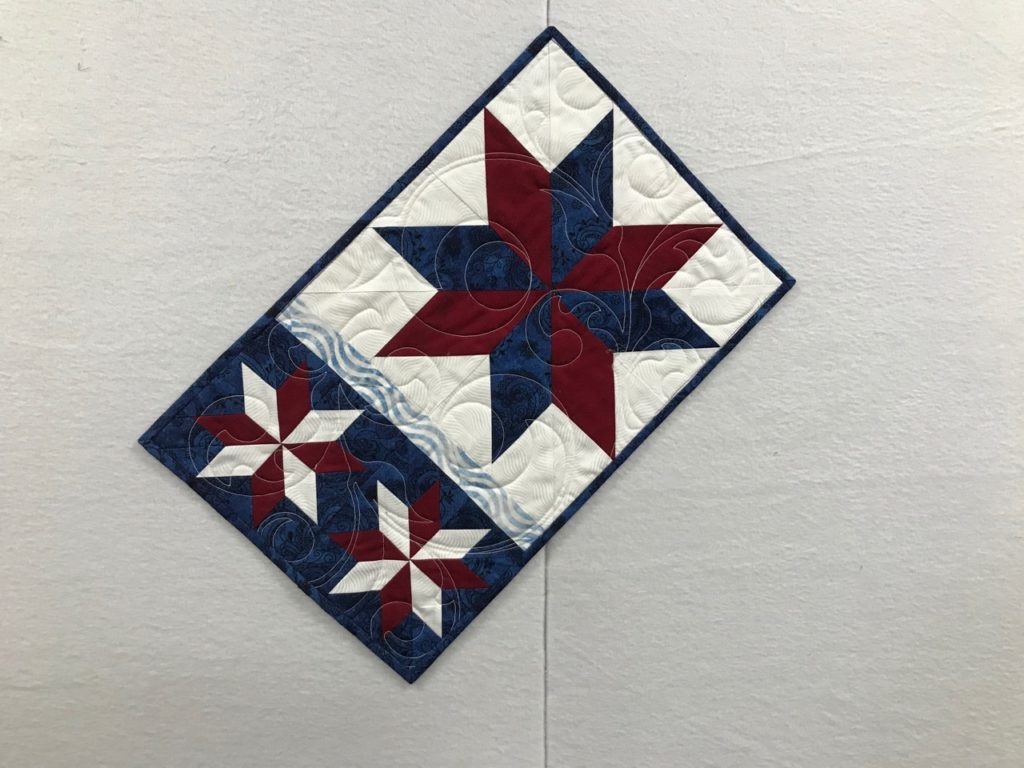
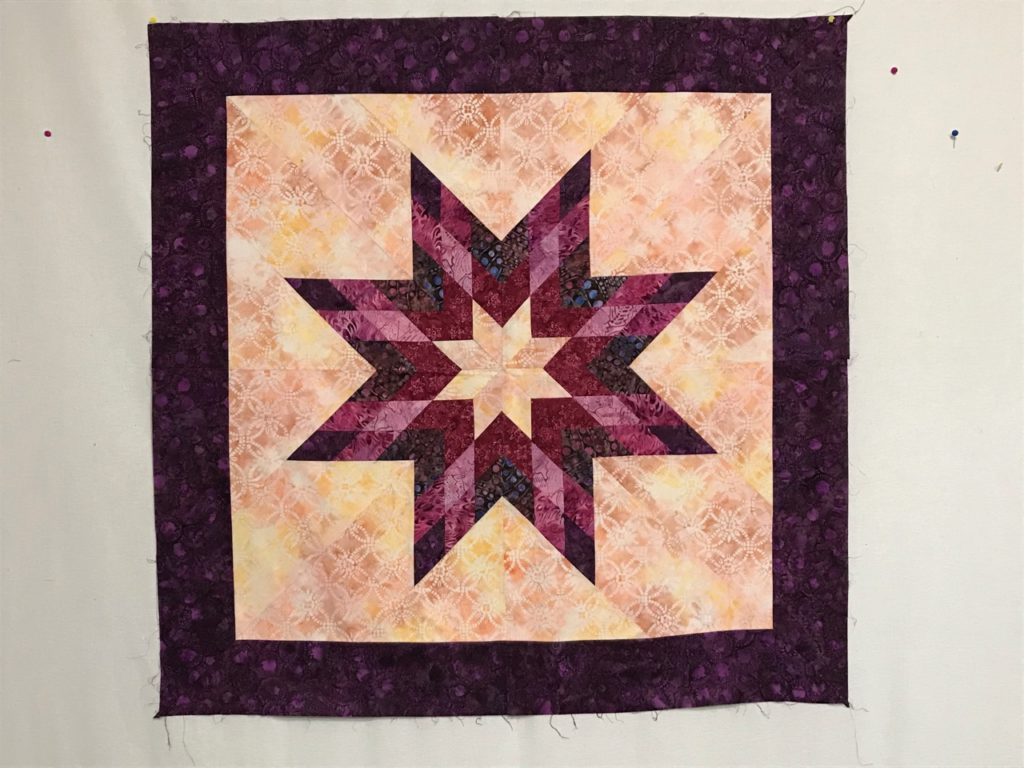
I love my Twinkle Star! It was sooo much fun to make. And at only 38″ square, it’s a great size for gift giving too!

Next is a summer color way of My Two Baby Sisters placemat. Another quick project with endless color options.
This is Star Baby…waiting for her turn on the long arm. I LOVED putting this together! Another sweet little wall hanging.
And here are Tea Time Placemats, also waiting to be quilted. This pattern is awesome! And comes with enough papers to do a set of 4 for your table. Can’t wait to make some in autumn colors too!

Golly! There are more than I thought that came from my stash.  Actually, there are even a few more, but I’ll save those for another time.  Using from my stash is something I’m pleased with .  And it’s also something I think will be a helpful to encourage my students to do.  Of course…when my students are shopping for fabric I’m only a phone call away to ask a question, if I’m not already there helping, guiding and suggesting options to add to their selection process.  Who doesn’t like to shop for fabric??

So, leaving the bunny trail that took me away from my original question…What’s under your needle?  This is what’s been under mine for the past several days.  I’m working on just a few patterns all at once.  It’s a skill set that I’m honing and finding it to be quite productive.  It can be a bit confusing at first, but it only takes a little while before it becomes second nature. I love working on my projects this way.  

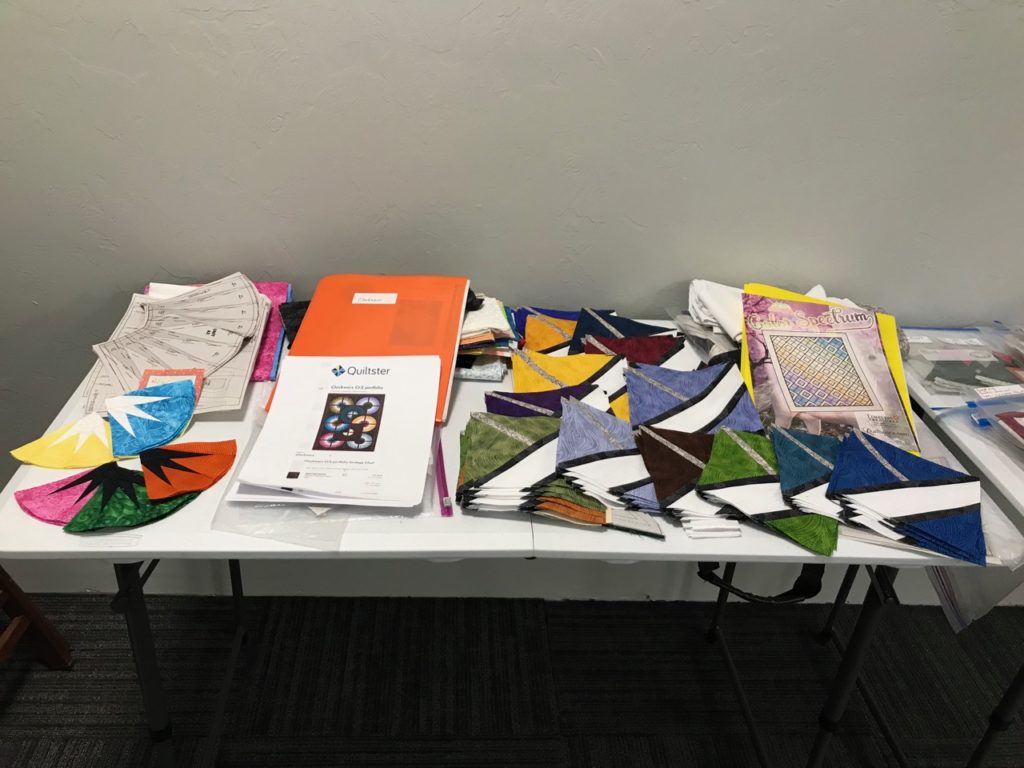
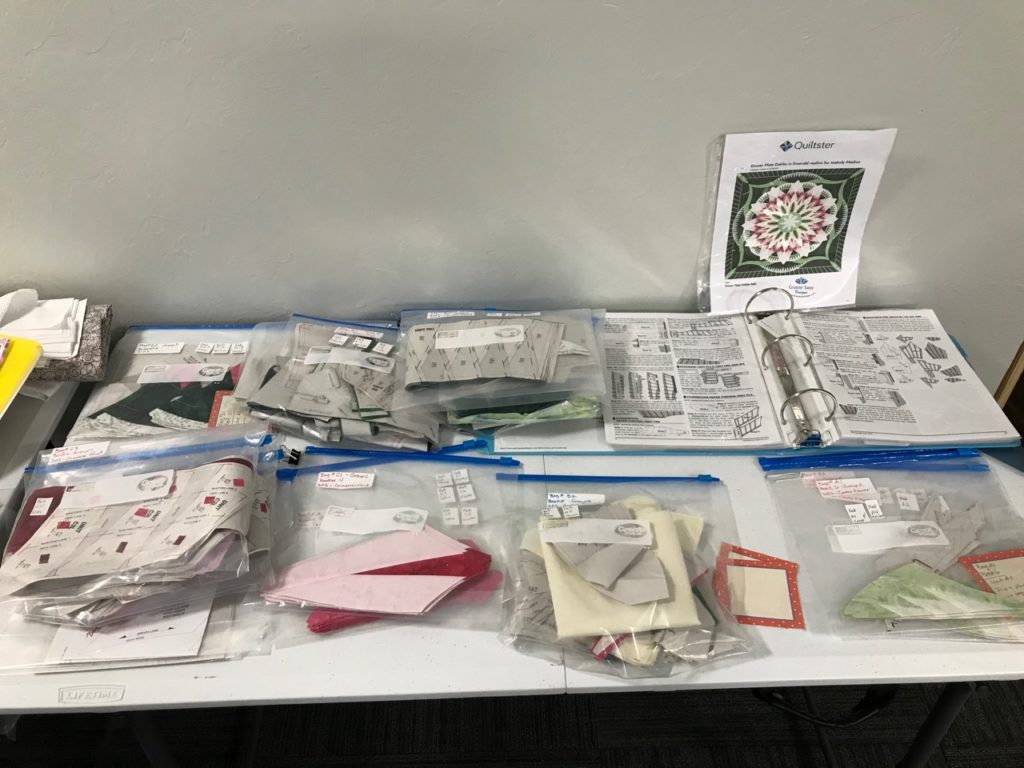
I have two 4 foot tables that I use for my pattern staging. Here’s the first one. On the right is my version of Clockworks, which is a Quiltworx Cut Loose Press pattern. And on the left is Color Spectrum I have nearly all of these blocks completed…next will come setting the blocks to make the top.
Here is the second 4 foot table. I’m working on my Dinner Plate Dahlia here. Granny Sassy Designs put this kit together for me, and she does an AMAZING job! I’ve loved this color way since the first time I saw it. I’m over the moon about this beauty!!
This is how I stack my projects as I work on them. Each time I go through the stack I do the same step to everything regardless of the project. For example, each layer will get ironed all the way through the stack, then on to trimming and placing the next piece, then sewing them together, repeat.
Here is what the stack looks like exploded out layer by layer. I know what each of these belongs to, and where they are in the process by just looking at the top layer. Oh! And there’s an Impatiens placemat in there too. That’s 5 patterns across these 8 layers. Not everyone wants to work in this way, and that’s the beauty of it all…we all get to enjoy our own process with no judgements.

For me, it breaks things up enough to keep me from being bored if there is a lot of repetition (as in a large quantity of the same thing).  It also lets me make significant progress on a project if I employ the same method on a single pattern.  Yep…there must be a screw loose in there somewhere. But boy to I have a good time with it! Yippeee!!

I hope you are having a stitch filled day with lots and lots of enjoyable moments and a sense of accomplishment in being able to put needle to fabric.

May your bobbin never be empty!

Another Fun Day at MY Office

What a fun day I had today. Just as much fun as I had yesterday. I love working with my students to help them create the living version of what they envision in their minds eye.

Today I helped another student layout her blocks for the quilt she’s making as a gift. Kenda is also working on a wedding ring pattern by Quiltworx, titled “Flowers for My Wedding Ring”. She selected the “Taffy” strip set byTimeless Treasures to create her arcs, and this is how they turned out.

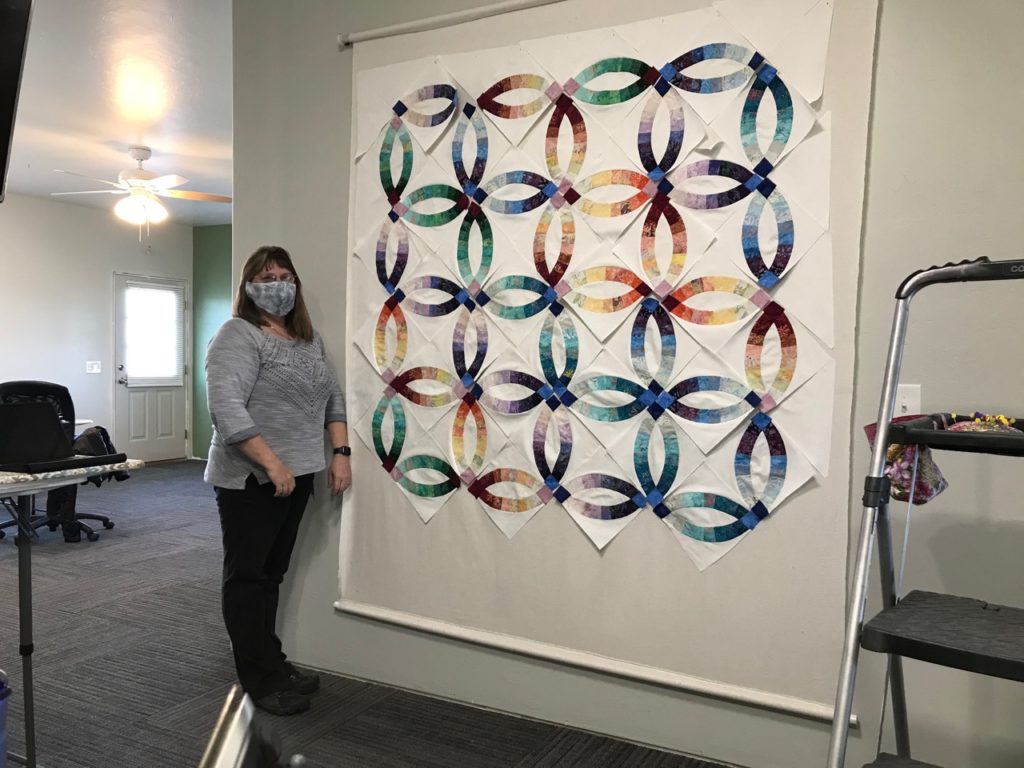
Here is Kenda with the first rendition for setting her arcs. It’s looking really good so far!

There are several things to consider when setting the arcs for this pattern. Things like color placement and sequence across the quilt, corner stone placement for where the arcs connect to the next block…not to mention number of completed circles that go across and then down the piece to complete the layout of the body of the quilt.

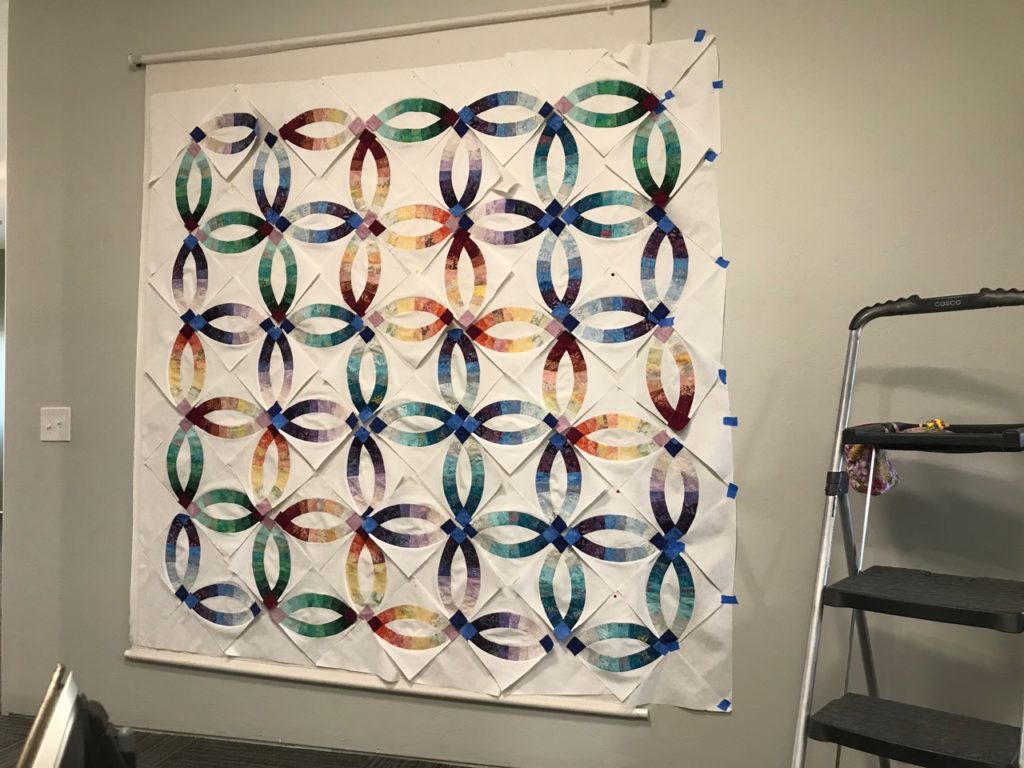
Here’s the finished version of how Kenda set her blocks. She decided to add another column in order to have 5 circles, or rings across and 5 down. Now to sew them all together.

Once all this is sewn together, it will create the center of the quilt. After this comes a “Flying Geese” border, followed by a large outer border where she will place appliqué flowers. Every step of the way, her work becomes more and more of what she envisions of the end product.

We also spent a little time working on the turned edge method of appliqué that she will use for the flowers, leaves and stems needed to finish this beauty. I couldn’t be more proud of her progress!

Like everything in our lives these past several months, it’s been a struggle to find a way to continue moving forward. I’m so pleased that between us, Kenda and I have found a way to stay connected and continue making progress on her project. It’s been a struggle at times, but completely worth the effort. It’s definitely no small thing to be able to have a face to face class like we did today.

If you would have told me a year ago that some of the most important tools in my teaching arsenal would be my phone, iPad and laptop, I would have humored you and given a nonchalant nod. Now…they are vital tools.

Today, I use text messages and pictures to pinpoint a question area for a student. Phone calls and coaching happens several times through a project. And for those who either live too far away, or just plain feel more comfortable at home, services like Zoom and Google Meet have become necessary and common place to stay in touch and in front of each other. This is a skill set that I never expected to acquire. But in all honesty, it’s a good one to have and be comfortable with. I’m not really a “techie”, but Praise Be that I’m married to one who knows how to interpret my questions and help me fulfill the needs of both my students and myself. I’m grateful and appreciative these avenues are available for the everyday person to utilize in order to do the things we love.

Someone once said that if you do what you love, you will never work a day in your life.

I whole heartedly agree with this sentiment. And these past two days have been evidence of that…because I call this playtime…..at MY office!!

Until next time…may your bobbin never be empty!

Time to Buy Fabric!

I love, LOVE to buy fabric. It’s almost an art form in itself. And it’s even better when I get to help someone pick out fabric for their project.

Today, I got to help a dear friend shop for a couple pieces of fabric that she needed for her Quiltworx pattern, Grandma’s Wedding Ring. She is soooo excited about this project. And she is doing such a beautiful job on it too!

Here we are–Jean is on the left, I’m on the right. We dangled our masks from our ears for the pictures, because who can recognize anyone in a picture with them on! In the background you can see 3 of my samples for classes offered at Clubb’s! To the right of me is the Lincoln Log Cabin, and above us is the Twinkle Star and also Tea Time Placemats.

This is Jean’s 4th class with me, and every project she tackles is more beautiful than her last. Her color sense is spot on, and I’m so pleased to be a part of her paper piecing adventure. What I love about teaching is that it only takes a few minutes before my students become friends. We had the best time today, shopping for her “cornerstone” fabrics to go along with her arcs.

She is working with the Quiltworx Strip Set “Cobblestone” by Timeless Treasures, and I have to say, they are simply beautiful. The colors are rich and warm throughout the collection, just inviting you to look again and again at how well they play together. Jean has done such a lovely job of piecing and I couldn’t be more proud of her.

We met at Clubb’s Fabric Store on Main Street in Delta, CO to accomplish this mission. After visiting about ideas on how to find the perfect colors to coordinate with her project, we then headed over to the “batik wall”.

So drool-worthy! 7 sections long and 3 shelves high, Clubb’s has a wonderful batik section to play in. I simply love to shop here!

And as you can see, Clubb’s has a wonderful display of batiks to play with. It’s way better than a candy store in my humble opinion! Definitely a feast for the eye. If you ever get the chance to visit this little gem of a store on Colorado’s Western Slope, you’ll be transported back to the fabric store of old where they have everything under the sun relating to sewing and fabric and quilting.

And then the search began. I truly expected it to take an hour to find the perfect fabrics, but Jean was on a mission and she landed her selections in less than 5 minutes! I’ll tell ya, she is awesome at this. It was so much fun to watch her in action!

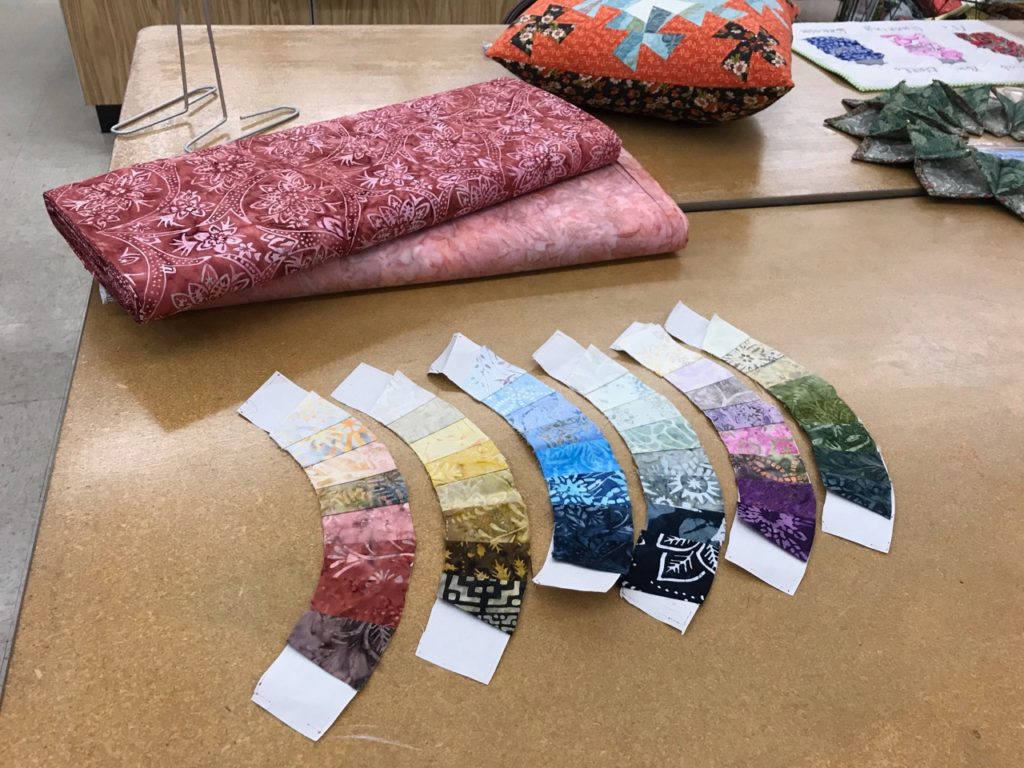
Here are the B arcs that she brought to use as color reference for finding the cornerstone fabrics. Her selections are the bolts lying above the arcs. She’s quite pleased, as am I.

Next task for the day was to enjoy a tasty lunch at a wonderful little mom & pop restaurant 3 doors down. It was so good! But then, it’s always easy to enjoy a meal when your companion is doing the happy seat dance on her side of the booth because she is so excited to get home and back to working on her project.

All in all it was a wonderful outing.

I’m so inspired….time for me to get my machine humming too!

Till next time…..may your bobbins never be empty!
The Story Continues

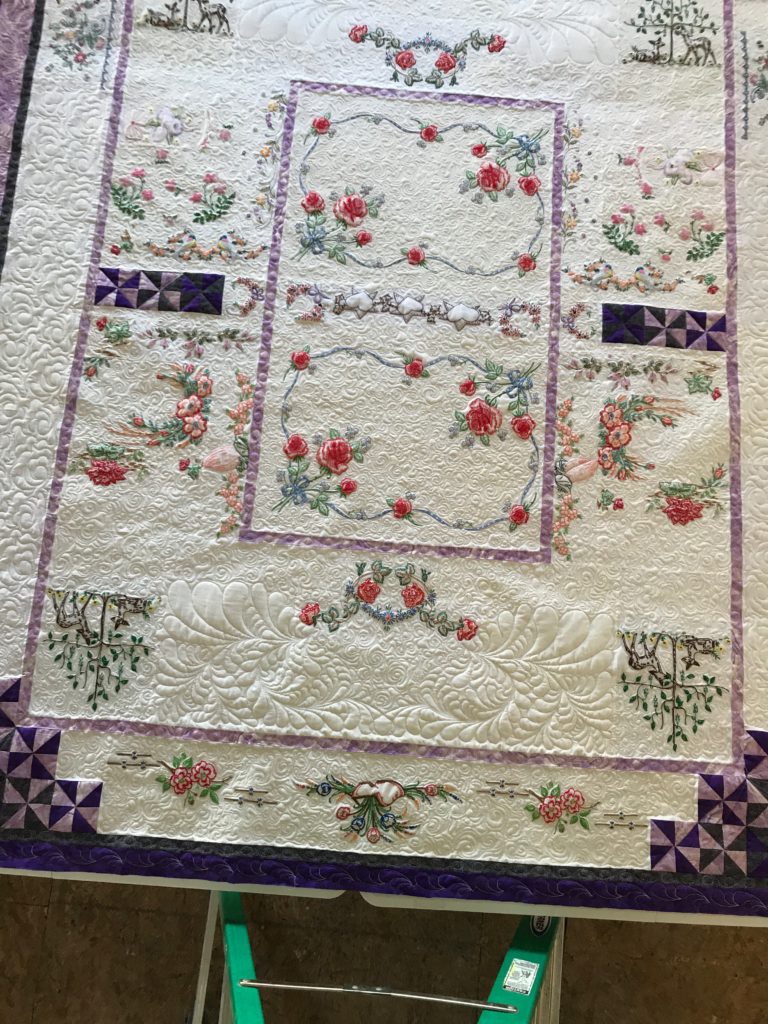
Another look at the completed top.

Thanks for stopping in again to continue the story about the making of this remarkable quilt. Today, I’m going to share the second half of creating a quilt…the quilting. Now, for those who live outside the quilt world, you may not realize that there are two distinct types of work involved in creating a finished quilt. The first step is called “piecing” which is when multiple pieces of fabric are sewn together to create what is called a “quilt top” or “flimsy”. It is not yet an actual quilt. The second step is when a “top” is added to additional layers. These are the “batting” (middle), and the “backing” (what is seen as the reverse side of a quilt). These three layers are then sewn together. That process, where these layers are sewn together is called “quilting”. So we quilters are all piecers, lol, and then we are quilters—either we quilt it, or we quilt by check! But any way you slice it, we are quilters. Back to the story…..

This quilt has sections of computerized quilting, but the majority of the work is free motion. Those terms are fairly self explanatory in that with the computerized quilting, a computer program makes the machine quilt by itself, and free motion means that a person drives the movements of the machine head. What is not as well known is that these two skill sets are quite independent of each other. They both take a lot of practice and skill to learn, and neither is as easy as it sounds. The results of each can be quite remarkable in their own way, and are even more stunning when used in concert with each other. Let’s take a look as some of the highlights of this piece.

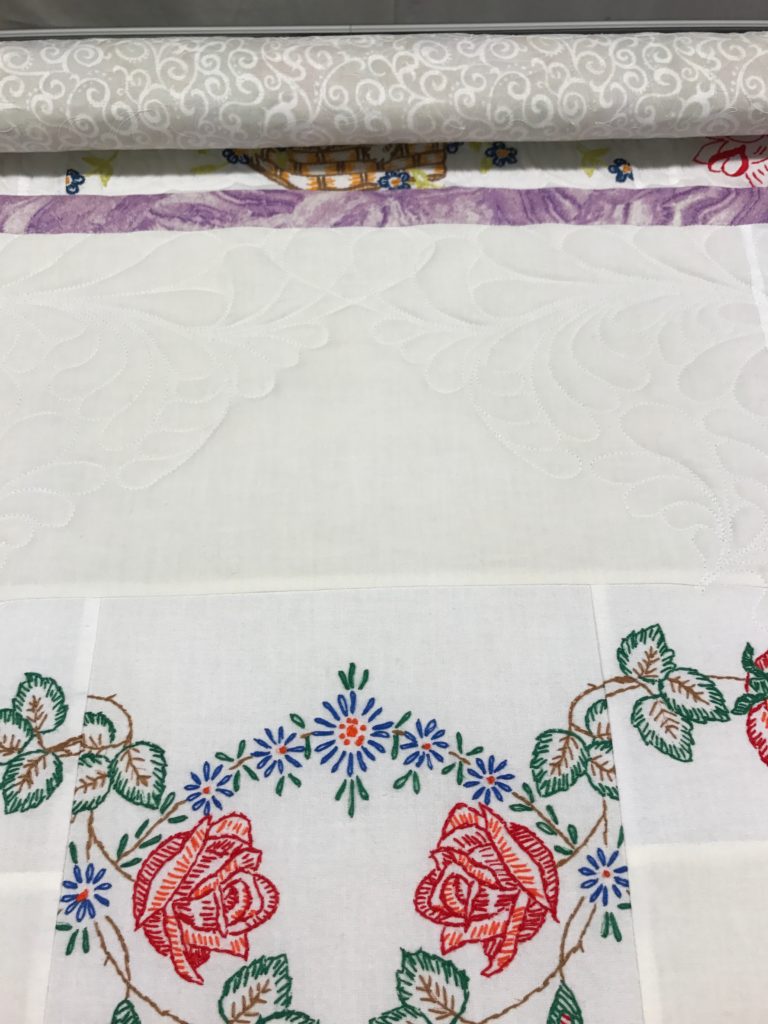
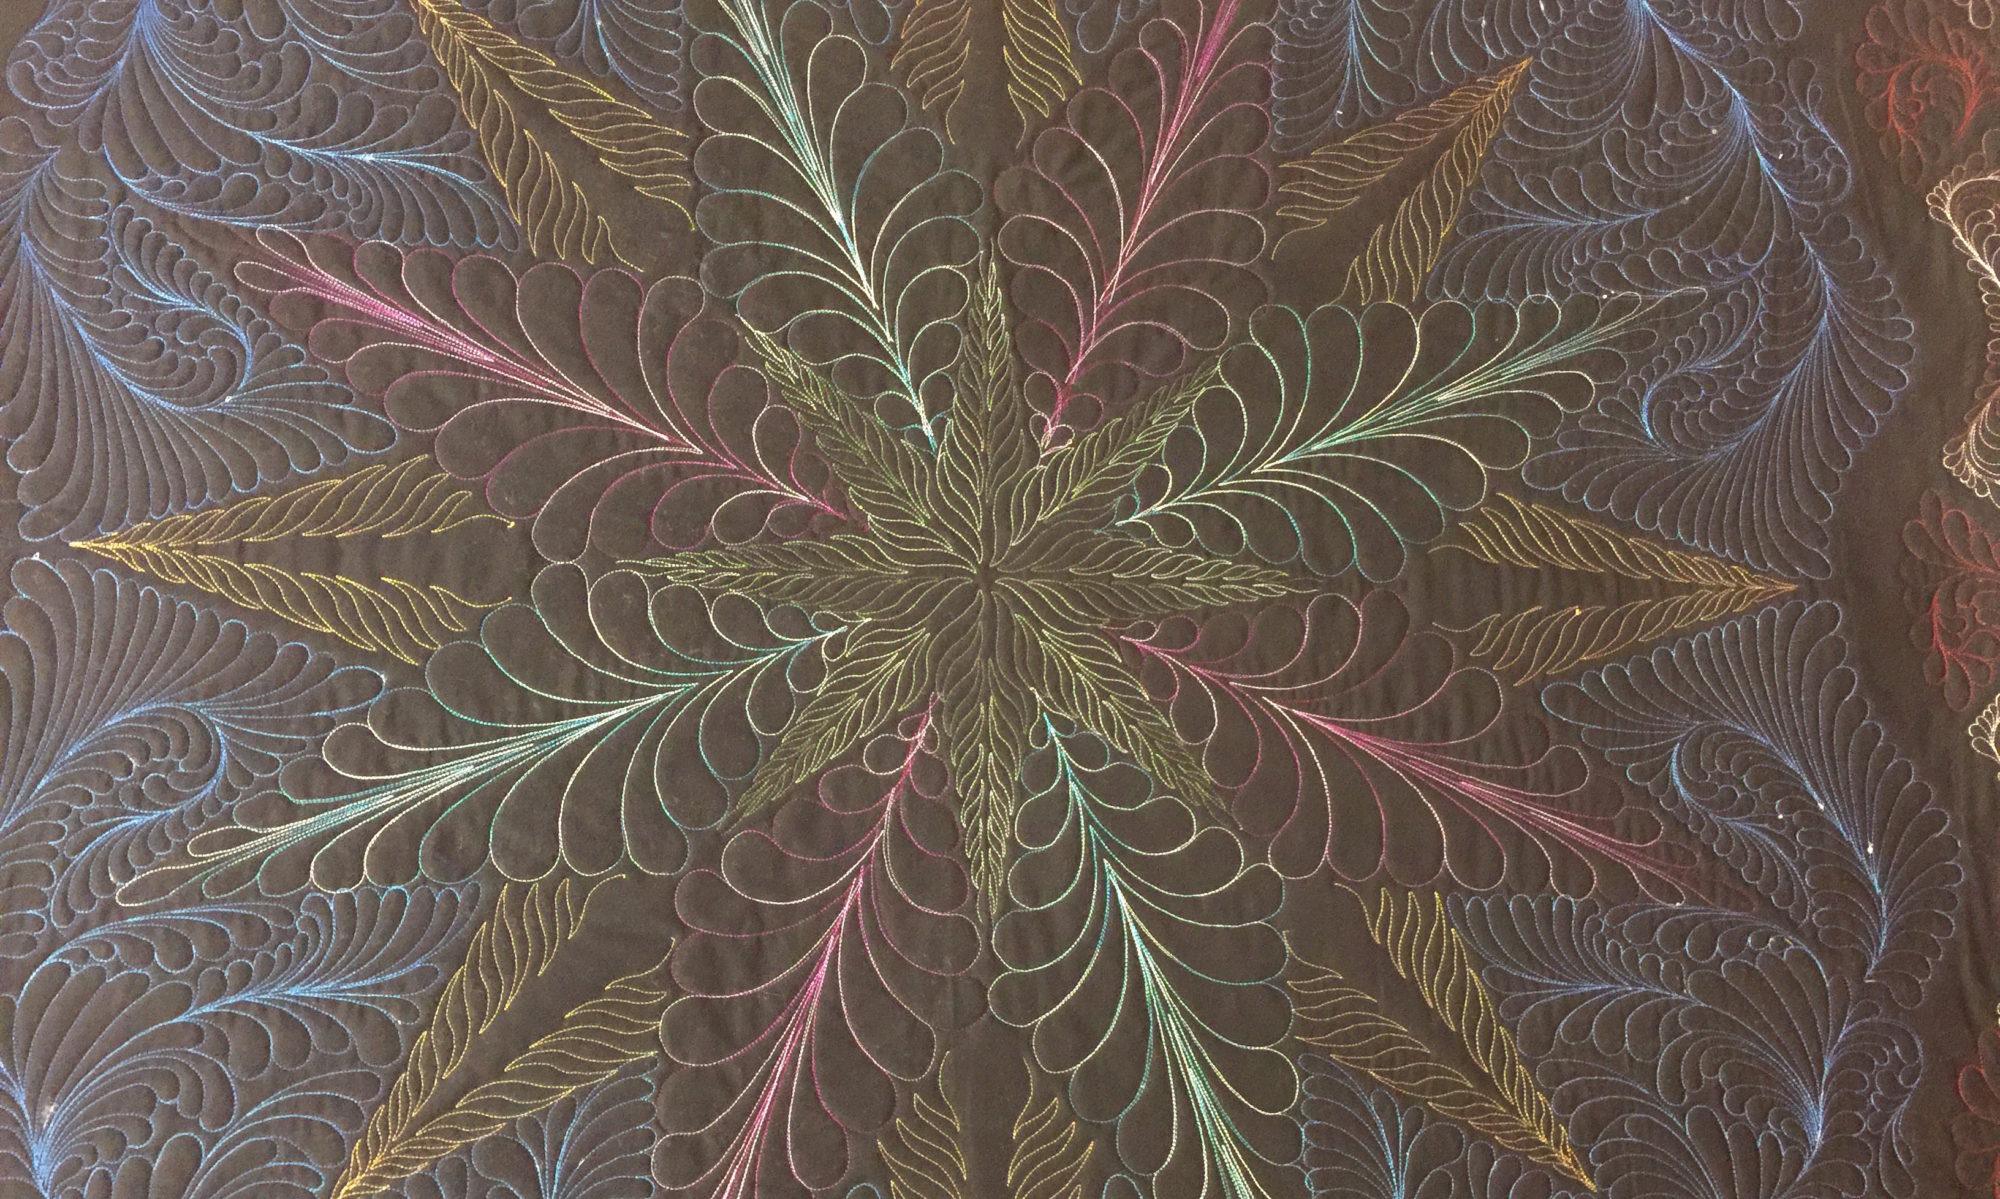
The beginning of the quilting process. The feathers are a digitized motif. As the quilting is laid down, you can begin to see shapes coming to life across the open areas.
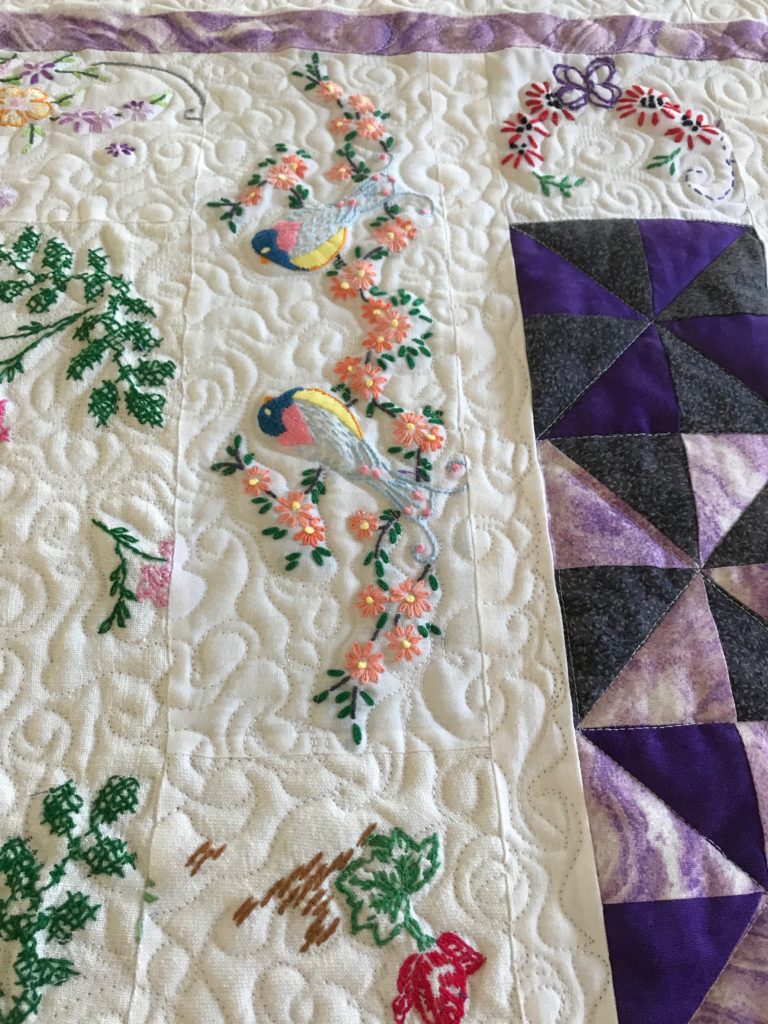
The free motion fill that is outlining the embroidery motifs.
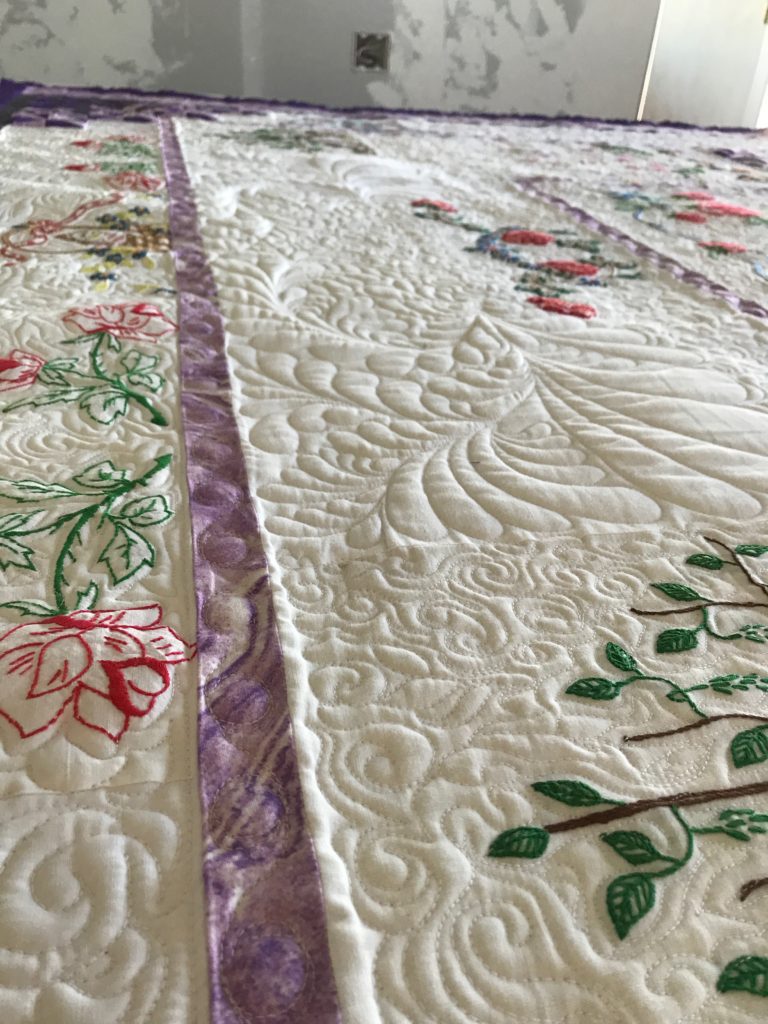
The texture of the surface is quite pronounced here. A blending of both computerized and free motion.
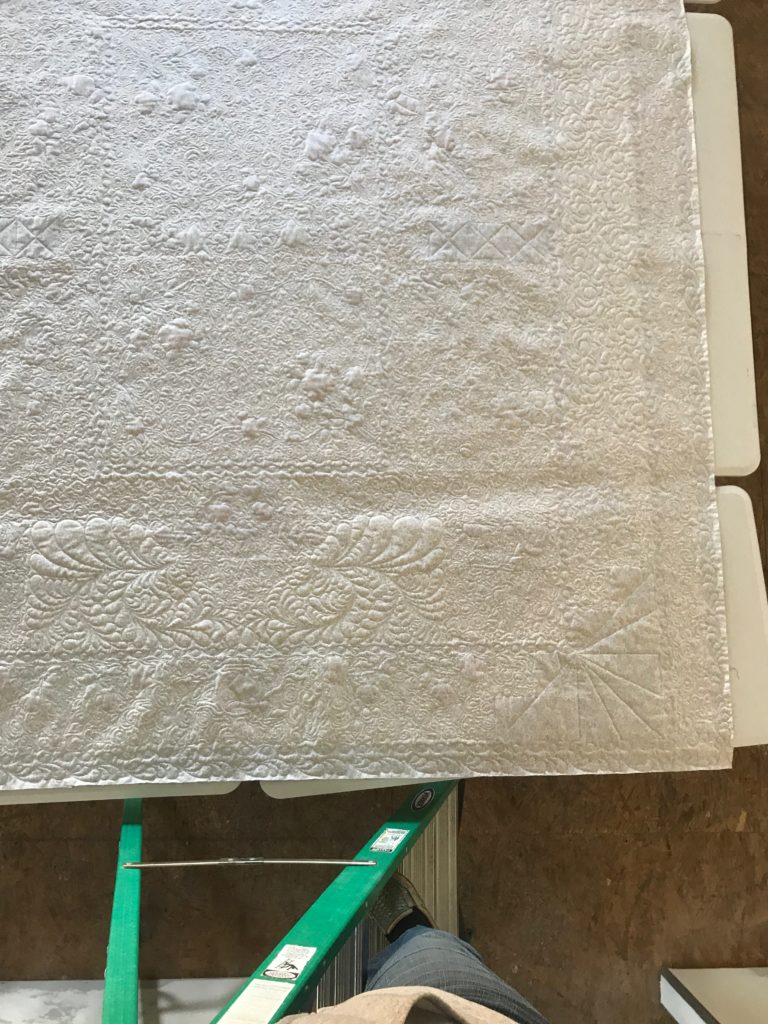
And finally, a view of the back of the quilt. You can see quite clearly how the quilting allows for shapes and motifs to be highlighted. It becomes a completely different creation when you look at the back.

The computerized quilting motif used for the feathers is a Quiltworx design that I already had in my digitized library and it just begged to be used here. If you are looking for some amazing and well made designs, particularly for anything made for a Judy Niemeyer pattern, visit their website and look through what they offer. They are well designed and stitch out with ease. https://store.quiltworx.com/SearchResults.asp?Cat=1841

I couldn’t have completed this quilt without the offerings of Angela Walters and her Free Motion Challenge. You can also follow this link to find out more about what she is doing to inspire multitudes of quilters on their journey to grow their skills. http://www.quiltingismytherapy.com/2018/02/07/free-motion-challenge-quilting-along/

My last bit of info to pass on to you all concerns the batting I used. If you look back at the pictures, you will see how the stitching that is laid down begins to bring more pronounced texture to the surface of the quilt. There are a lot of different ways to bring this about, but suffice it to say that the batting is the biggest helper to this and works in concert with the density of the stitching. One of the more popular methods to attain this look is to use a double batting. By that, I mean you literally use two battings to give the loft to the areas not as densely quilted. Typically an 80/20 poly/cotton blend for the bottom layer, and a thinner 100% cotton or even bamboo or other fiber content batting is laid over the first. I personally don’t like the double batt. My first experience in using this method was not as enjoyable as I’d hoped. Plus, I found the weight of the quilt to be significantly greater than I anticipated. Not to say at all that it shouldn’t be done! I’ve seen lots and lots of quilts made this way that turn out simply beautifully. I just didn’t enjoy the process very much.

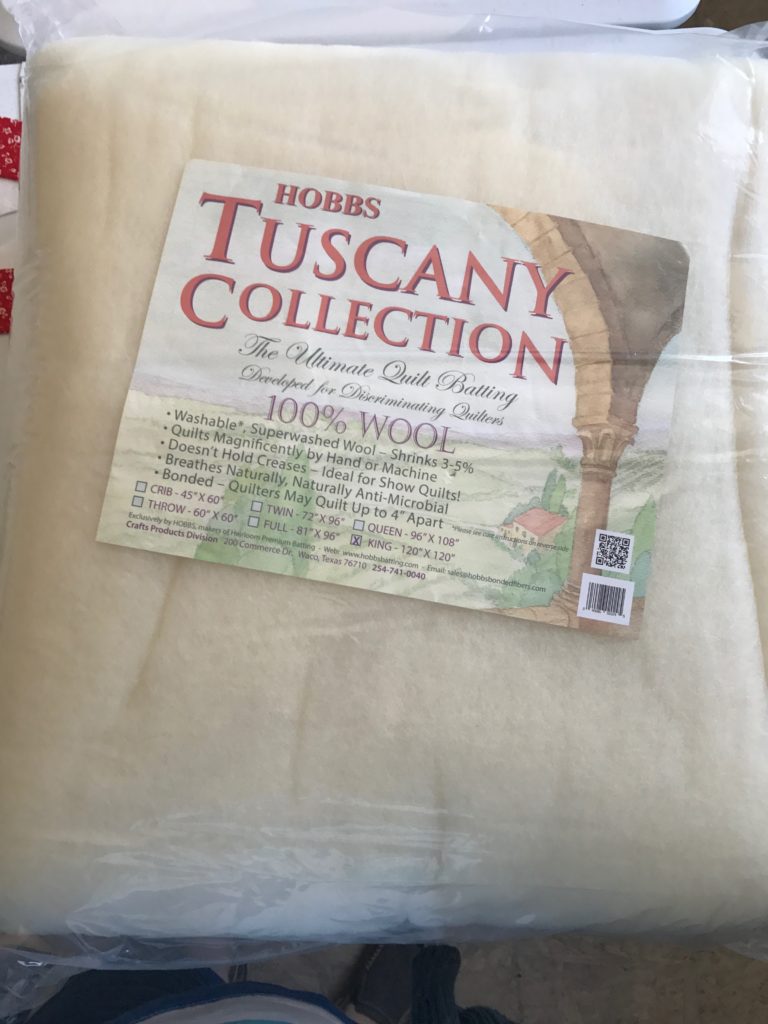
Instead, I opted for this product.

This my fav! I love it. Hobbs hit a homer on this one. If you want to give it a try, ask your local quilt shop if they can get it for you. It’s worth the effort!

And I must tell you, I am sold! Any quilt that I want to give noticeable depth and texture to will have this as the batting. I love the feel of the batting, the drape of it and the way it stitches throughout the project. But even more importantly… the weight of it. It is lightweight, has just the right amount of loft….and it’s washable. Wool breathes and is appropriate in both warm and cool climates. Yep—it’s my favorite!

Thanks for coming along with me on this two-day installment post. It’s been fun for me to reminisce and share. I hope you’ll share your thoughts with me about this project.

If you would like to share your thoughts with me directly to this post, make sure you are on my blog site, rather than FB. If you followed the link from FB, just look to the upper right side of what you see and under the caption “Recent Posts” you’ll find the listing of my posts. Click on the one you want to read and follow through to the end of the post. At the bottom you will find comment boxes where you can share your thoughts. Either place you post your comments, I’ll see them, but one flows through FB and the other through my blog site. Please feel free to “Share” things you like through FB! It helps me reach more people every time you do. And thanks for bearing with me as I learn the ropes of blogging…and the proper “blogging etiquette” too.

As always…may your bobbins never be empty!
The Quilt Zone!

Welcome to my blog! Through these pages I’m excited to share with you my wonderful adventure of being a quilt-a-holic.  I confess…I love quilts.  I love everything about quilts!  And most of all, I love teaching and sharing what I know with any who may ask.

Quilting is a huge part of my life, and I wear many hats within the field of quilting.  I do repair and restoration; I am a long-arm quilter; I hold quilting retreats know as quilt camps; and the very best of my adventures includes my journey to become a Certified Instructor for Judy Niemeyer/Quiltworx patterns.  

Let me tell you about a wonderful experience I had last week!

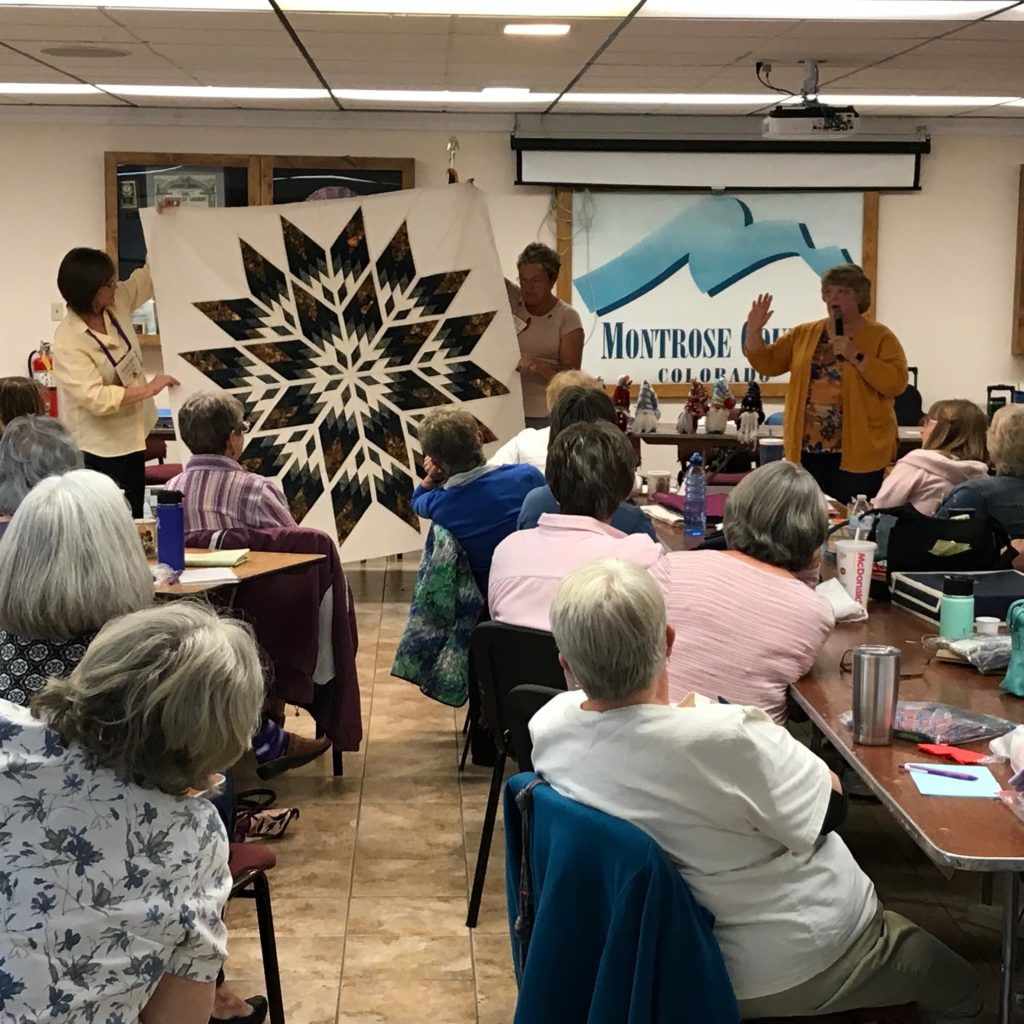
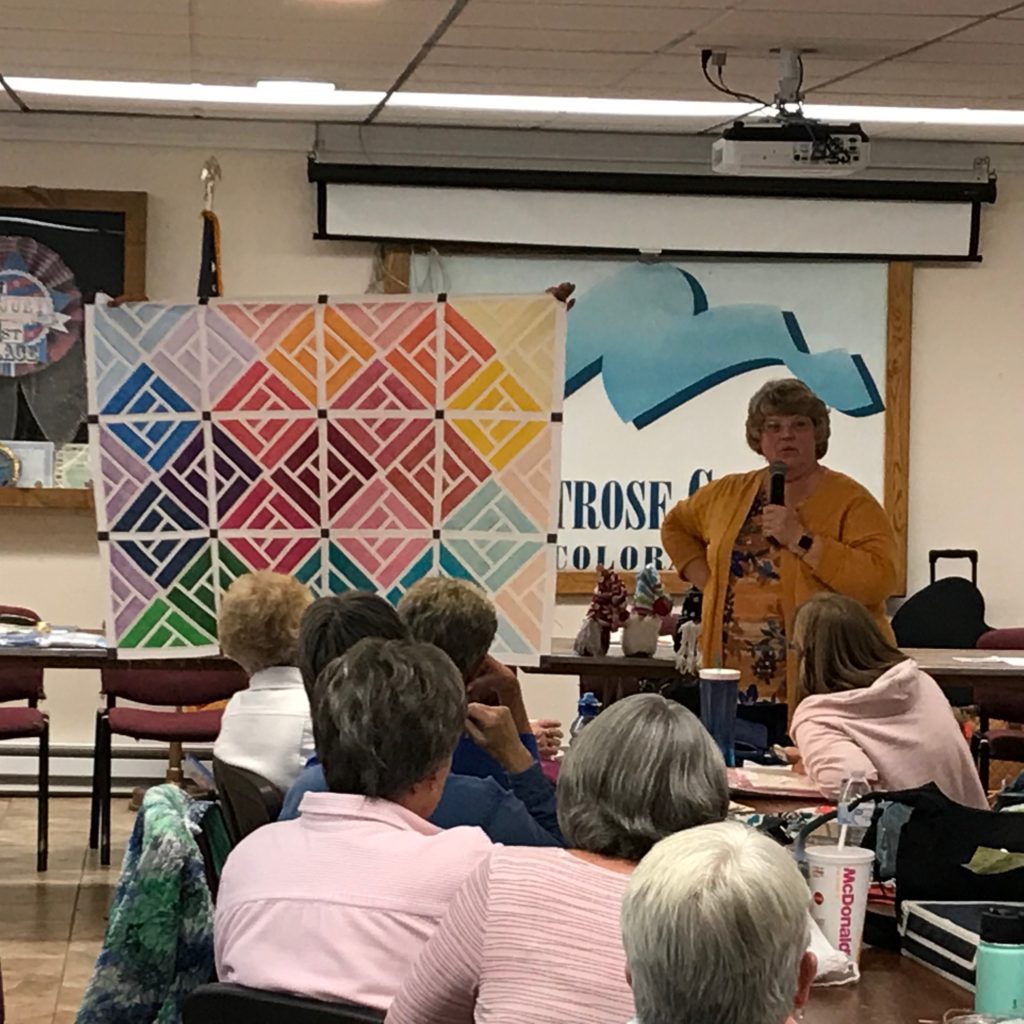
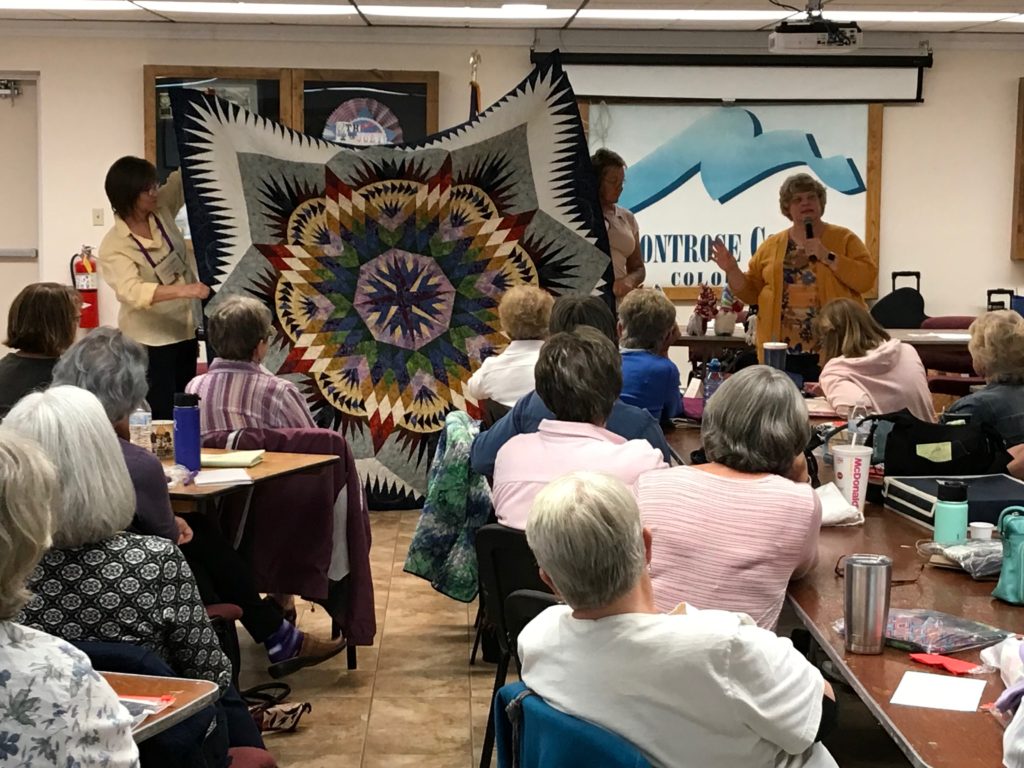
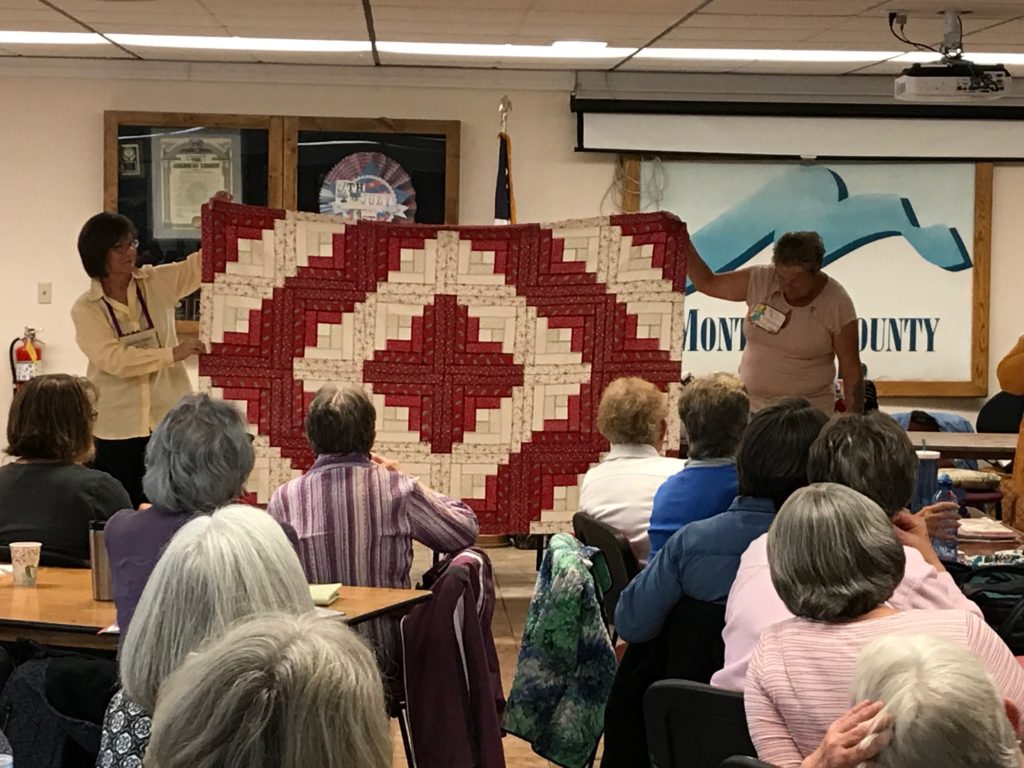
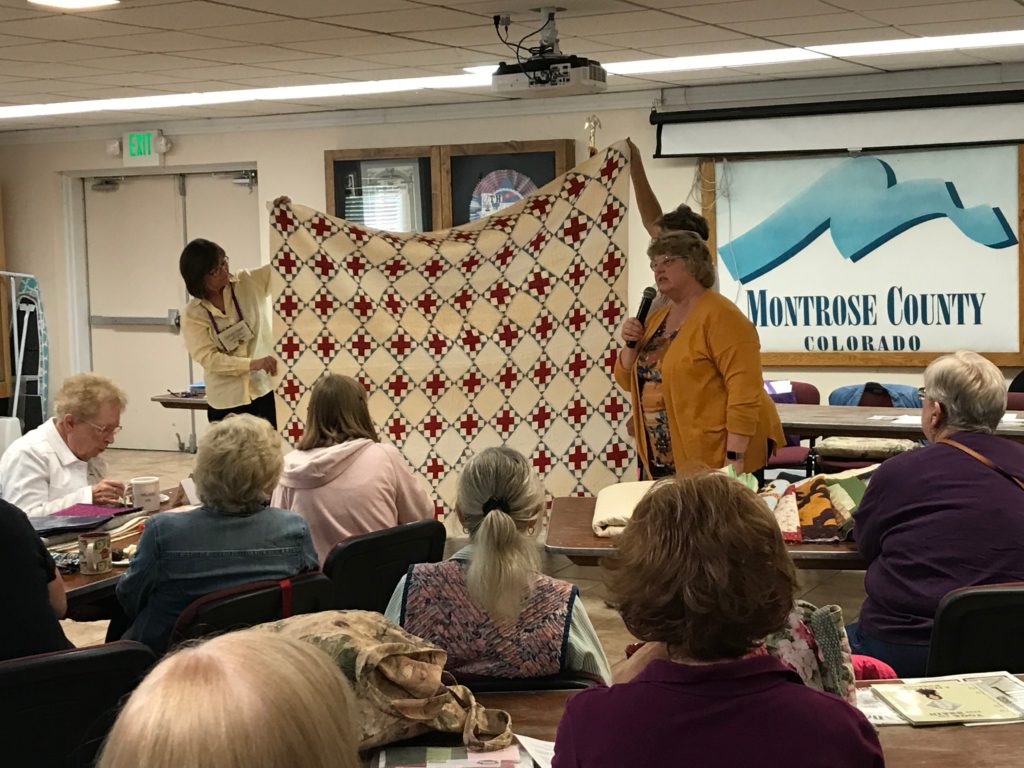
On Thursday, I had my very first trunk show!  I did the program for my guild (Friendship Quilters of Western Colorado).  I was as nervous as could be.  Now, I have no problem getting up in front of people and speaking about any number of things, but generally not about myself.  This was different, and in a very good way.  Our attendance is usually around 45-50, but on last Thursday, we were over the 60 mark.  Yikes!  But it was all good.  We all laughed, and we cried a tear or two, but mostly we laughed and had a terrific time.

After that, and on into Friday, I taught a class to 21 ladies!!  It was a full house, and a wonderful success.  Oh my, was it a blast.  Most of the ladies were new to Judy patterns, and by the end of the second day, they were well on their way to mastering the Quiltworx pattern Cappuccino. I couldn’t be more pleased.

Let me show you some of the highlights of those two days.

Here is my Vintage Compass, (Quiltworx), made with Asian fabrics. It was only my second Judy pattern. Lots of good lessons learned on this quilt. I especially like how the quilting turned out using the Quiltworx digitized patterns for this quilt.
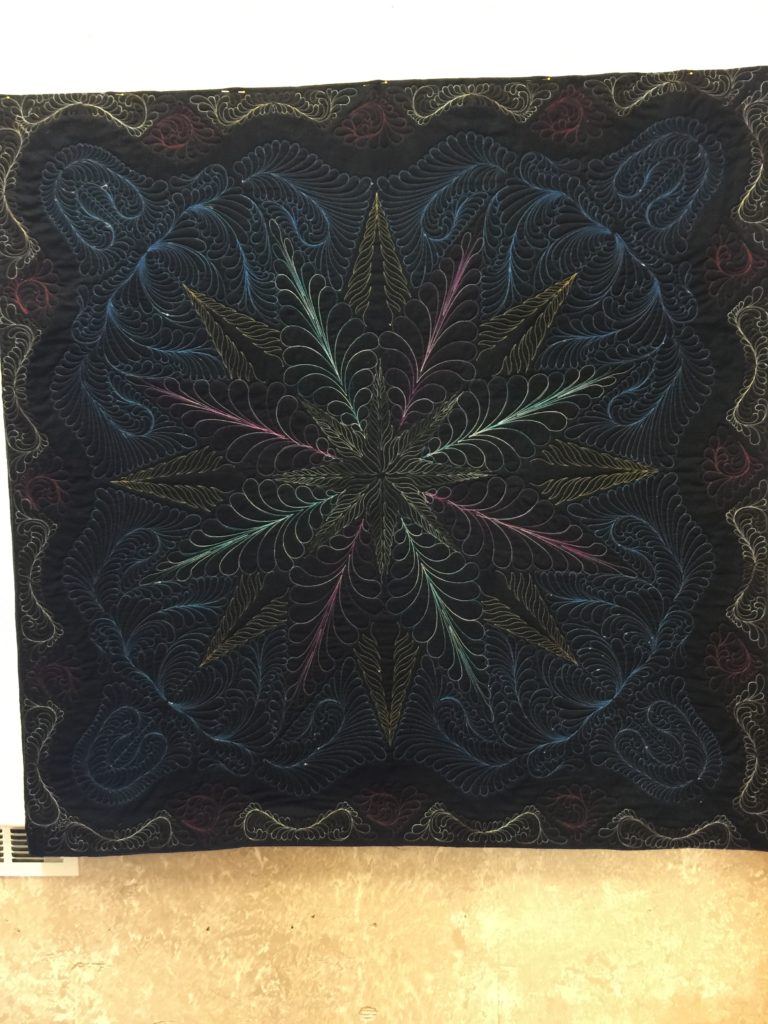
The back of this quilt is just as striking as the front. Changing thread colors may be a bit of a chore, but it certainly has a dramatic effect on the over all presentation. I love this quilt!
And here is the very first quilt I ever made!! It is an Eleanor Burns Quilt in A Day Log Cabin. After 20+ years, it is still just a top (held sideways) with no borders. I enjoyed making this piece, but once I got this far—I never looked back! Needless to say, this needs to make the migration from my UFO pile and into the completed pile, ready for the next trunk show.
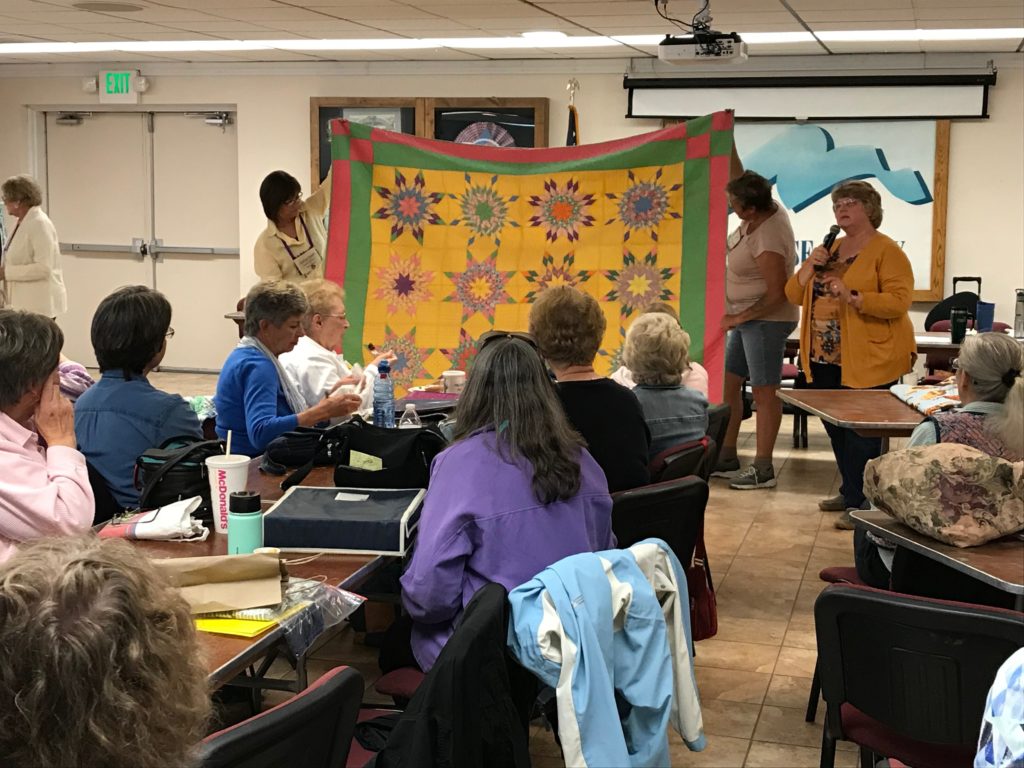
This was the very first quilt I showed. It is from my great-grandmother, circa WWI. A “Red Cross Quilt”. I am so very proud to have this beautiful heirloom to cherish.
And here is an amazing quilt from my father-in-law. Beautiful hand quilting and pristine condition! An absolute treasure.
Prismatic Star (Quiltworx pattern). I chose to make this from a kit and it’s a very striking color way for this quilt. These are not my first choice of colors, but I felt the best way to acquaint myself with these type of colors was to utilize a well designed kit. It proved an excellent learning opportunity, as I’m much more comfortable in working with colors such as these. Really enjoyed making this quilt…much more than I anticipated.
A Fractured Paint Box (Quiltworx) made with a Chambray jelly roll. Fast — fun — and easy!
Prairie Star (Quiltworx). A terrific pattern that I am now teaching at Fabrics and More as a “Block of the Month”. Our class is small, but the ladies are so enthusiastic about their work. Learning, and teaching, this quilt is turning out to be a very rewarding experience.

There were about 20-25 more quilts in the trunk show, but I’ll save those for another day.

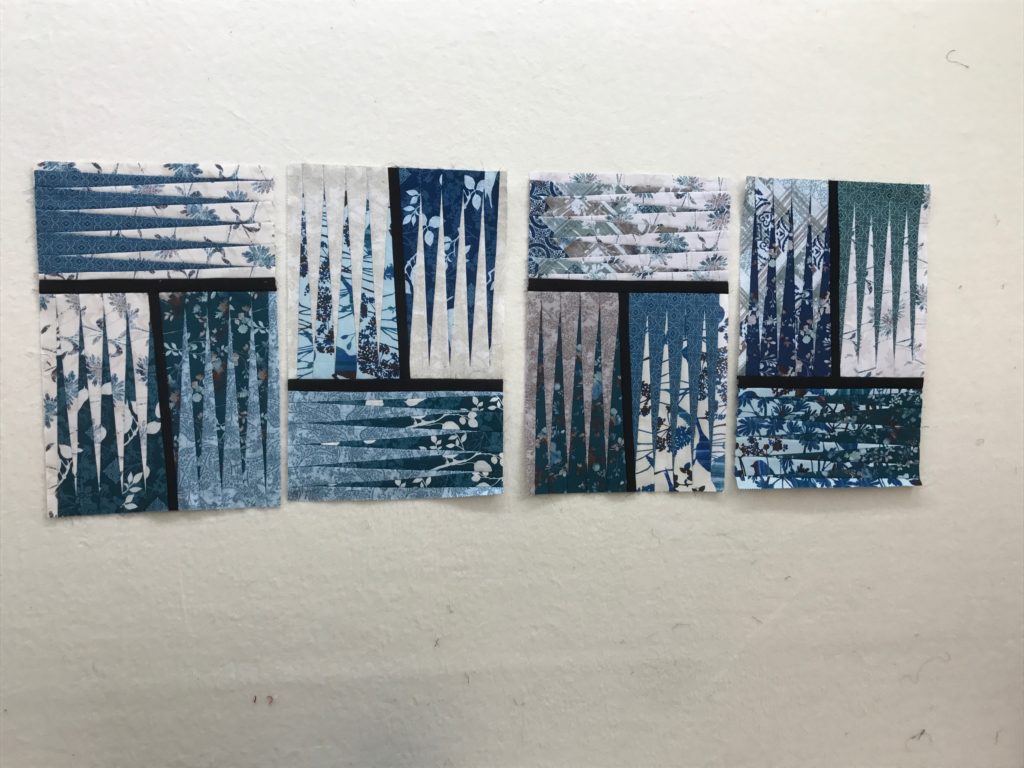
The project for the class following my trunk show was a set of placemats made from the pattern Cappuccino (Quiltworx).
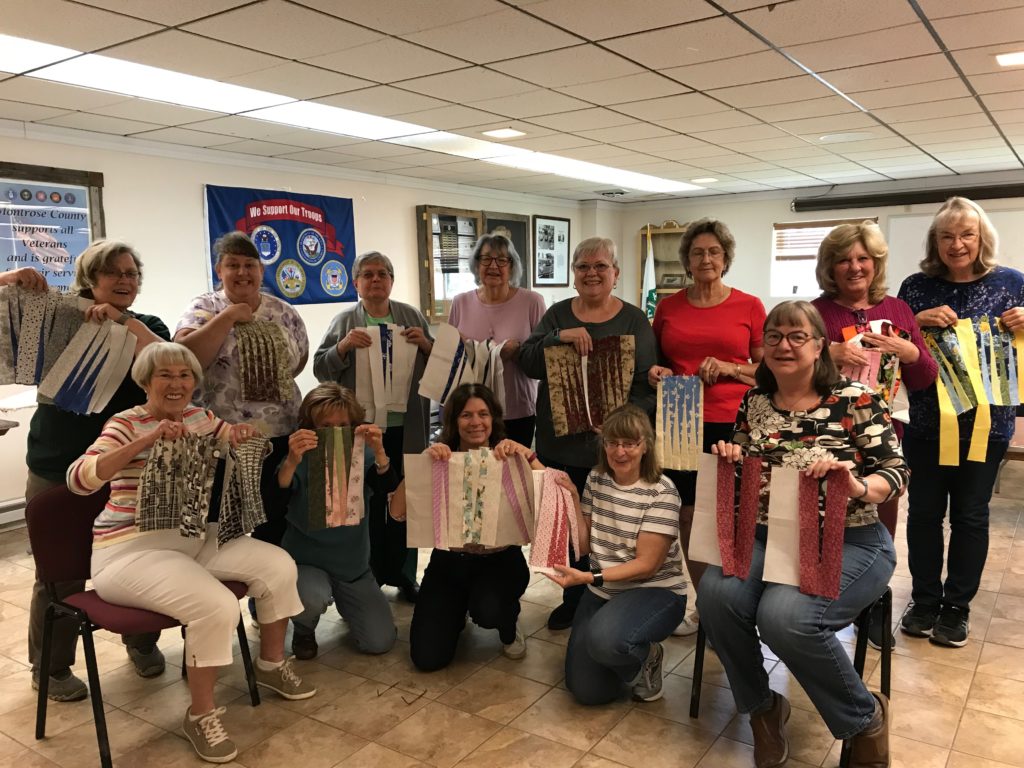
Look at those smiling faces! These ladies have some beautiful beginnings to their projects.

It was certainly an exciting and fulfilling event. I feel so honored and pleased to have shared my first trunk show with my guild sisters.

Until next time—may your bobbin never be empty!